


참고로 본 blog를 통해 이미 소개된 바 있는 RTOS는 다음과 같다.
<Zephyr Project>
<RIOT OS>
Contents
1. ARM Mbed OS 소개
2. Mbed CLI w/ STM32 Nucleo F103RB
3. Mbed Studio
4. Mbed Online Compiler
5. DISCO-L072CZ-LRWAN1 보드
6. LoRaWAN의 (진짜^^)모든 것
1. ARM Mbed OS 소개
ARM Mbed OS(이하 Mbed OS로 통칭)는 FreeRTOS(https://www.freertos.org/), Zephyr(https://www.zephyrproject.org/) 등과 견줄만한 open source IoT OS 이다(ARM 사가 밀고 있어 파급력이 매우 큰 느낌이다. 그래서 선택했다^^). Security, Connectivity, RTOS 적인 특징을 갖추고 있으며, 주로 ARM Cortex-M micro controller에 탑재하는 용도로 사용할 수 있다. 따라서 Arduino(AVR 계열) 등에 올리기에는 좀 덩치가 크다고 볼 수 있다~

[그림 1.1] ARM Mbed OS home page
Mbed OS가 활용되는 분야는 매우 다양하다. 이를 확인해 볼 수 있는 site가 아래에 있으니 한번 훑어 보시기 바란다. 재밌는 내용이 아주 많다~

[그림 1.2] ARM Mbed OS가 사용된 다양한 예
Mbed OS가 갖고 있는 가장 큰 장점은 뭐니 뭐니 해도 다양한 connectivity 환경을 지원한다는 점이 아닐까 싶다. 이 중 우리는 LoRaWAN에 관심이 큰 만큼 앞으로 이 부분을 집중적으로 살펴 보아야 할 것이다.
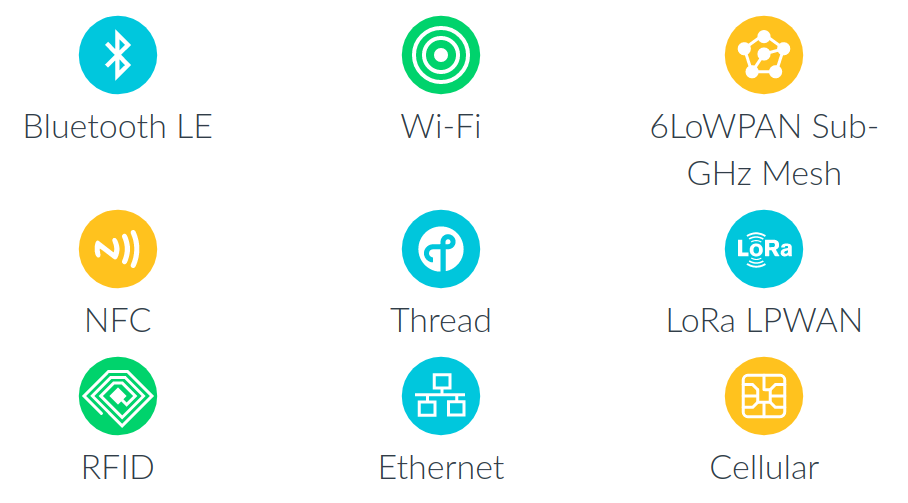
[그림 1.3] ARM Mbed OS Connectivity
Mbed OS의 전체 architecture는 다음과 같다. 이와 관련해서는 추후 하나씩 세세하게 뜯어 보아야 할 것이다.
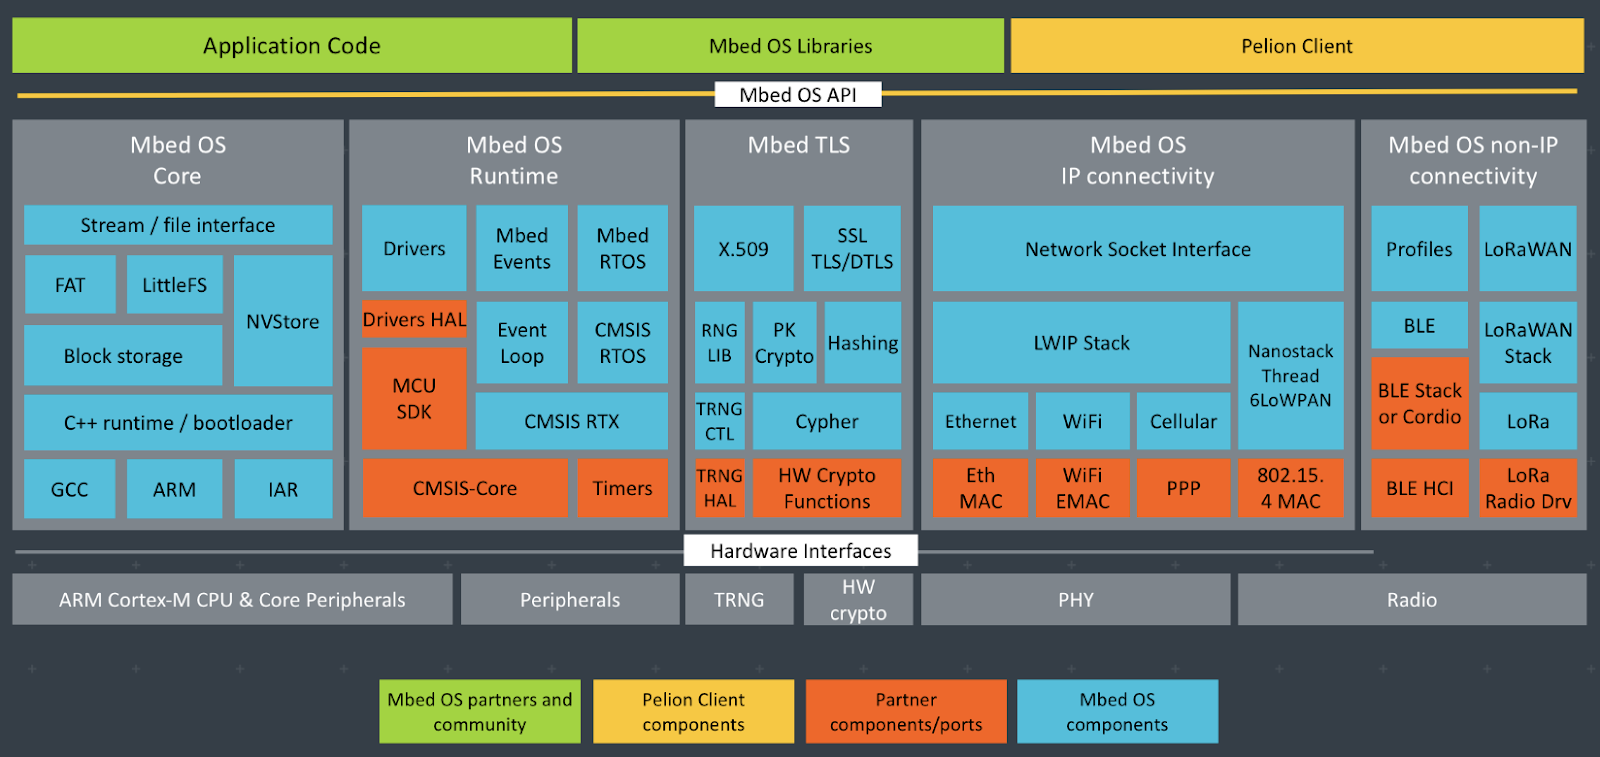
[그림 1.4] ARM Mbed OS Architecture
먼저, Mbed OS를 사용하기 전에 자신의 계정을 등록(그림 1.1의 아래 버튼 선택) 하도록 하자. 계정 등록 방법은 아주 간단한 사항이라 여기서는 별도로 정리하지는 않겠다. 각자 시도해 보기 바란다~

[그림 1.5 계정 등록 버튼]
참고: Mbed OS 사용자 계정은 Mbed Studio, Mbed Online Compiler 사용시 반드시 필요하다.
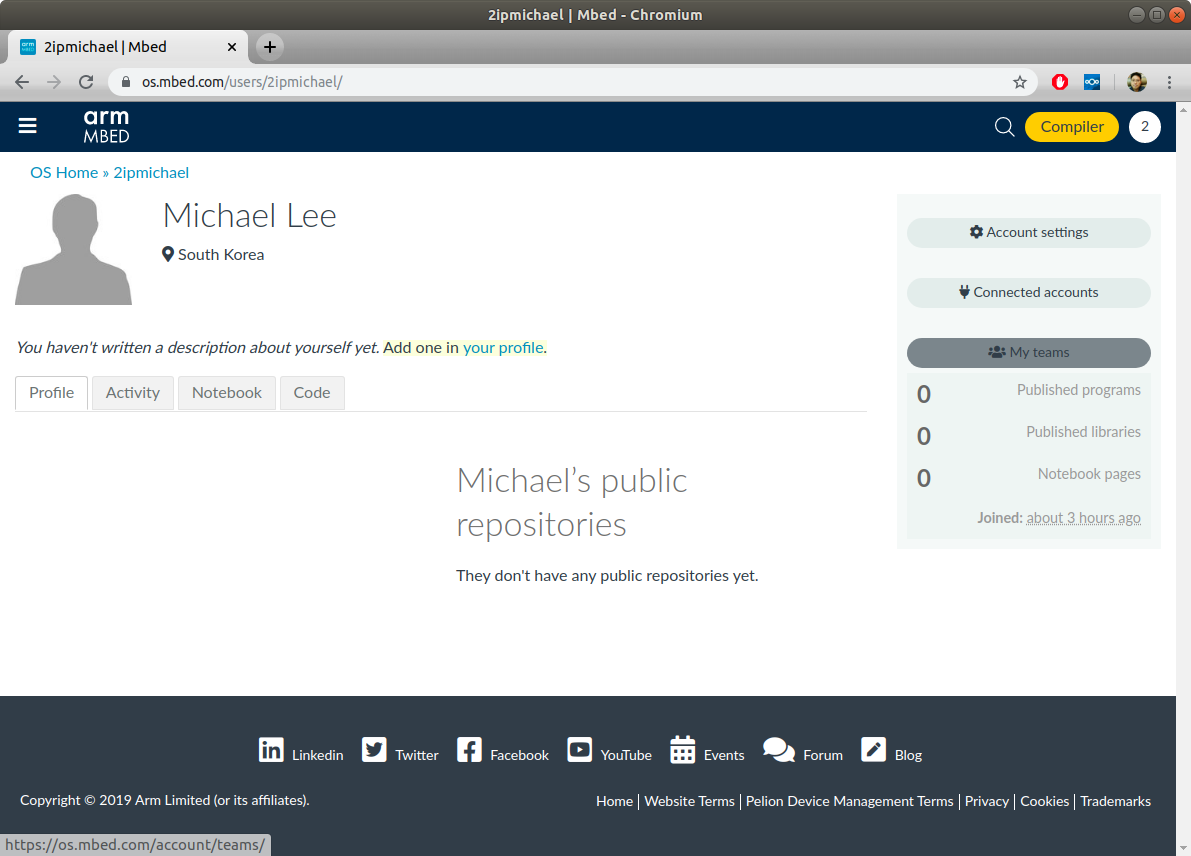
[그림 1.6] Mbed OS 계정 등록 모습
<Mbed OS 교육 과정>
국내 ARM 교육 기관에서 시행하는 Mbed OS 교육 과정을 참고삼아 정리해 보았다. 앞으로 이런 정도의 내용을 파악해야 한다는 야그^^
교육 기관에 불필요하게 돈을 기부(?)할 필요는 없다. 적당한 개발 보드를 하나 구입한 후, 아래 책 정도를 보면서 study를 진행하는 것으로 충분하다 :) 사실 Mbed OS와 같은 RTOS ~ 그렇게 어렵지 않다 ?! 그냥 하는 소리가 아니다 :) Linux가 (상대적으로) 훨씬 어렵다...

[그림 1.7] 참고 도서
2. Mbed CLI w/STM32 Nucleo F103RB
Mbed OS 환경에서 firmware를 개발하는데 사용되는 도구로는 "Mbed Studio”, “Mbed Online Compiler”, “Mbed CLI” 세 종류가 있다. 이를 하나씩 하나씩 사용해 보기로 하자.
먼저, 이번 절에서는 (linux 개발자를 위해)Mbed OS CLI를 이용하여 sample code(mbed-os 포함)를 build하는 과정을 소개해 보기로 하겠다. 동작 시험을 위해서는 아래 STM32 Nucleo-F103RB 보드를 사용하였다.
"Mbed CLI 만 있어도 개발하는데 아무런 문제가 없다 - chunghan.yi@gmail.com”
[그림 2.1] mbed CLI
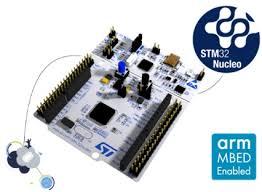
[그림 2.2] Nucleo F103RB 보드
참고: Nucleo F103RB 보드는 가격이 저렴(만원이 조금 넘음)하다.
a) Ubuntu 18.04에 Mbed CLI 설치하기
지금부터 설명하는 내용은 Ubuntu 18.04 desktop을 기준으로 하며, 아래 site의 내용을 기초로 하였다.
<Install dependencies>
$ sudo apt install python2.7 python-pip git mercurial
- 보통 이정도는 이미 설치되어 있다. 혹시 설치 되어 있지 않다면, 각자 설치하기 바란다.
<Install Mbed CLI>
$ pip install mbed-cli
- Mbed CLI는 python으로 구현되어 있다.
$ mbed --help
- mbed가 정상적으로 설치되었는지를 확인하기 위해 위의 명령 실행
<Install a compiler>
- 헐, 여기서는 download할 수 가 없군...
- 그럼 여기서 받도록 하자.
- gcc-arm-none-eabi-9-2019-q4-major-x86_64-linux.tar.bz2
참고: ARM Mbed OS를 build하기 위해 사용 가능한 compiler로는 GCC Arm, Arm Compiler 5, Arm Compiler 6 or IAR 등을 생각해 볼 수 있다. 우리는 이중에서 open source인 GCC Arm compiler를 사용할 것이다.
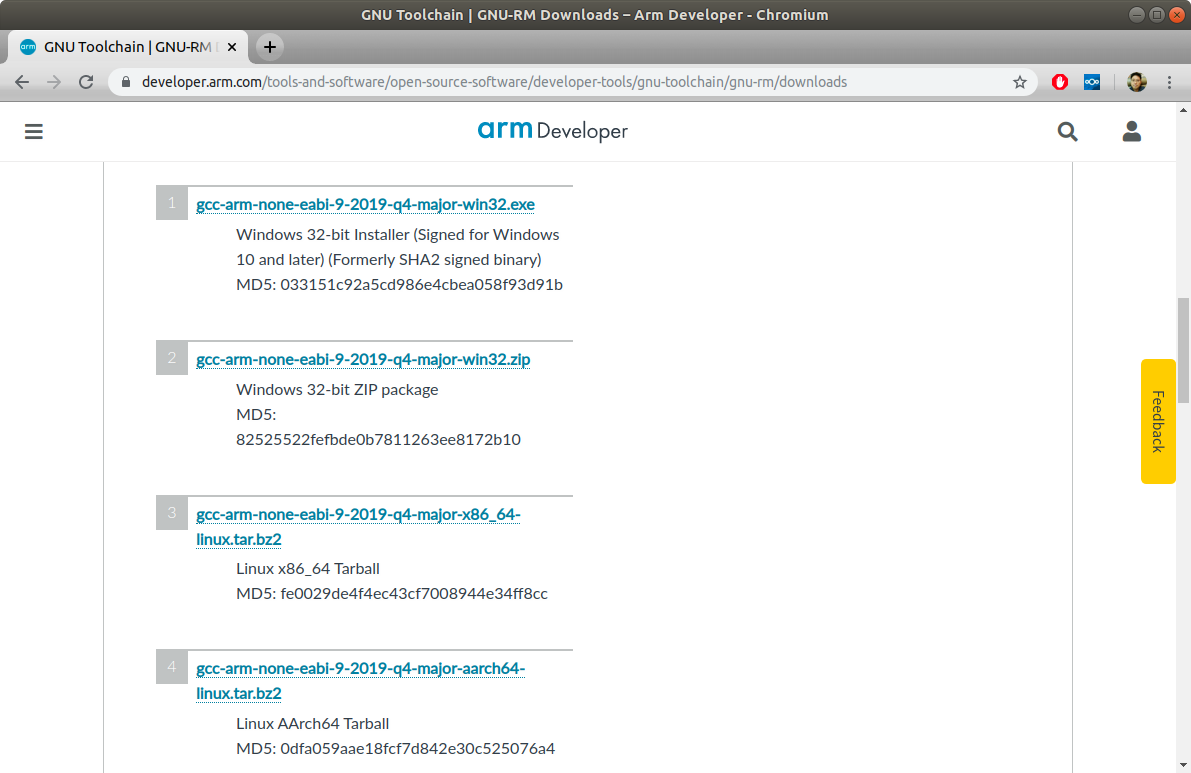
[그림 2.3] GNU-RM Downloads site
$ cd ~/workspace/MbedOS
$ tar xvjf gcc-arm-none-eabi-9-2019-q4-major-x86_64-linux.tar.bz2
$ sudo mv ./gcc-arm-none-eabi-9-2019-q4-major /opt
- 반드시 /opt 아래로 이동시켜야 하는 것은 아니다.
$ vi ~/.bashrc
$ source ~/.bashrc
- 터미널을 다시 실행해도 된다.
참고: 이상의 내용은 (일반적으로) toolchain 설정시 공통적으로 수행하는 부분에 해당한다.

[그림 2.4] ARM gcc version - gcc 9.2.1 버젼
$ mbed config -G GCC_ARM_PATH /opt/gcc-arm-none-eabi-9-2019-q4-major/bin
- Mbed CLI가 arm compiler의 위치를 알 수 있도록 해 줌.
<Bash completion>
- mbed-cli bash completion(자동 완성 기능)을 설치하기 위해서는 아래 절차를 따른다.
참고: bash completion은 bash 환경에서 명령 전체를 입력할 필요 없이 <TAB> 키를 사용하여 명령을 좀 더 편하게 입력하는 방식을 말한다.
- Mbed-cli를 내려 받는다.
$ cd mbed-cli/tools/bash_completion
$ mkdir -p ~/.bash_completion.d/
$ cp mbed ~/.bash_completion.d/
- 이후 터미널을 다시 실행해야 한다.
chyi@earth:~/workspace/MbedOS$ mbed config --list
b) LED Blinky 예제 코드 돌려 보기
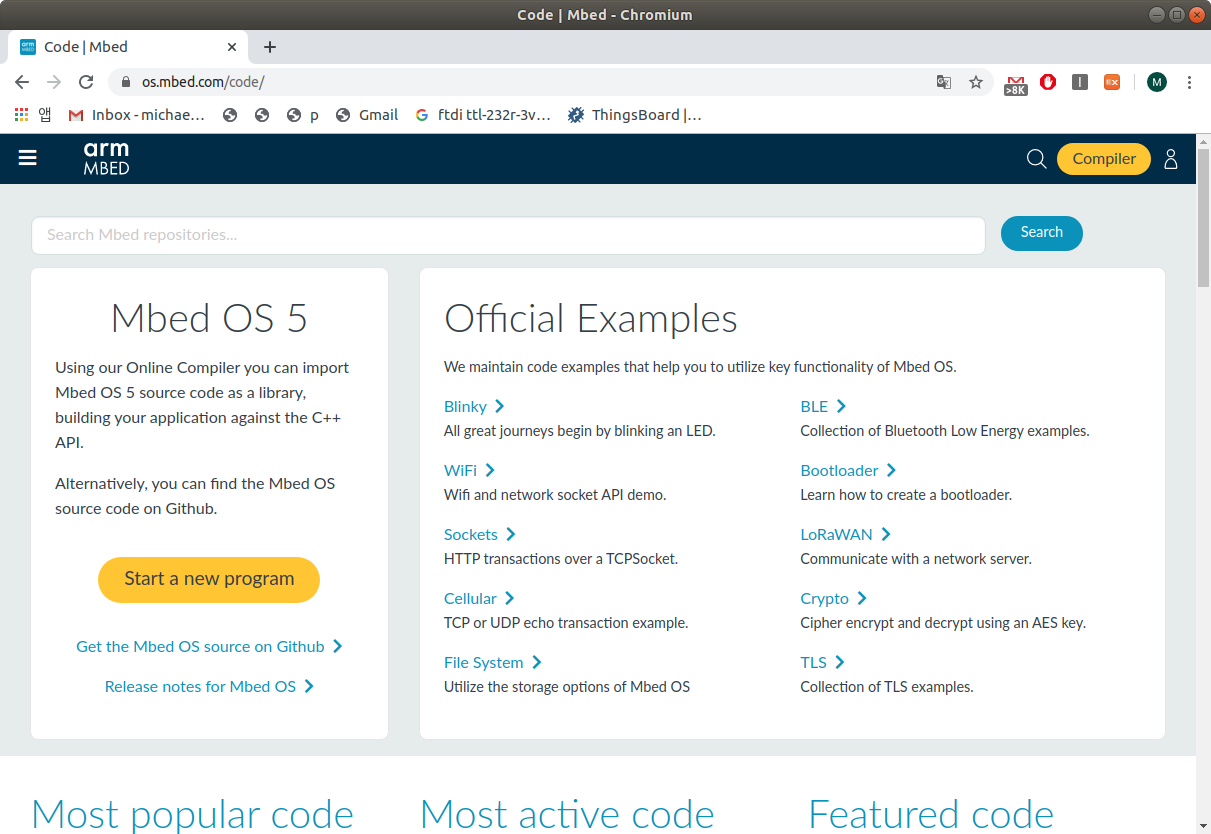
[그림 2.5] mbed-os 예제 코드(1)
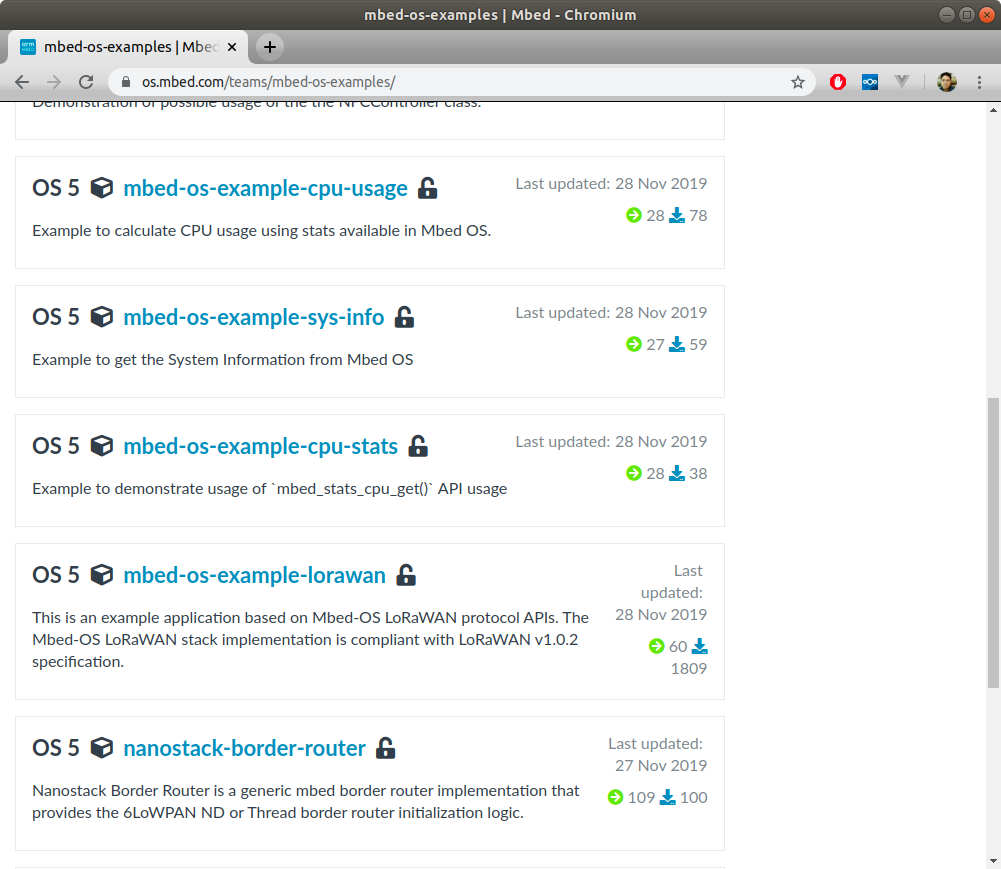
[그림 2.6] mbed-os 예제 코드(2)
$ cd ~/workspace/MbedOS
$ mkdir projects; cd projects
$ mbed import https://github.com/ARMmbed/mbed-os-example-blinky#mbed-os-5.11.0
$ cd mbed-os-example-blinky
$ ls -la

[그림 2.7] LED blinky 예제 코드 - main.cpp
$ mbed compile -m K64F -t GCC_ARM
- -m: target board, -t: toolchain
- NXP K64F board(가격: $35정도 함)는 아래 그림과 같이 생겼는데, 여기서는 이 board에 올릴 수 있는 firmware image를 생성해 보도록 해 보겠다.
- 참고: mbed OS 문서 내용이 이 보드를 기준으로 설명되어 있다.

[그림 2.8] NXP FRDM-K64F 보드
$ cd BUILD/
$ ls -la
c) Nucleo F103RB 보드에 mbed-os(firmware) 올리기
(개인적으로) mbed-os를 지원하는 STM32 Nucleo F103RB 보드가 하나 있어, 여기에 mbed-os를 올려 보도록 하겠다.
$ cd ~/workspace/new_boards/MbedOS/mbed-os-example-blinky
$ mbed target NUCLEO_F103RB
- Target을 지정한다.
or
$ mbed target detect
- 특정 target 명을 알 수 없을 경우, 이렇게 할 수도 있다.
[mbed] Working path "/home/chyi/workspace/new_boards/MbedOS/mbed-os-example-blinky" (program)
[mbed] detect now set as default target in program "mbed-os-example-blinky"
$ mbed toolchain GCC_ARM
- Toolchain을 지정한다. 이렇게 지정하는 이유는 compile 시 일일히 지정하지 않기 위함이다.
$ mbed compile -c
- clean build를 한다.
$ mbed compile -f
- flash writing을 한다.
자, flash writing에 성공하였다. F103RB 보드에 LED가 1초 간격으로 깜빡거린다.
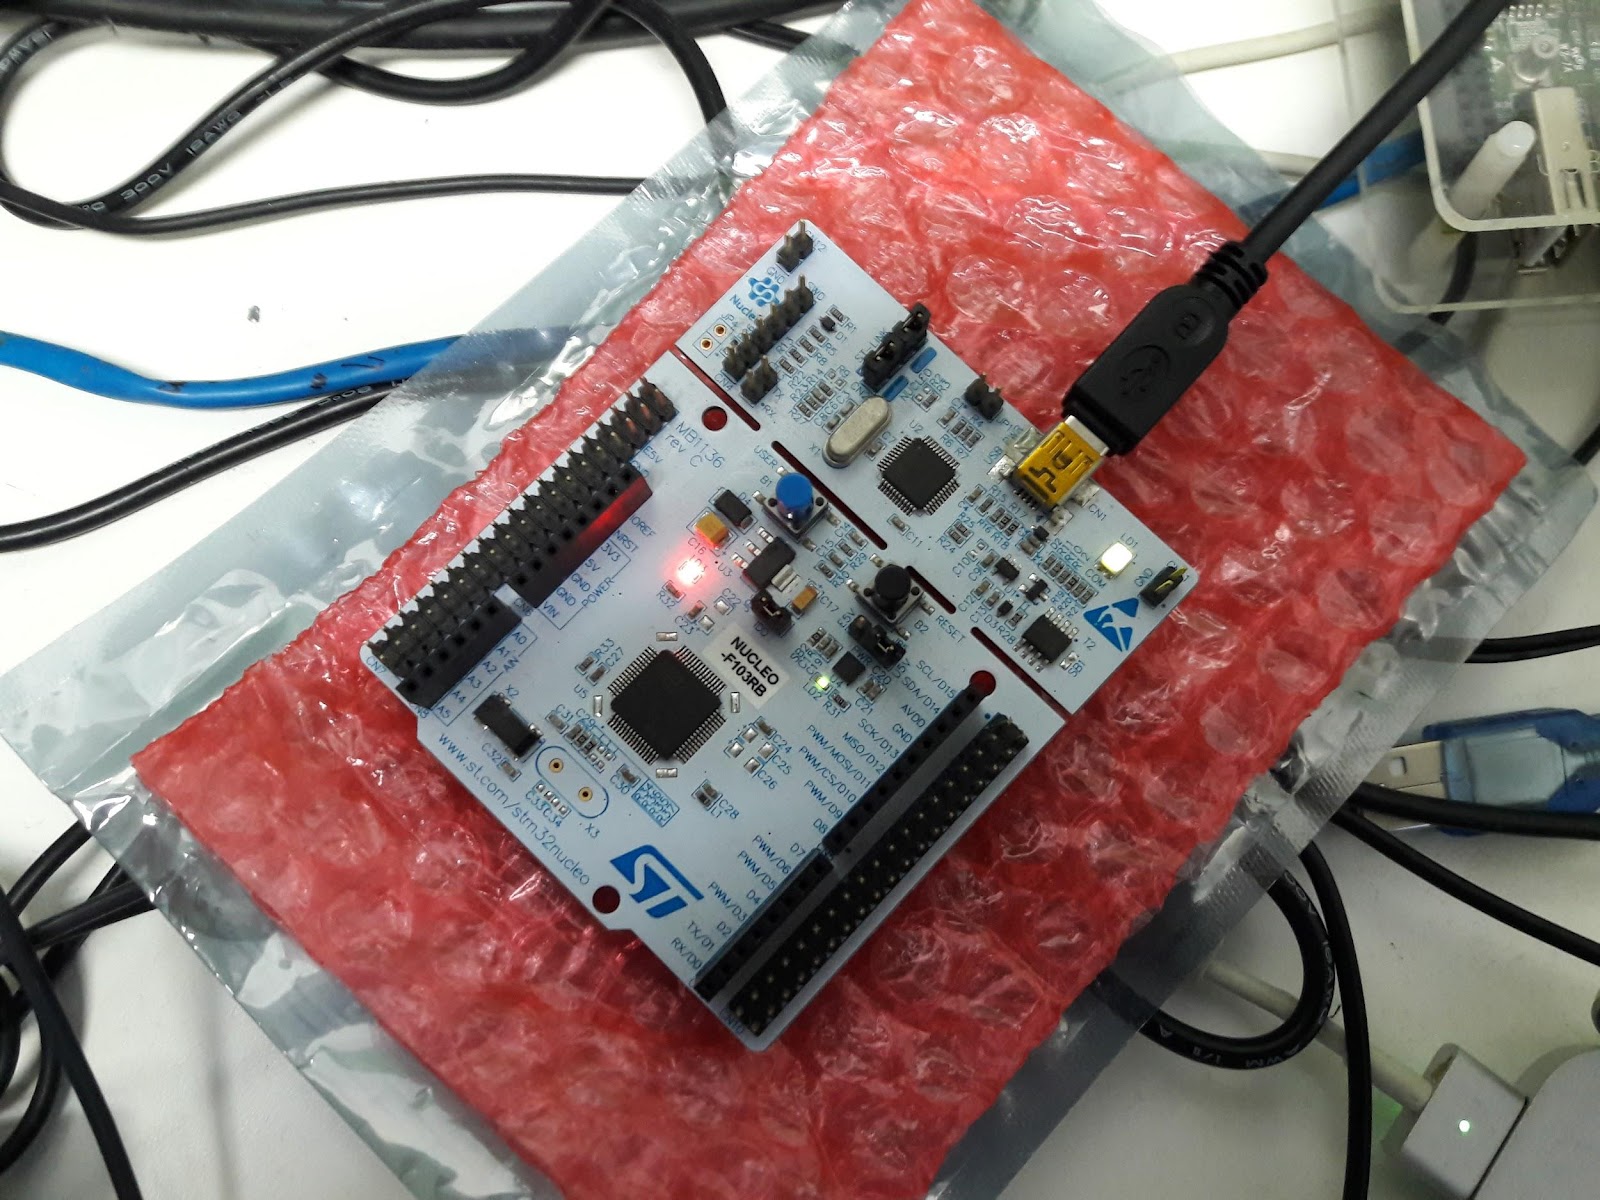
[그림 2.9] Nucleo F103RB 보드에 firmware(mbed-os)를 올린 모습 - 가운데 녹색 LED blinking 중
$ mbed compile -f --sterm
- Minicom 등과 같은 serial console emulator를 통해 board 상태를 확인하기 위해 설정해 준다.
$ sudo minicom -s
- /dev/ttyACM0, 115200, 8N1
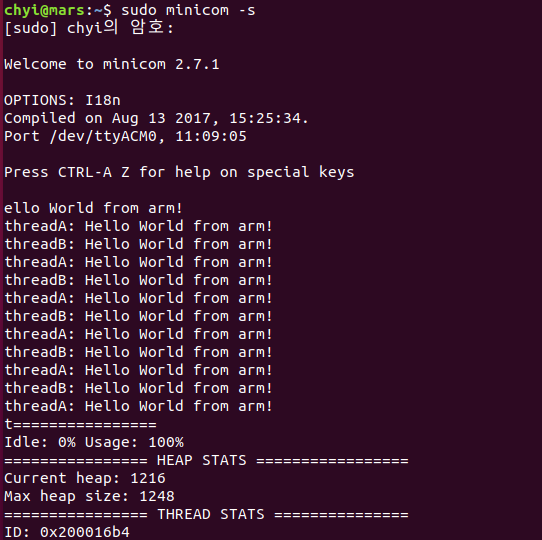
[그림 2.10] Nucleo F103RB 보드 - minicom 설정
어떤가 ? 간단하지 않은가 ?
3. Mbed Studio
Mbed Studio는 MS Visual Studio 처럼 IDE 환경에서 개발하고자 할 때 설치하여 사용한다. 현재는 Windows & MacOS 만을 지원한다. Linux 개발자라면 Mbed CLI를 이용하면 된다. 따라서 본 문서에서는 Mbed Studio 설치 과정만 간단히 정리해 보았다. 나머지 build 이후의 작업은 직접 해 보시길~
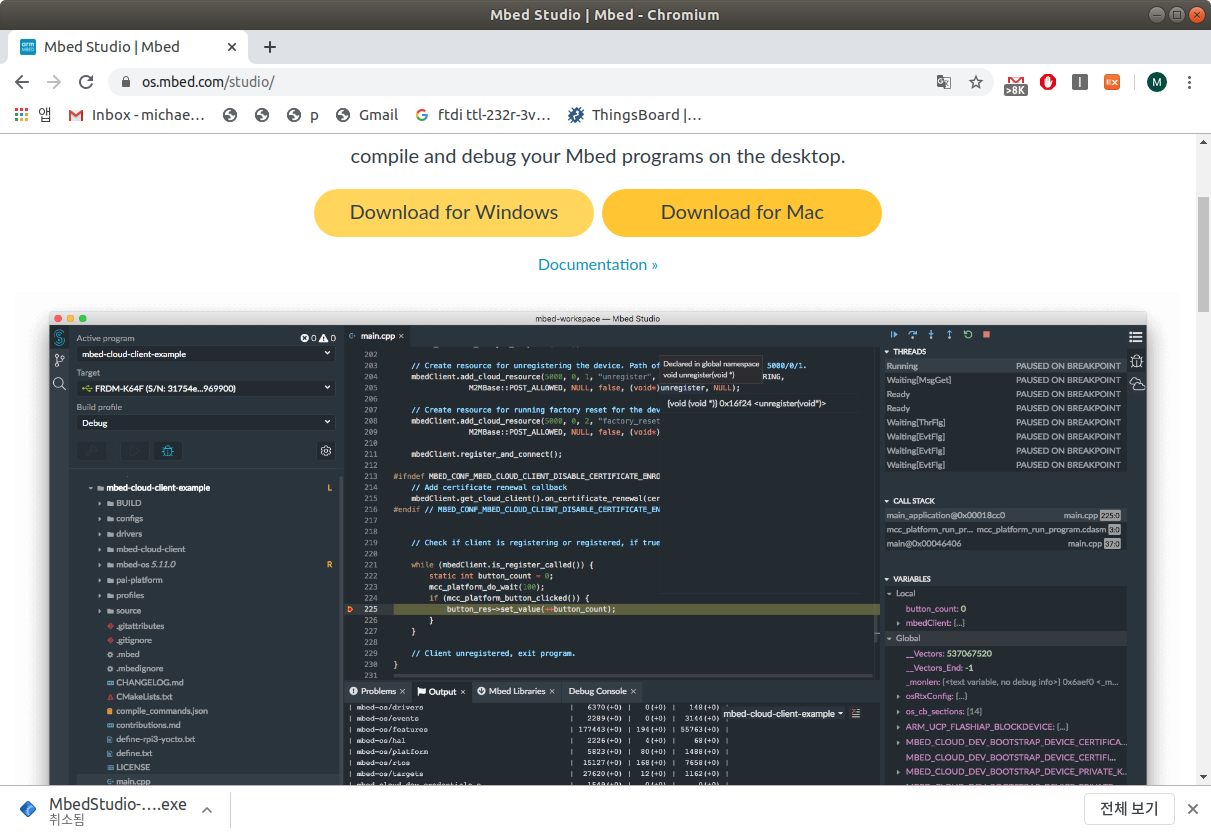
[그림 3.1] Mbed Studio 설치 Page
그럼, 이제 부터 Windows 10에 설치해 보도록 하겠다.
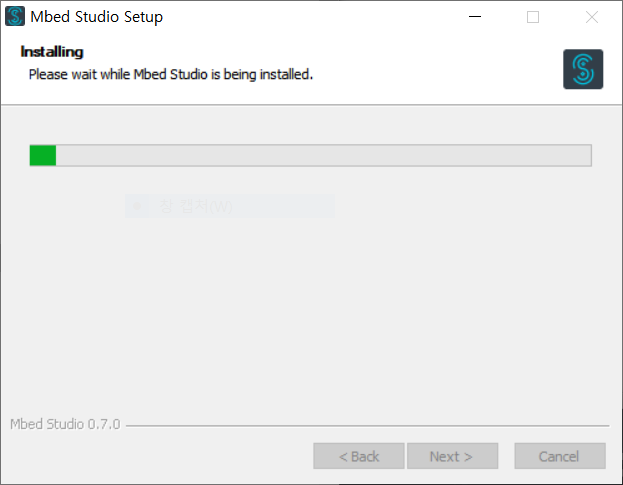
[그림 3.2] Mbed Studio 설치 과정(1)
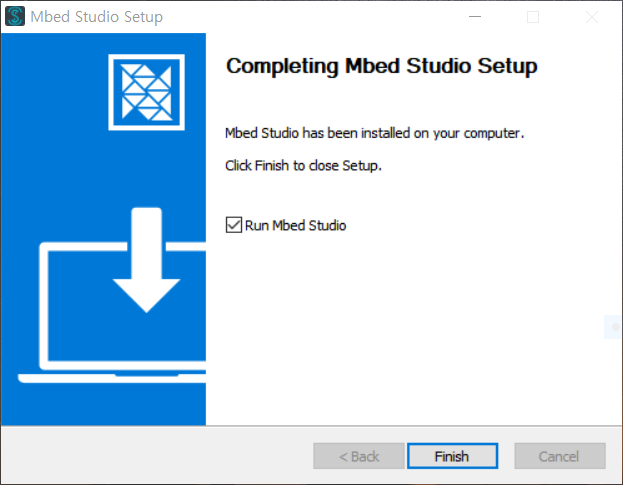
[그림 3.3] Mbed Studio 설치 과정(2)
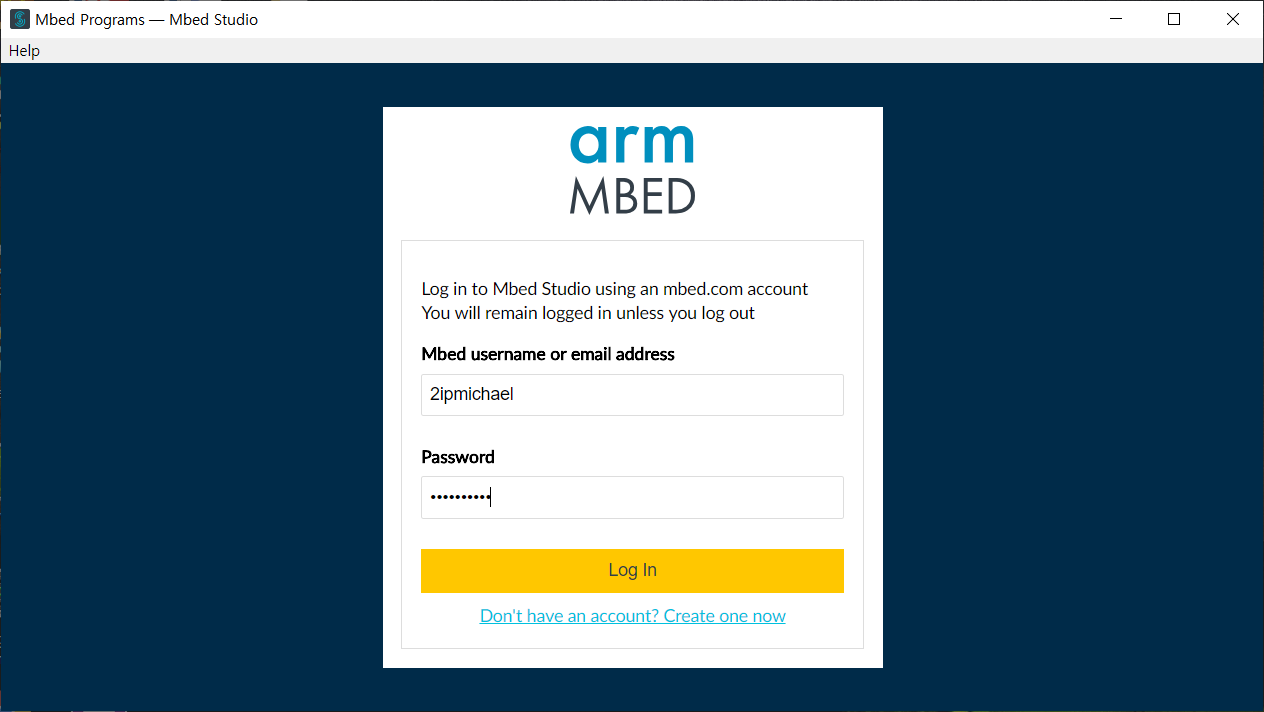
[그림 3.4] Mbed Studio 설치 과정(3) - 1장에서 등록한 사용자 계정 사용
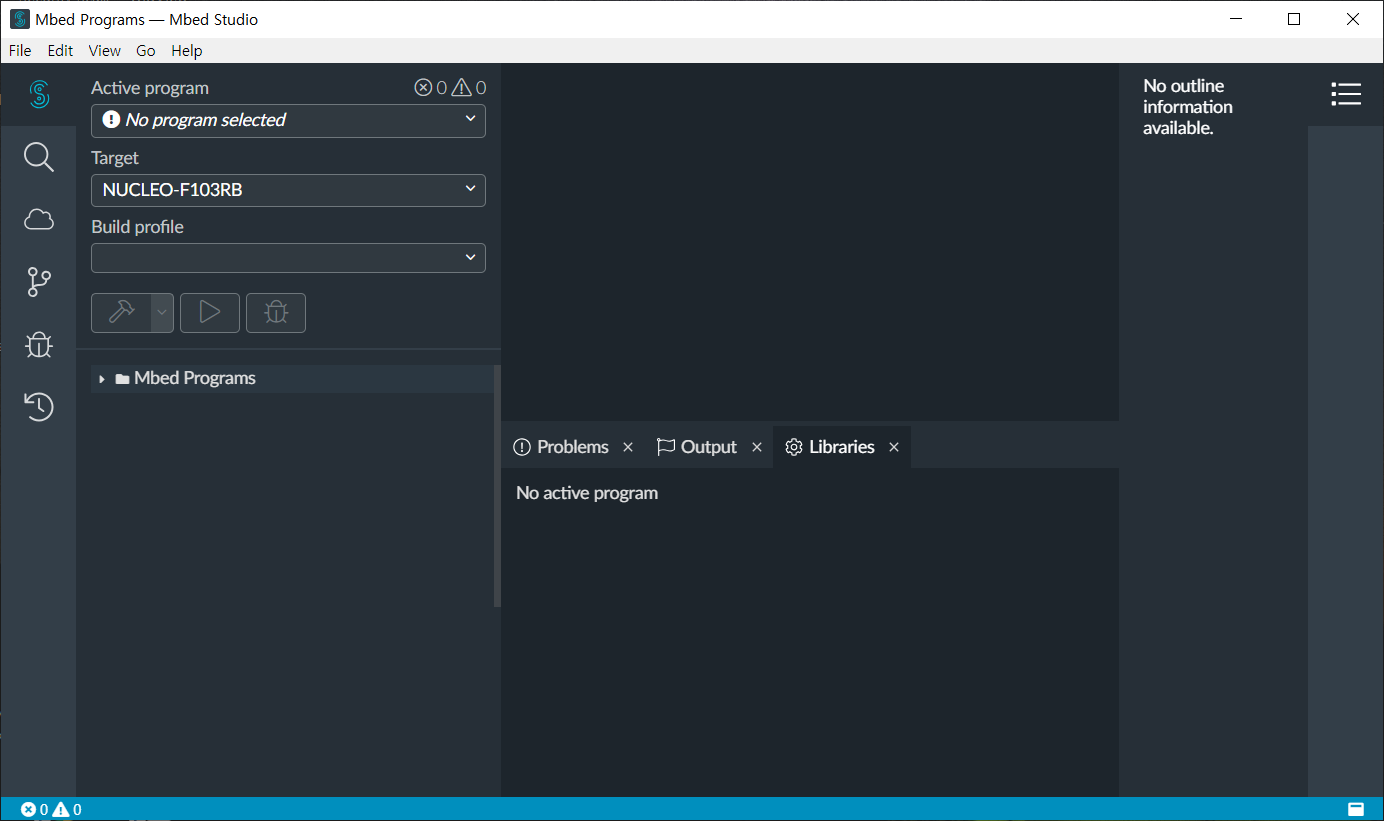
[그림 3.5] Mbed Studio 실행 모습
Example code를 내려 받아 build해 보자. 어렵지 않으니 이부분은 독자 여러분의 몫으로 돌리겠다.
4. Mbed Online Compiler
지금 부터는 Mbed Online Compiler를 사용하여 firmware를 개발하는 방법을 소개해 보도록 하겠다. Web을 통해 개발을 할 수 있는 아주 편리한 방법이다 :)

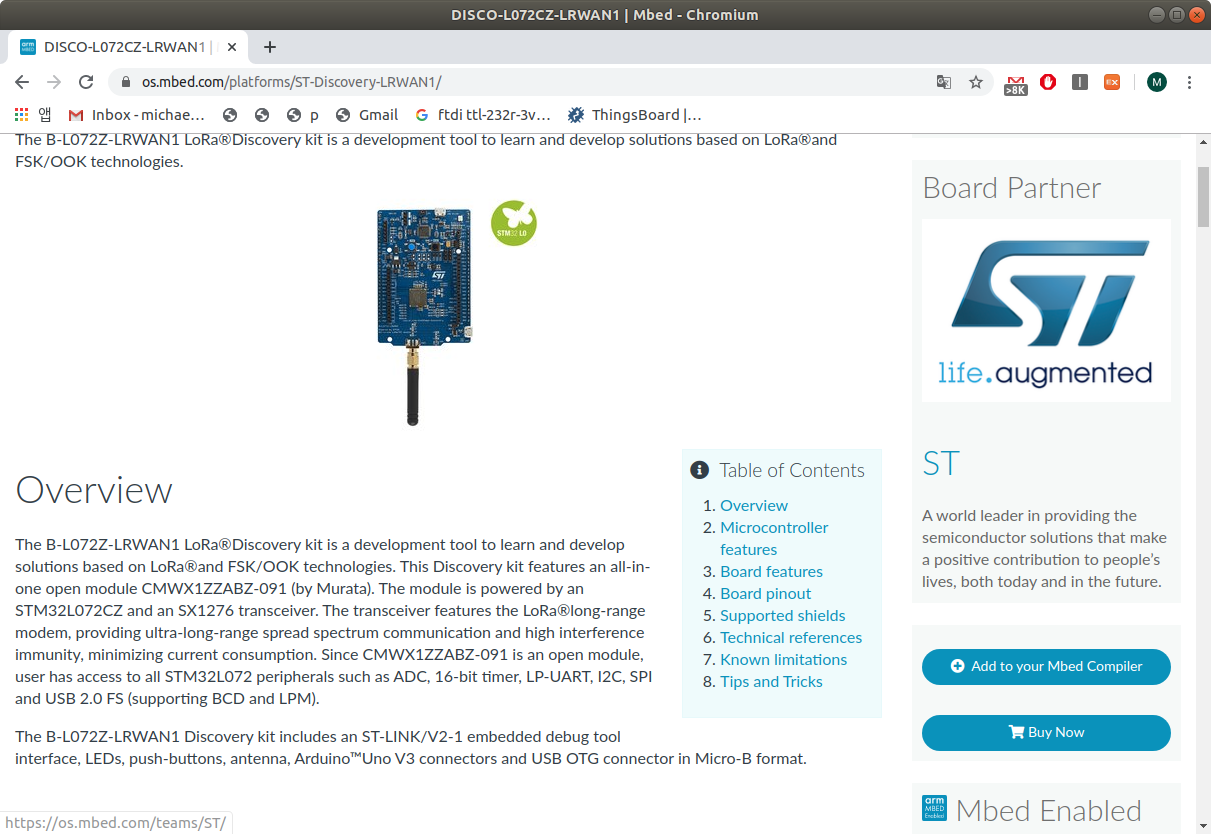
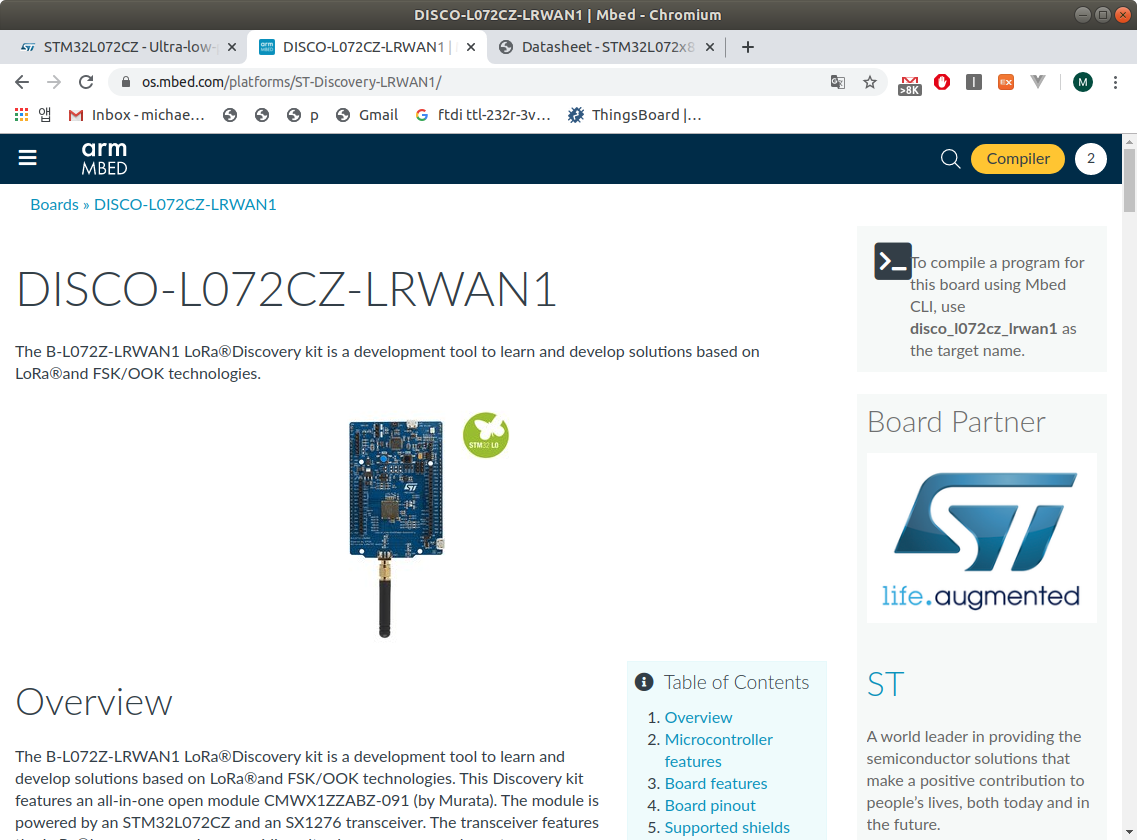
[그림 4.1] Mbed OS Online Compiler - 사용하려는 보드 선택(검색)(1)
[그림 4.2] Mbed OS Online Compiler - 우측 "Add to your Mbed Compiler” 버튼 선택
[그림 4.3] Mbed OS Online Compiler - 우측 "Open Mbed Compiler” 버튼 선택

[그림 4.4] Mbed OS Online Compiler 화면
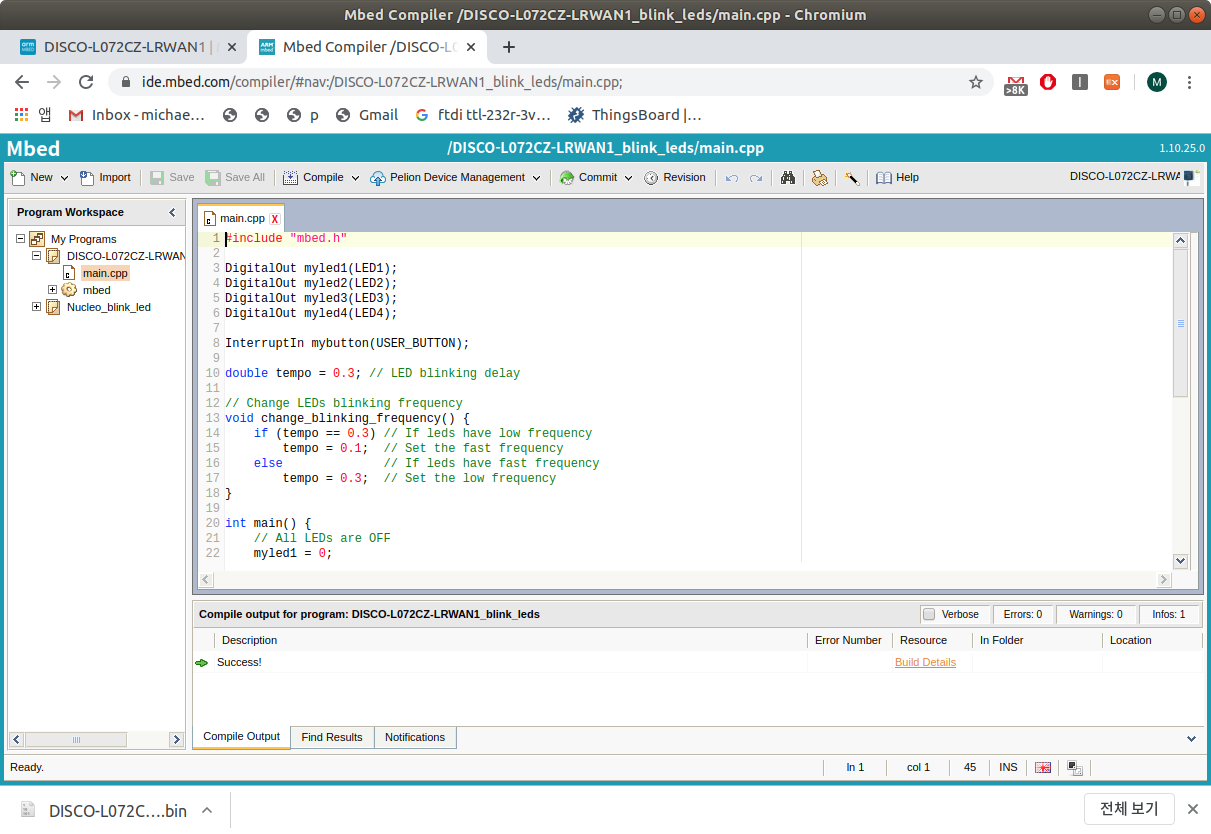
[그림 4.5] Mbed OS Online Compiler - Compile 모습
참고: Compile이 정상적으로 완료되면 bin 파일이 자동으로 download 된다.
<firmware writing하기>
Online compiler에서 compile하여 생성한 bin 파일을 Mbed 보드의 USB device folder로 복사한 후, reset 해 주면 된다.
- F103RB 상에서 이렇게 했는데, 잘 안되는 것 같다(물론 LED Blinky code를 테스트해 봄)… 나중에 다시 시도해 보기로 하자.
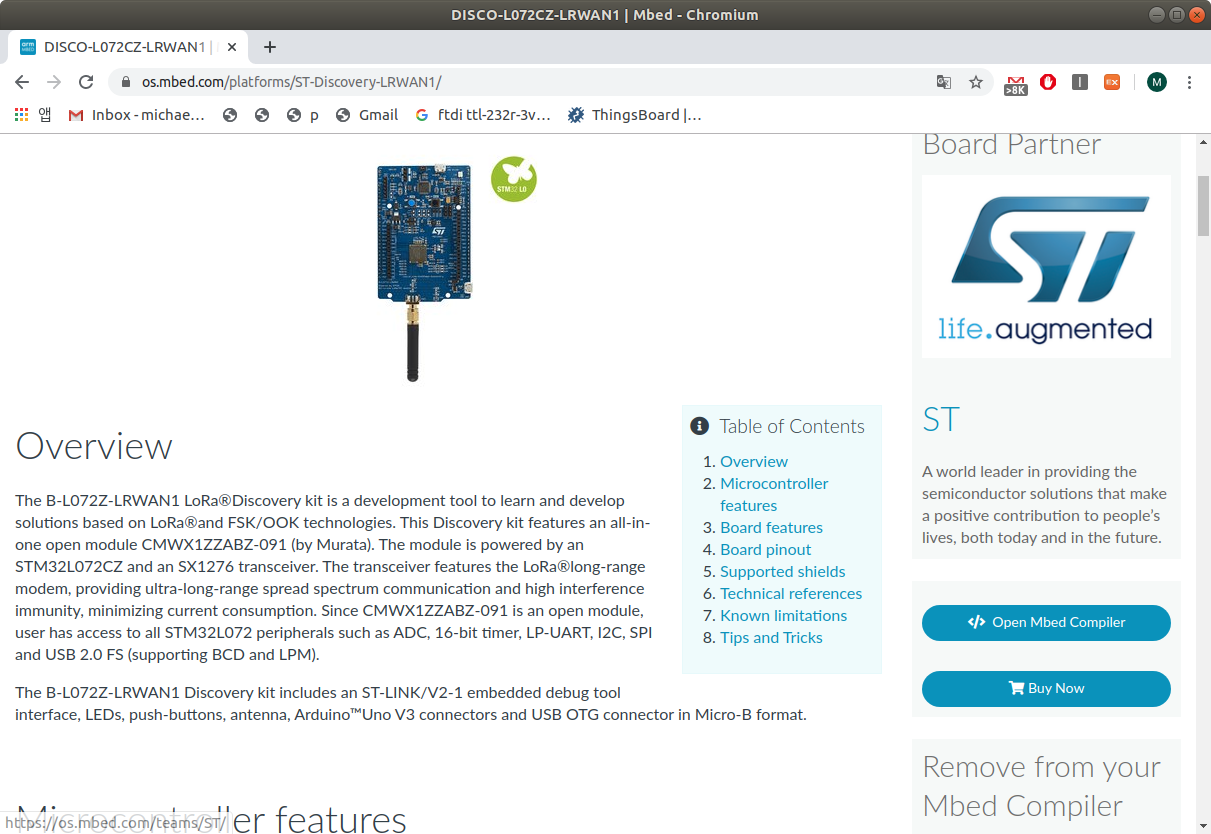
5. DISCO-L072CZ-LRWAN1 보드
이번 장에서는 DISCO_L072CZ-LRWAN1 보드에 lorawan firmware를 올려 보도록 하겠다.
a) STM32 LoRa and Sigfox Discovery Kit
[그림 5.1] DISCO_L072CZ-LRWAN1 보드
https://kr.mouser.com/ProductDetail/STMicroelectronics/B-L072Z-LRWAN1?qs=PzRbFReKxL2UVPVODSIYig%3D%3D&gclid=EAIaIQobChMI9bXag6m55gIVy2kqCh0uSAiwEAQYASABEgL7BPD_BwE
참고(가격): ₩60,915 (좀 비싸다)
아래에 Microcontroller(줄여서 micom)와 보드의 주요 특징을 열거해 보았다.
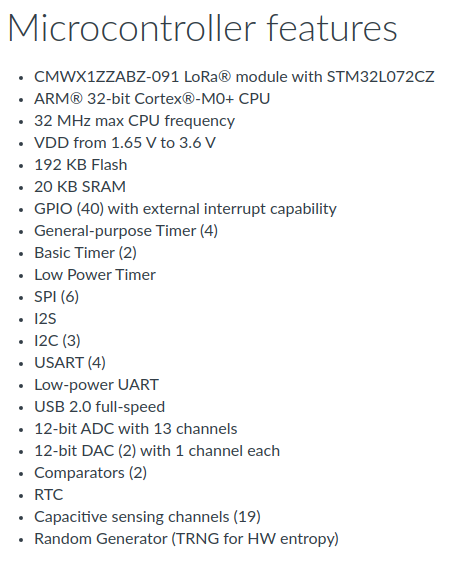
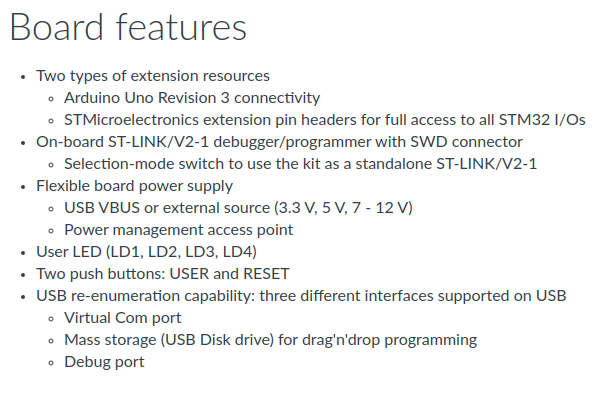
다음 4개의 그림은 실제 programming 시 중요한 부분(센서 연결시 필요)이라고 할 수 있는 확장 pin header에 대한 pin map 정보를 표현한 것이다.

[그림 5.2] Arduino-compatible pin header(보드 top 왼쪽 pin - CN4, CN6)
참고: 위의 그림은 Antenna가 아래 방향에 있는 그림이다.
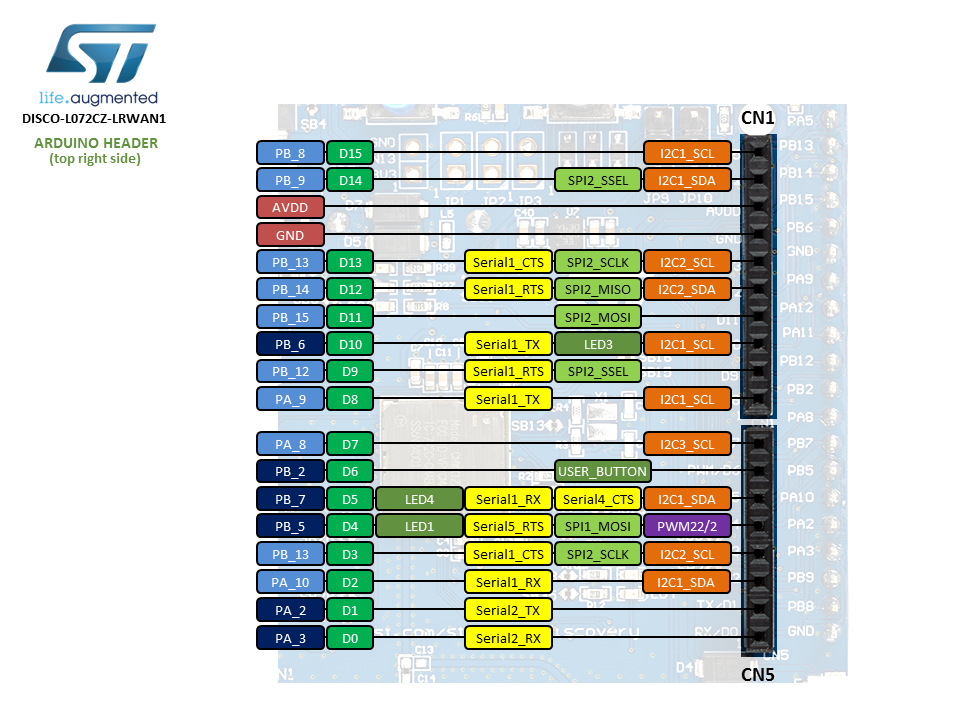
[그림 5.3] Arduino-compatible pin header(보드 top 오른쪽 pin - CN1)
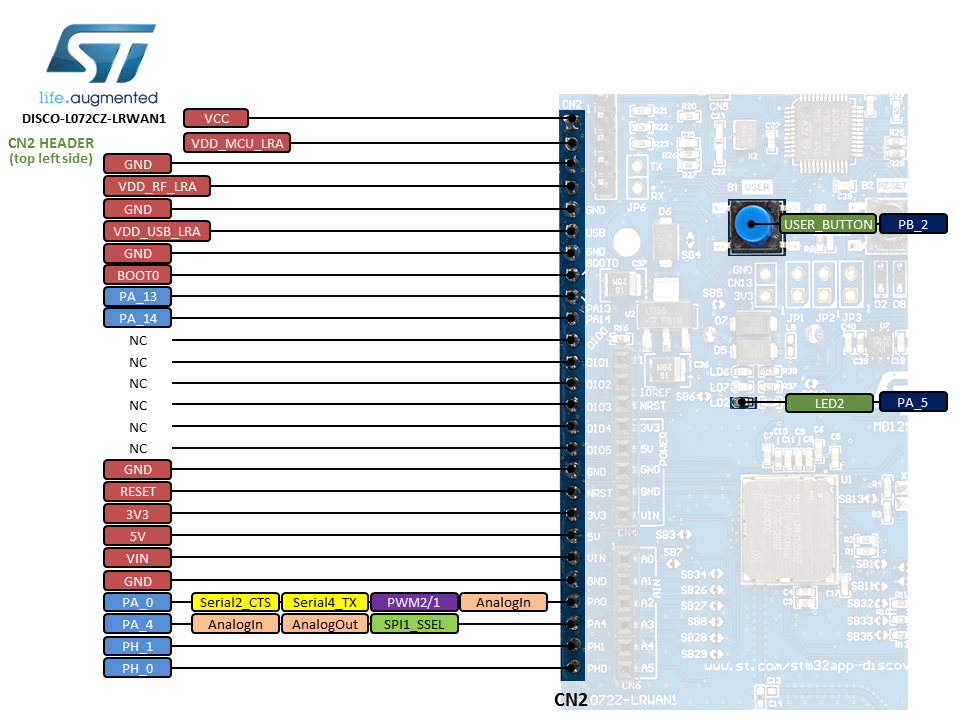
[그림 5.4] Morpho pin header(보드 top 왼쪽 pin - CN2)
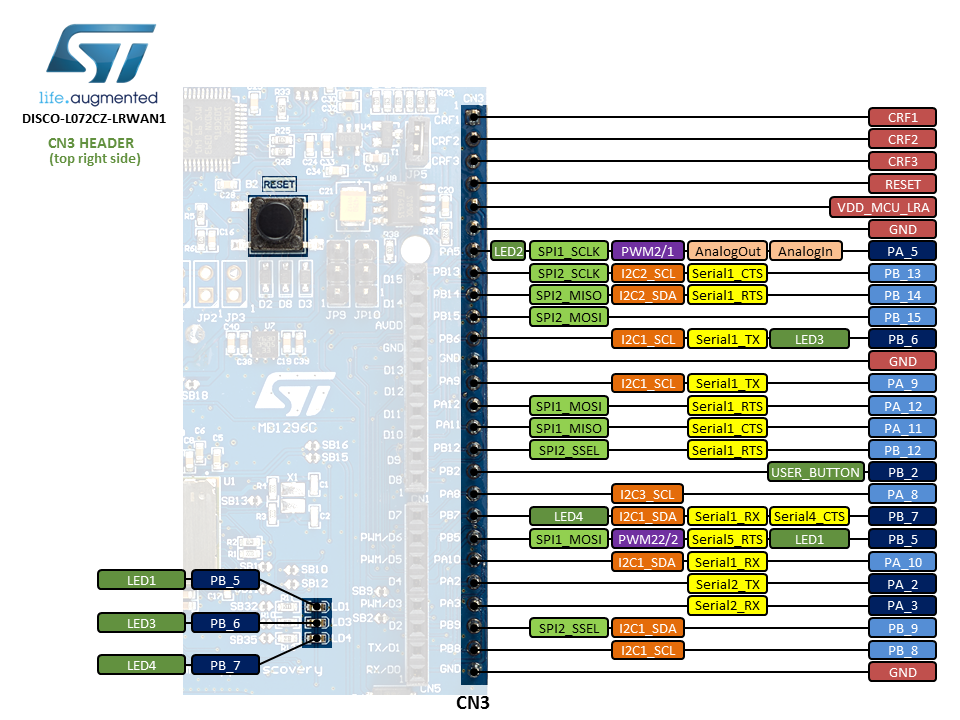
[그림 5.5] Morpho pin header(보드 top 왼쪽 pin - CN3)
b) lorawan example build하기
지금 부터 설명하는 내용은 아래 site를 기초로 한다.
$ cd ~/workspace/new_boards/MbedOS
$ mbed import mbed-os-example-lorawan
$ cd mbed-os-example-lorawan/mbed-os
$ sudo pip install -r requirements.txt
- pycryptodome, psutil, click 등 필요한 python package를 자동으로 설치해 준다.
<Supported MCUs>
$ cd ..
$ mbed compile -m DISCO_L072CZ_LRWAN1 -t GCC_ARM
c) lorawan firmware 수정해서 보드에 올리기
보드(이하 disco 보드로 통칭)가 도착했으니, 이제 부터 firmware를 올려 보도록 하자. :)
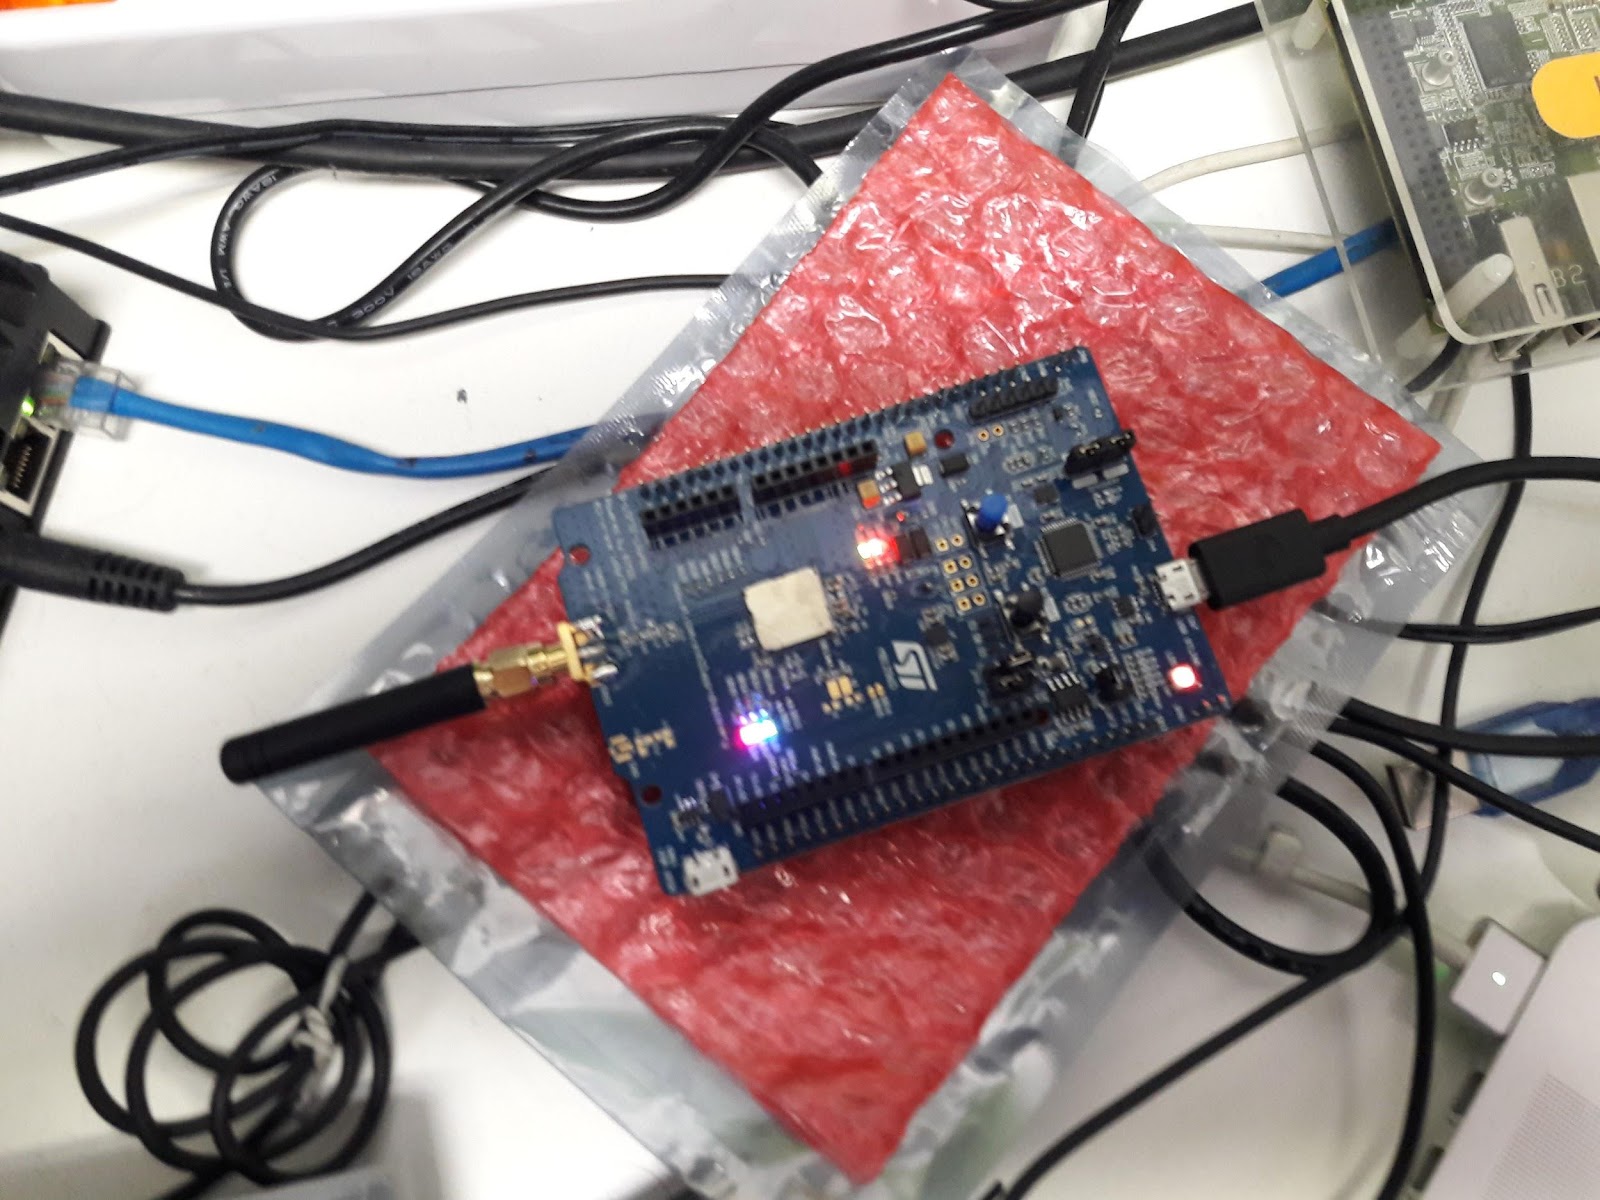
[그림 5.6] DISCO_L072CZ-LRWAN1 보드 전원 연결 모습
먼저 mbed-os-example-lorawan/mbed_app.json 파일을 열고, KR920 주파수 설정 및 OTAA 설정 변경을 해 보자.

[그림 5.7] mbed_app.json 파일 내용
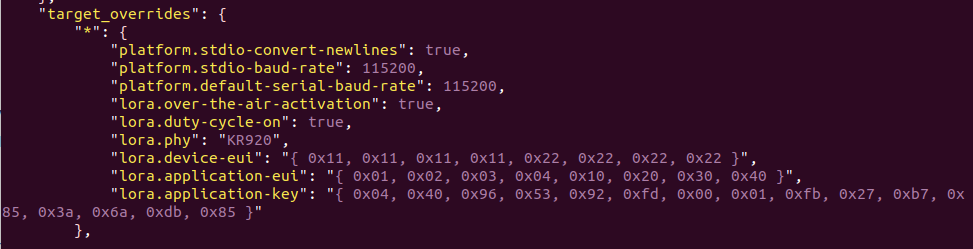
[그림 5.8] mbed_app.json 파일 수정
참고: LoRaServer에서는 application-eui를 사용하지 않는다.
수정한 내용을 반영하기 위해 코드를 재 build해 보도록 하자.
$ mbed compile -m DISCO_L072CZ_LRWAN1 -t GCC_ARM
Build에 문제가 없으니, 바로 flash writing을 해 보기로 하자.
chyi@mars:~/workspace/new_boards/MbedOS/mbed-os-example-lorawan$ mbed compile -m DISCO_L072CZ_LRWAN1 -t GCC_ARM -f
- Flash에 write하자.
주의: 장치를 PC에서 인식 못할 경우, PC를 재 부팅해 주면 해결될 수 있다.
Flash에 writing은 정상적으로 진행된 듯 한데, LoRaWAN 연결(<=> LoRaServer)이 안되는 것 같다.
참고: LoRaServer에 disco board를 Application으로 등록하는 절차는 (반복되는 내용이라) 별도로 정리하지 않았다.

[그림 5.9] minicom(/dev/ttyACM0, 115200, 8N1) 실행 모습
어라, LoRaServer application key 설정이 잘 못 되었다. 아래와 같이 다시 조정해 보니, 정상 동작한다.
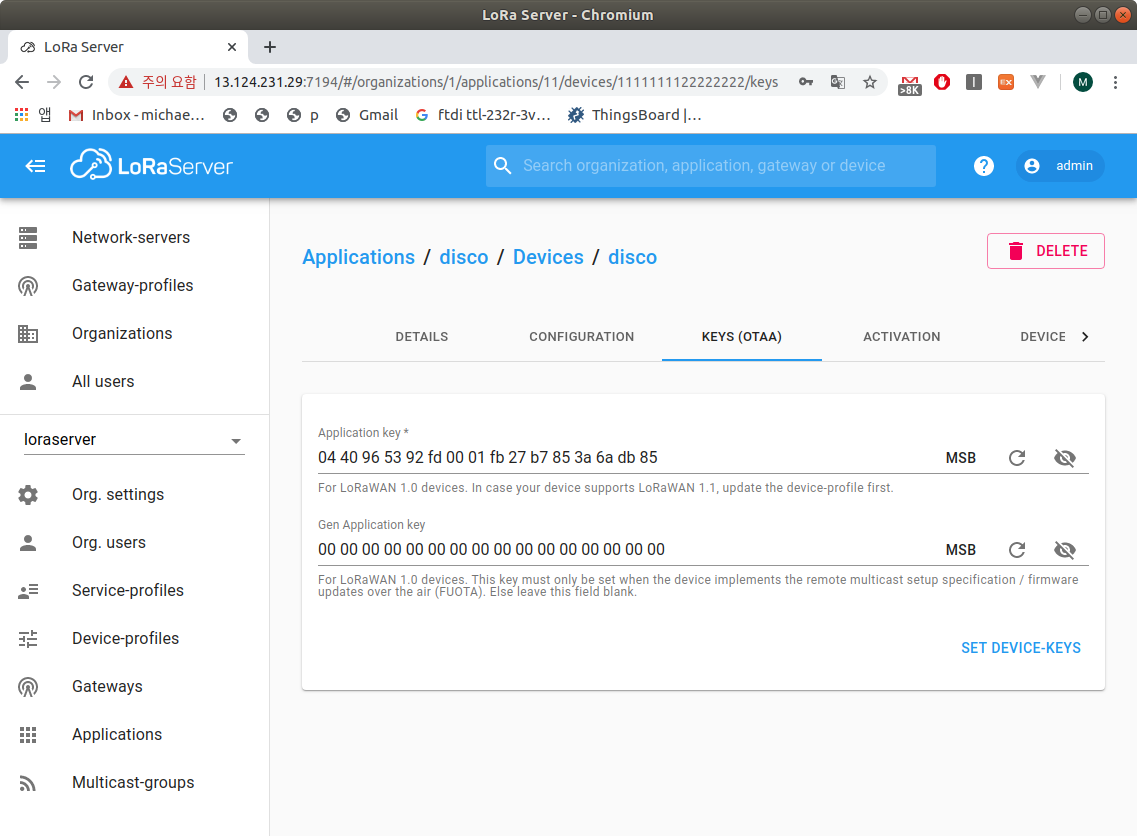
[그림 5.10] LoRaServer OTAA 설정 변경
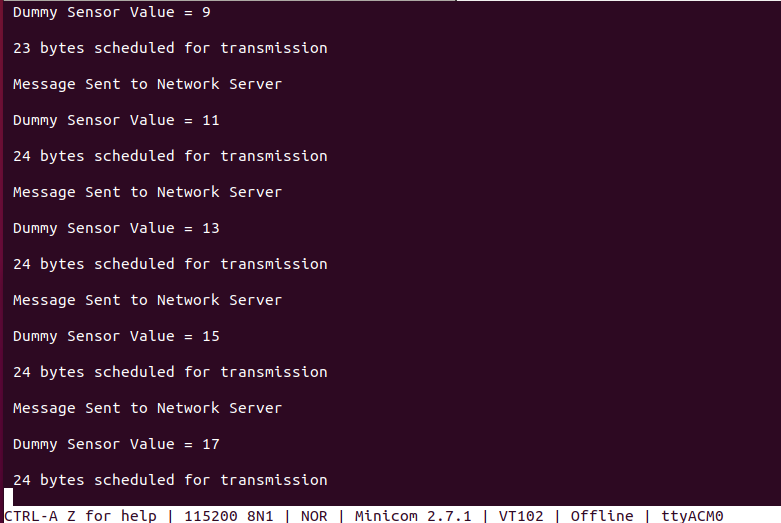
[그림 5.11] minicom(/dev/ttyACM0, 115200, 8N1) 실행 모습 - OK

[그림 5.12] LoRaServer application page 모습
근데, 왜 에러 packet이 보일까 ?

[그림 5.13] LoRaServer application page - error packet
내용을 보니, error:"invalid data type: 117" 인데 ... 실제 sensor를 달지 않아서 제대로 된 data가 없어서 그런가 ? 아직은 정확한 이유를 알 수 없으니, 좀 더 두고 볼 일이다. :(
[나중에 정리한 것임] ThingsBoard로 전달할 message format(Codec 설정)이 안 맞아서 발생한 에러이다.
6. LoRaWAN의 모든 것
이번 장에서는 LoRaWAN 관련하여 필자가 작성한 몇가지 문서를 소개하고자 한다. 아래 4개의 문서에서는 LoRaWAN Sensor(Node) => Gateway => LoRa Server => Application Server에 이르는 전반적인 내용을 다루고 있으니, 관심있는 분들은 한번 읽어보시기 바란다.
<LoRaWAN & security 1>
https://github.com/ChunghanYi/spnhacks/blob/master/lorawan_security_solution/SPNBox_LoRa_Dev_Guide15_1.pdf
<LoRaWAN & security 2>
https://github.com/ChunghanYi/spnhacks/blob/master/lorawan_security_solution/SPNBox_LoRa_Dev_Guide15_2.pdf
<LoRaWAN & security 3>
https://github.com/ChunghanYi/spnhacks/blob/master/lorawan_security_solution/SPNBox_LoRa_Dev_Guide15_3.pdf
<LoRaWAN & security 4>
https://github.com/ChunghanYi/spnhacks/blob/master/lorawan_security_solution/SPNBox_LoRa_Dev_Guide15_4.pdf
Slowboot
댓글 없음:
댓글 쓰기