
(오래전에 Google Docs로 정리했던 문서인데 blog에 올려 본다)


1. GainStrong MiniBox V3
2. OpenWrt(LEDE) Build 하기
3. Firmware Upgrade 하기
4. WireGuard build 및 동작 시험하기
5. OpenWrt 이모 저모
1. GainStrong MiniBox V3
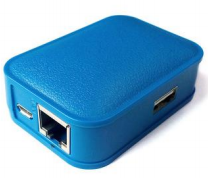
지금부터는 GainStrong MiniBox V3를 검토해 보기로 하겠다. 생각보다 MiniBox(CPU: QCA9887 AR9531 사용) 외관은 꽤 괜찮아 보인다.
장비 앞 뒤로 10/100Mbps ethernet port 2개가 인상적이다. 제품 size는 신용카드 크기 보다도 작다.
[그림 1.1] GainStrong MiniBox V3 장비 외관

[그림 1.2] GainStrong MiniBox V3 보드

[그림 1.2] GainStrong MiniBox V3 보드
근데, S/W는 허접 그 자체 :( 문서도 하나 없고 … Gl.iNet과 비교해 보면 하늘과 땅 차이 ㅎㅎ
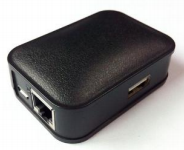
[Tip] Gl.iNet은 OpenWrt 기반의 소형 Wi-Fi Router를 제조하는 아주 훌륭한 회사이다^^. 추후 Gl.iNet 제품에 대해서도 별도의 blog posting으로 정리해 볼 생각이다.

[그림 1.3] Gl-iNet 제품 line-up
<WebUI 접속 정보>
[Tip] 나중에 설정한 password 값은 root1234 이다.
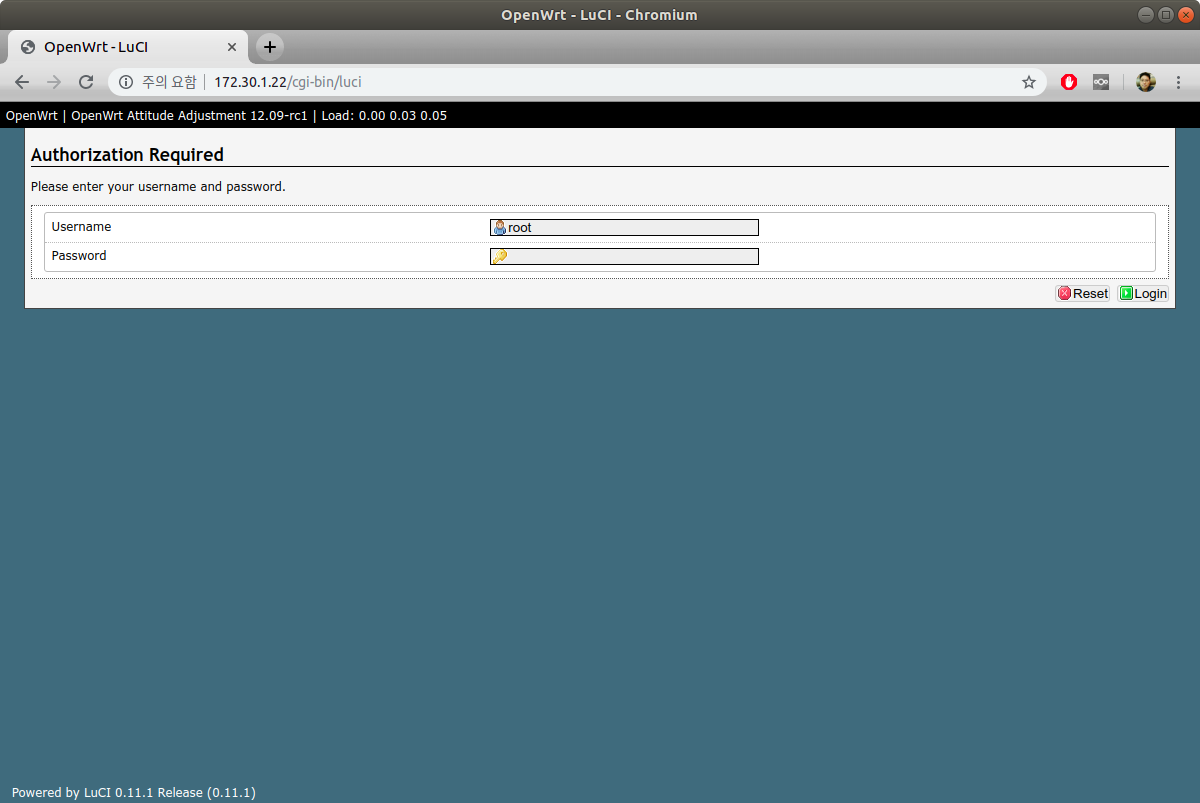
[그림 1.4] GainStrong MiniBox V3 WebUI
ssh로 로긴해서 확인해 보니, kernel 3.3.8을 사용하고 있다. 이 버젼에서는 wireguard가 compile이 안된다.
Compile을 위해서는 최소한 3.10 version 이상이어야 한다.

[그림 1.5] GainStrong MiniBox V3 - kernel version 확인

[그림 1.6] GainStrong MiniBox V3 - df 명령 실행 모습
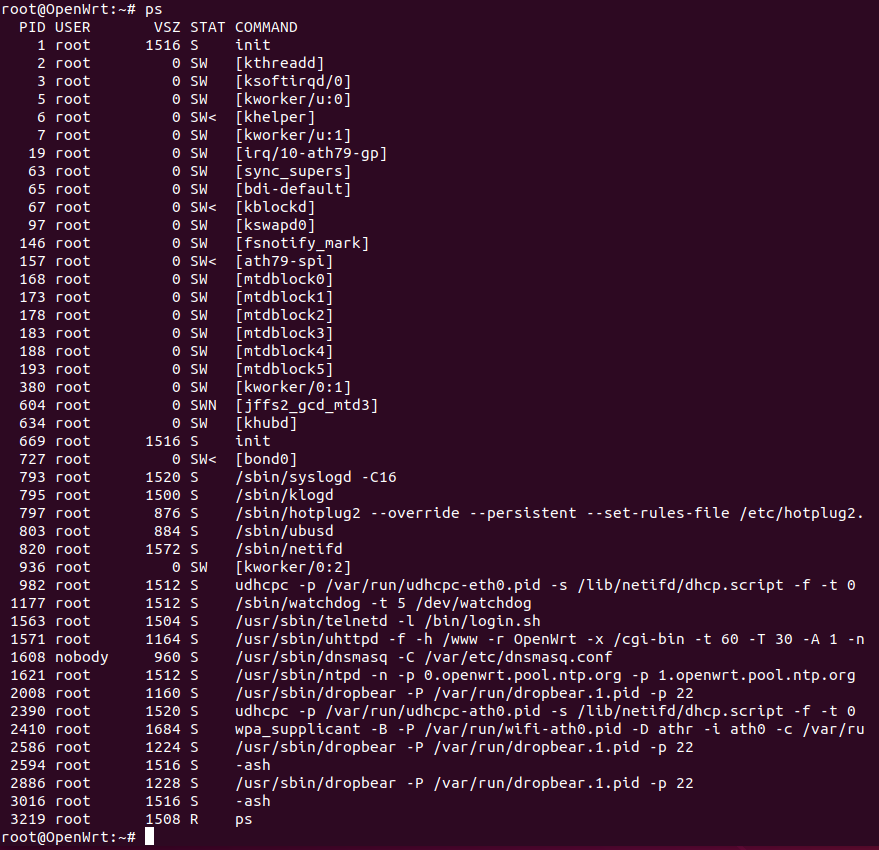
[그림 1.7] GainStrong MiniBox V3 - ps 명령 실행 모습
2. OpenWrt(LEDE) build 하기
우선 GainStroing openwrt code를 내려 받아 build해 보도록 하자. OpenWrt LEDE(17.x version)인데, 얘는 위에서 보았던 것과는 다른 버젼(kernel 4.9.91 버젼 사용)인 듯 하다. 일단 build해 보기로 하자.

[그림 2.1] GainStrong OpenWrt/LEDE github
<Ubuntu 18.04 Desktop>
$ sudo apt-get update
$ sudo apt-get install gcc g++ build-essential asciidoc binutils bzip2 gawk gettext git libncurses5-dev libz-dev patch flex bison make autoconf texinfo unzip sharutils subversion
ncurses-term zlib1g-dev ccache upx lib32gcc1 libc6-dev-i386 uglifyjs git-core gcc-multilib
p7zip p7zip-full msmtp libssl-dev libglib2.0-dev xmlto qemu-utils automake libtool -y
$ git clone https://github.com/GainStrongService/lede_projects
$ cd lede_projects/
$ git checkout minibox-v3-16m
'minibox-v3-16m' 브랜치가 리모트의 'minibox-v3-16m' 브랜치를 ('origin'에서) 따라가도록 설정되었습니다.
새로 만든 'minibox-v3-16m' 브랜치로 전환합니다
$ ./scripts/feeds update -a
$ ./scripts/feeds install -a
$ make menuconfig
- OK, 정상 build 된다.
다행히 build는 정상적으로 진행된다. 그 결과물을 확인해 보면 다음과 같다.
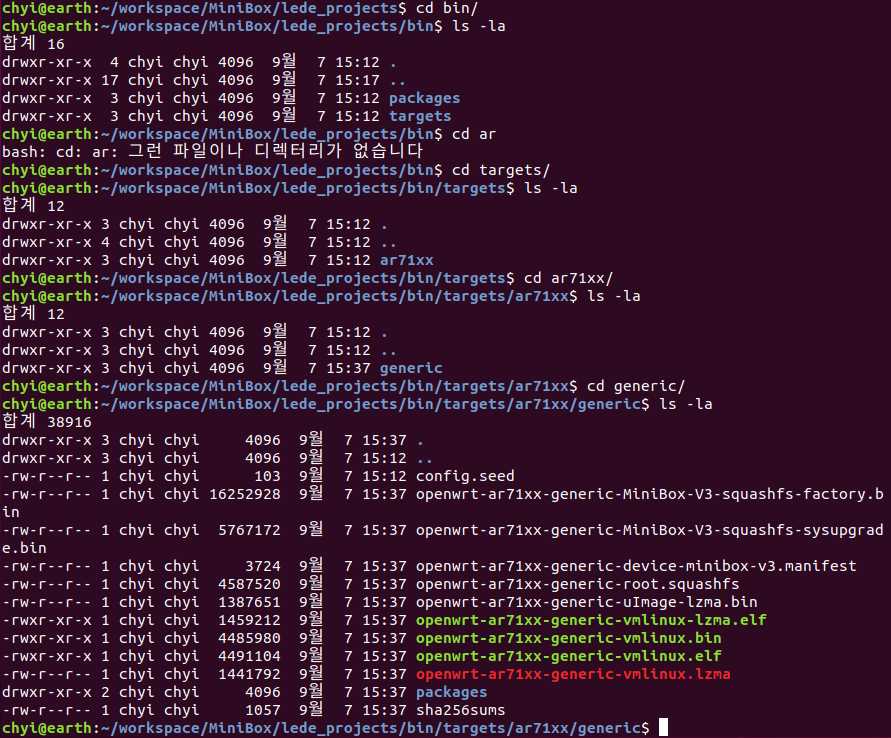
3. Firmware Upgrade 하기
자, 새로운 firmware image가 생성되었으니, target board에 올려 보도록 하자.
<build하여 얻은 firmware image 파일>
bin/targets/ar71xx/generic/openwrt-ar71xx-generic-MiniBox-V3-squashfs-sysupgrade.bin
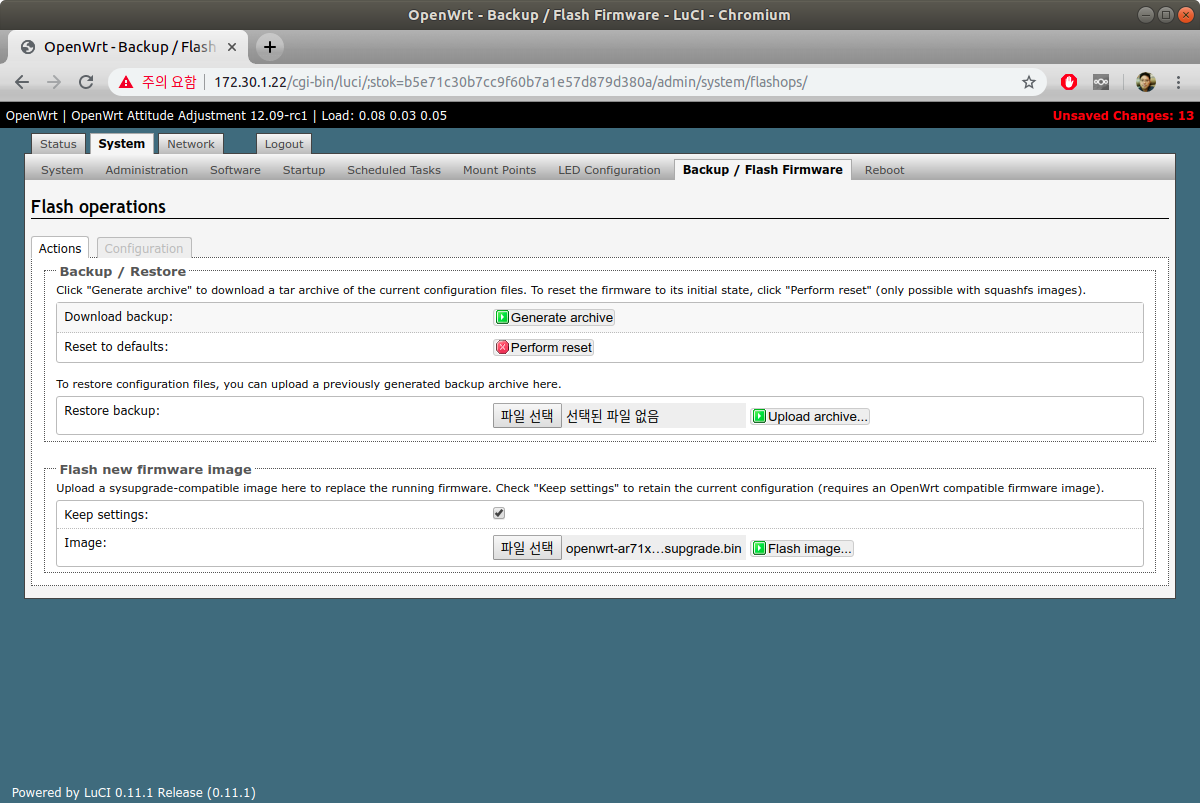
[그림 3.1] Firmware Upgrade 화면(1)
어라, “Flash image” 버튼을 눌렀더니, 아래 메시지를 뿌리면서, image writing이 안된다.
The uploaded image file does not contain a supported format. Make sure that you choose the generic image format for your platform.
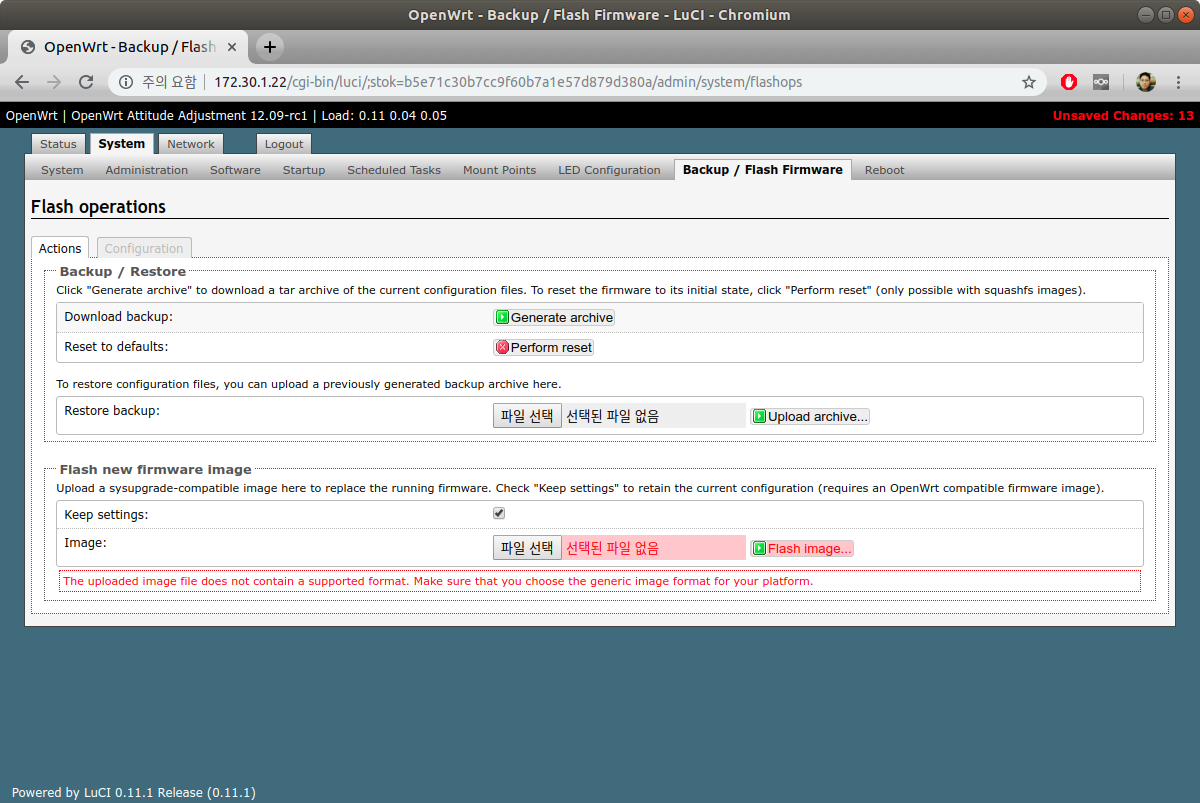
[그림 3.2] Firmware Upgrade 화면(2)
아래 site를 보니, bin file을 trx 파일로 전환해 주어야 하는 것 같다. 한번 시도해 보자. 어찌 되는지 …

Trx 파일로 시도해 보았으나, 결과는 동일하다(설치가 안된다).
아무리 봐도, 현재 version 은 DD-WRT or LEDE 중에서도 old 버젼인 듯하고, 위에서 build한 코드는 LEDE(17.x version)라서 format이 안 맞는 것 같다. 그렇다면 강제로 firmware upgrade를 시도해 보는 수밖에 ...
scp로 아래 firmware image를 target board로 올린 후, 아래 명령을 시도하자. 잘못되면 부팅이 안될 수도 있지만, 뾰족한 방법이 없으니, 어쩔 수 없다. :(
<target board>
# sysupgrade -F openwrt-ar71xx-generic-MiniBox-V3-squashfs-sysupgrade.bin

2~3분 정도 경과 후, 다시 연결해 보니, 다행히도 새로운 image로 정상 연결된다. :)
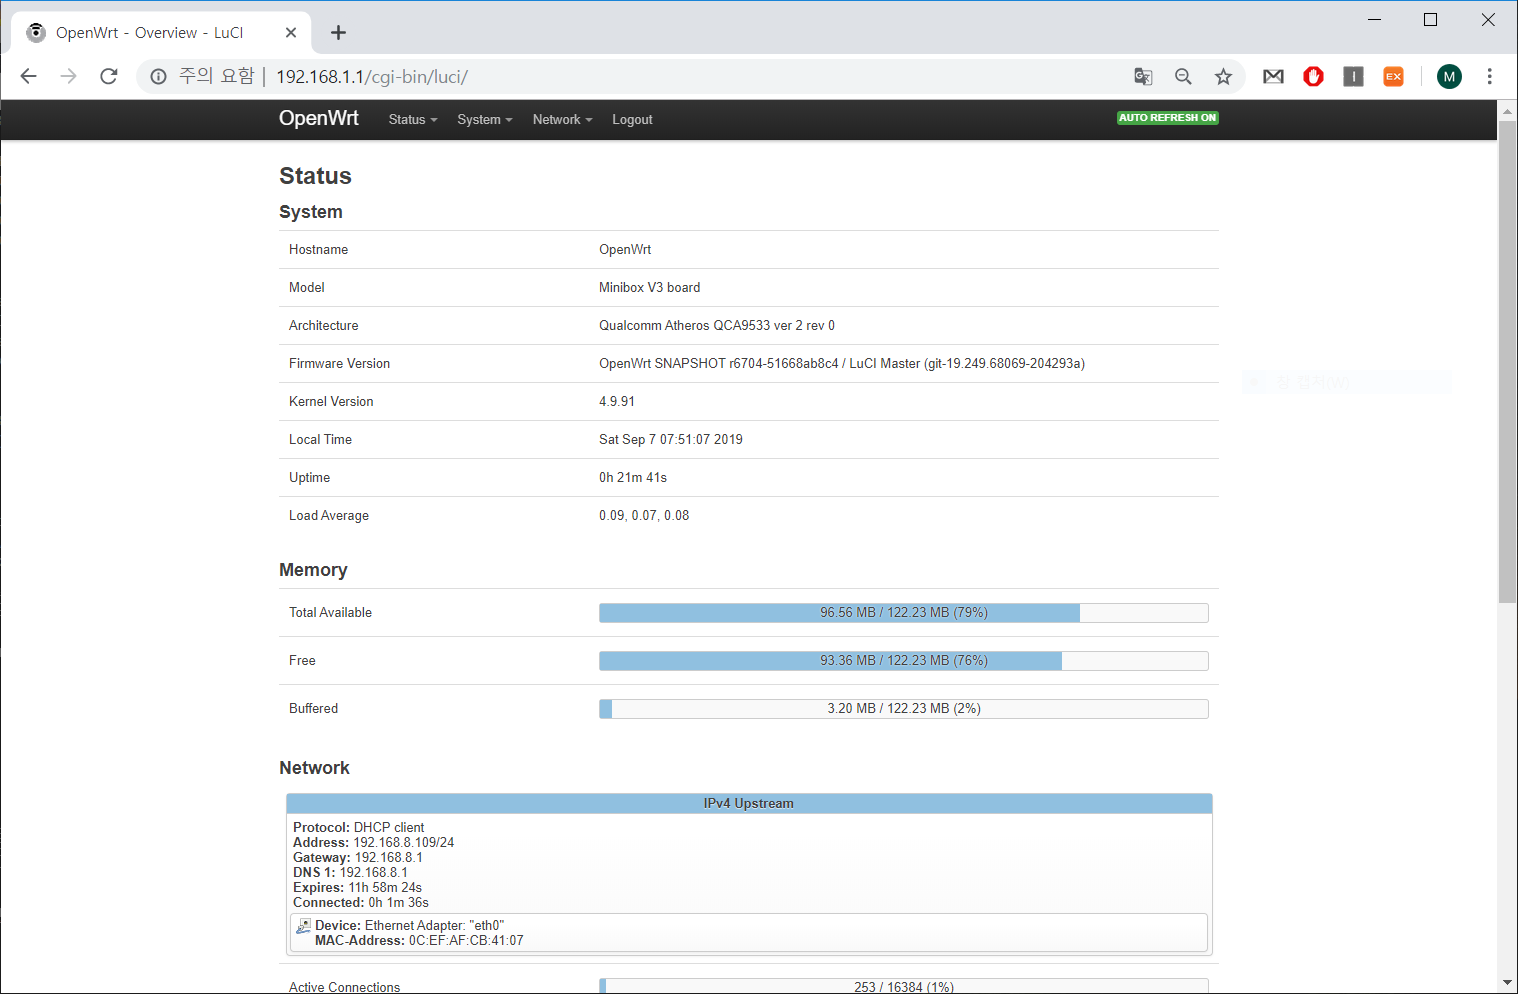
[그림 3.3] Firmware Upgrade 후, 새로운 WebUI(LEDE)
근데, wifi 설정을 해 보니, scan도 안되고 ... 동작을 안한다. 이런 shit~ wifi는 나중에 다시 살려 보기로 하고, 일단 유선 LAN/WAN port로 나머지 작업(wireguard build 작업)을 이어가 보도록 하자.
4. WireGuard Build 및 동작 시험하기
자, 이제 부터는 WireGuard kernel module을 MiniBox V3에 올려 볼 차례이다. 혹시 준비된 package가 있는지 먼저 확인해 보자.
# opkg update
# opkg install wireguard
혹시나 했는데, 역시나 준비된 package 없어 설치가 안된다.

[그림 4.1] wireguard package 설치 실패
그렇다면, 지금 부터는 wireguard source를 가지고 직접 build 한 후, target board에 올리는 방법을 시도해 보도록 하겠다.
먼저 wireguard code를 적당한 위치에 받아 둔다.
$ wget https://git.zx2c4.com/WireGuard/snapshot/WireGuard-0.0.20190905.tar.xz
다음으로, linux kernel download folder로 이동 후, linux-4.9.91.tar.xz 파일의 압축을 푼 상태에서 wireguard patch를 적용한다.
$ cd ~/workspace/MiniBox/lede_projects/dl
$ mkdir tmp; cp ./linux-4.9.91.tar.xz tmp; cd tmp
$ tar xvJf ./linux-4.9.91.tar.xz
$ cd linux-4.9.91
$ ~/workspace/MiniBox/WireGuard/contrib/kernel-tree/create-patch.sh | patch -p1
Patch가 정상적으로 진행되었으면, 다시 압축을 묶어 새로운 linux-4.9.91.tar.xz 파일을 생성해 낸다.
$ tar cvJf linux-4.9.91.tar.xz ./linux-4.9.91
$ cp ./linux-4.9.91.tar.xz ..
$ cd ~/workspace/MiniBox/lede_projects
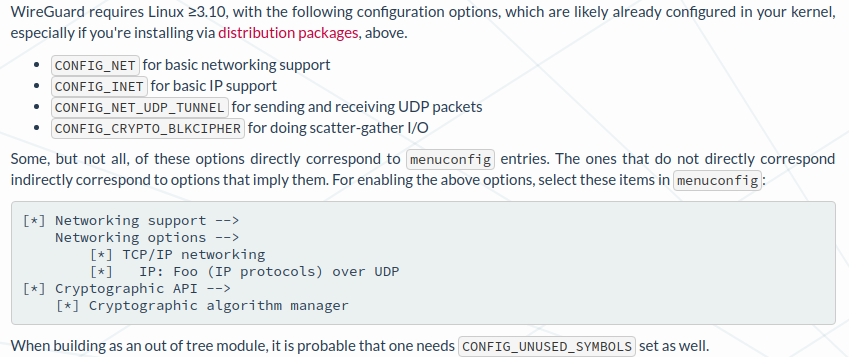
참고: CONFIG_FOU(IP: Foo (IP protocols) over UDP)도 M으로 지정해야 한다.

[그림 4.2] wireguard kernel requirements
$ make kernel_menuconfig
- 아래 feature를 M으로 조정한다.
- <M> IP: WireGuard secure network tunnel (NEW)
- <M> IP: Foo (IP protocols) over UDP

$ make V=s -j1
다시 openwrt 전체 build를 시도 한다. 역시 30분 정도에 걸쳐 build가 진행된다.
정상 build가 진행된 후, kernel build 과정에서 생성된 아래 4개 파일을 target board로 올린 후, insmod
명령을 실행해 보도록 하자. 아래 내용은 kernel 디렉토리에서 복사하여 한 곳에 모아 놓은 것이다.
[Tip] 나중에 다시 정리한 것이지만, fou.ko는 실제로 필요치 않다.
<Target board - MiniBox V3>
# insmod ./udp_tunnel.ko
# insmod ./ip6_udp_tunnel.ko
# insmod ./fou.ko
# insmod ./wireguard.ko
failed to insert ./wireguard.ko
# dmesg
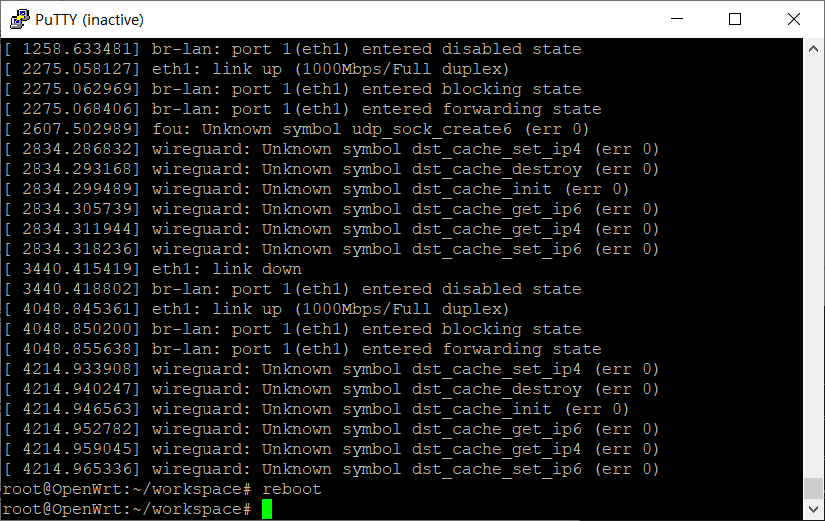
[그림 4.4] wireguard 실패 로그
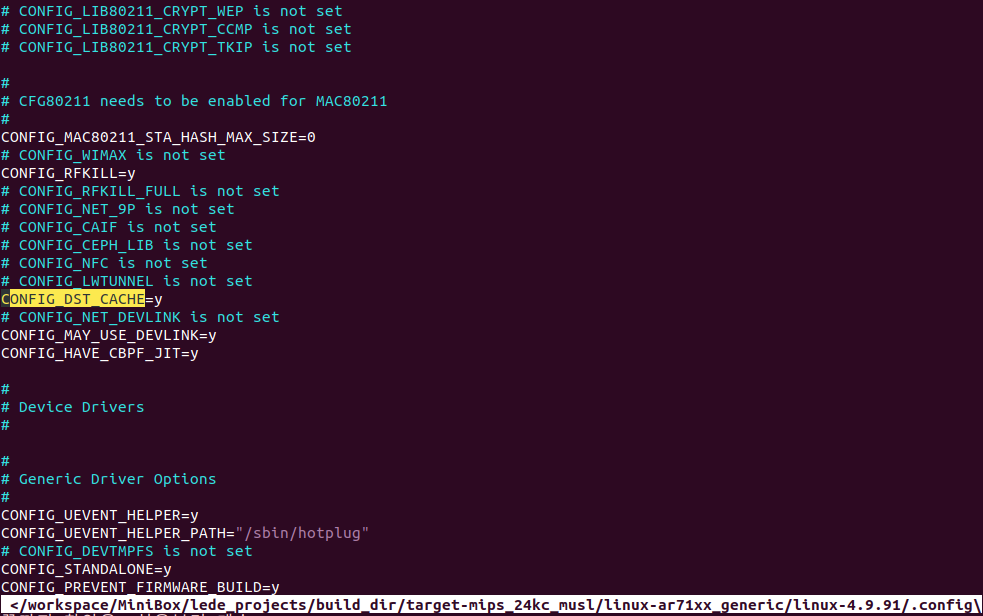
이상하다. 위의 에러 부분(dst_cache_set_ip4)는 이미 enable이 되어 있는데 … 왜 못 찾을까 ?
어쩔 수 없다. Kernel module 형태 말고, kernel에 integration(M -> * 로 조정) 시켜 build 한 후, firmware upgrade를 해 보자. Kernel build를 다시 수행하는 화면은 생략 ...
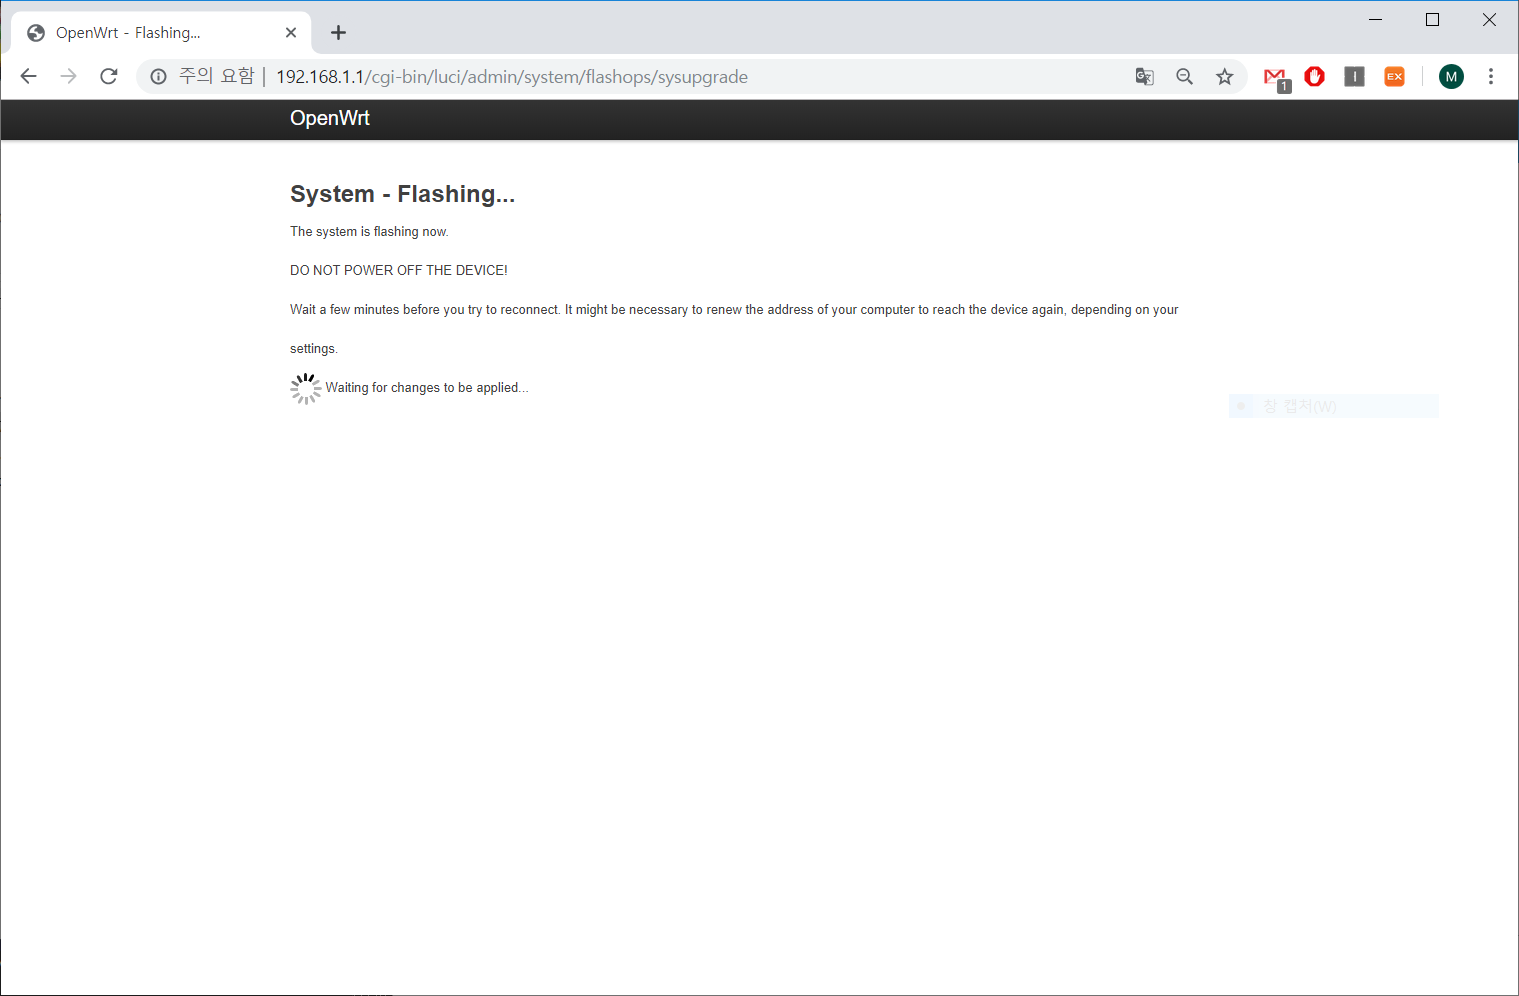
[그림 4.6] Firmware upgrade 진행 모습
Firmware upgrade 후, wireguard가 정상적으로 구동된다.

[그림 4.7] Firmware upgrade 후 부팅 모습 - wireguard log가 정상 출력됨.
이제 마지막으로 할 일은 wg binary를 target board에 올리는 일이다.
<cross-compile 환경 설정하기>
<toolchain path>
$ export PATH=~/workspace/MiniBox/lede_projects/staging_dir/toolchain-mips_24kc_gcc-7.3.0_musl/bin:$PATH
<staging dir>
$ export STAGING_DIR=~/workspace/MiniBox/lede_projects/staging_dir
<arch & compiler>
$ export ARCH=mips
$ export CROSS_COMPILE=mips-openwrt-linux-
<libmnl cross compile 하기>
$ git clone git://git.netfilter.org/libmnl
- 얘가 안 받아질 경우, spnbox/system/common/libmnl.tgz 복사하여 사용하면 된다.
$ cd libmnl/
$ mkdir output
$ ./autogen.sh
$ ./configure --host=mips-openwrt-linux --enable-shared --prefix=$(pwd)/output
$ make
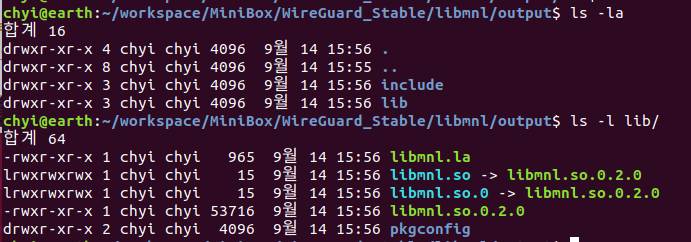
[그림 4.8] libmnl library cross-compile 결과물
chyi@earth:~/workspace/MiniBox/WireGuard_Stable/libmnl/src/.libs$ file libmnl.so.0.2.0
libmnl.so.0.2.0: ELF 32-bit MSB shared object, MIPS, MIPS32 rel2 version 1 (SYSV), dynamically linked, with debug_info, not stripped
<wg tool compile 하기>
Libmnl이 준비되었으니, wg binary를 build해 보기로 하자.
$ cd WireGuard_Stable/WireGuard-0.0.20190905/src/tools
$ vi Makefile
- Makefile을 아래와 같이 수정하도록 하자.
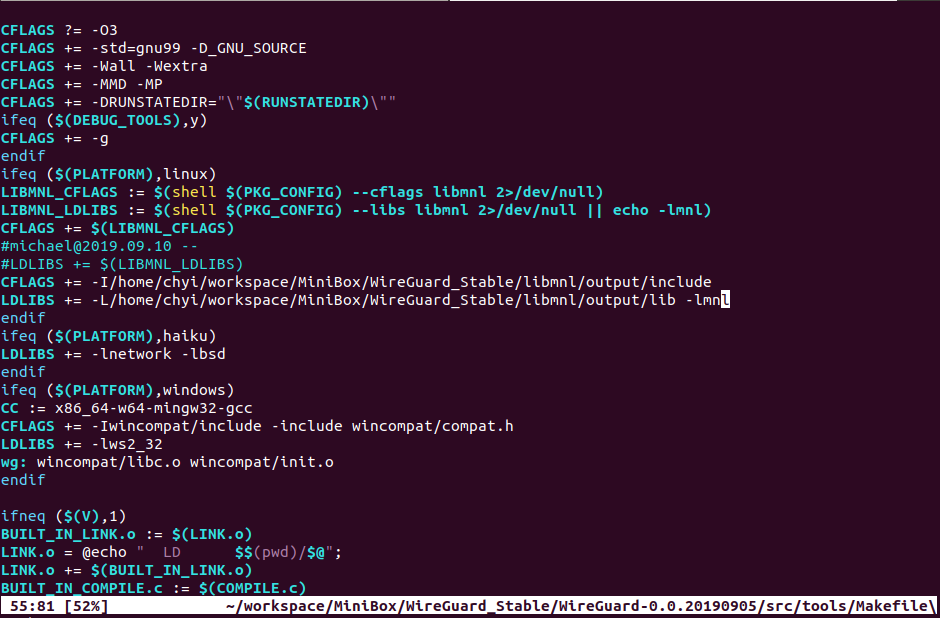
[그림 4.9] wg tool Makefile 수정
$ CC=mips-openwrt-linux-gcc LD=mips-openwrt-linux-ld make
- Cross-compile을 한다.
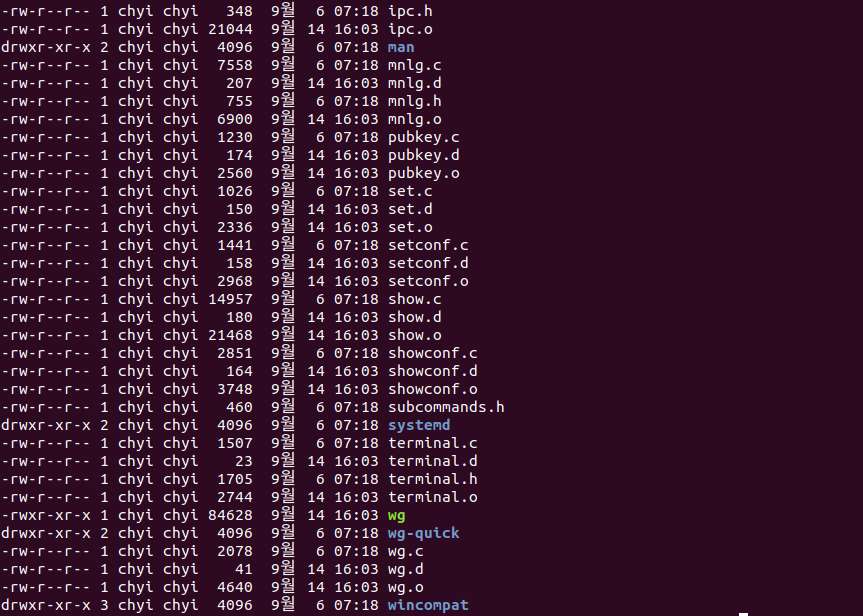
[그림 4.10] wg tool output
이제 wg와 libmnl library를 target board에 올려 정상적으로 동작하는지 시험해 보도록 하자.
<target board - MiniBox>
# export LD_LIBRARY_PATH=/root/workspace:$LD_LIBRARY_PATH
# ./wg -h
# ip link add wg0 type wireguard
- wg0 interface를 생성한다.
# ifconfig wg0 10.1.1.31 netmask 255.255.255.0
- wg0 interface에 ip를 할당한다.
# ./wg genkey | tee ./privatekey | ./wg pubkey > ./publickey
- ECC private/public key를 생성한다.
# ./wg set wg0 listen-port 59760 private-key ./privatekey peer gXlNPhrIpbOSr4rMD9tF614mVFvF/GqyONJo4kmNB3I=
allowed-ips 10.1.1.1/32 endpoint 13.125.60.224:59760
- AWS EC2(10.1.1.1)와의 wireguard 연결 설정을 해 보자.
- GainStrong MiniBox V3(WireGuard) => AP <=== Inernet ===> AWS EC2(WireGuard)
# ip link set up dev wg0
- 끝으로 wg0 interface를 up해 주자.
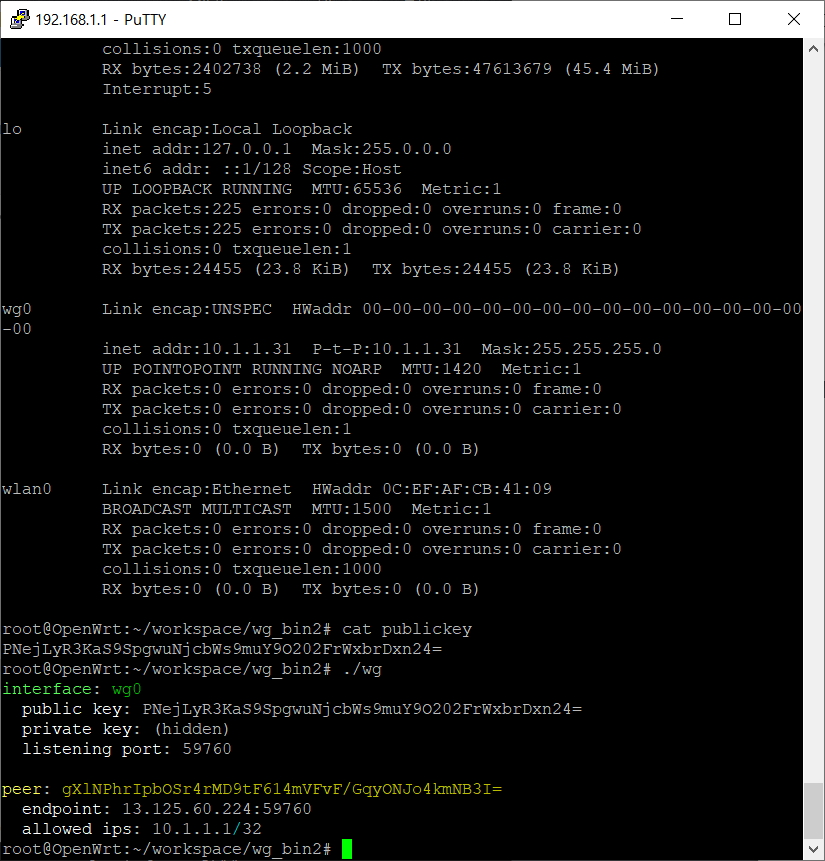
[그림 4.11] ifconfig wg0 and wg tool 실행 모습
# ping 10.1.1.1
- OK 동작한다.
==============================================================================
아래 내용은 최신 wireguard code를 내려 받아, target board에서 돌려 보는 과정을 다시 정리해 본 것이다.
$ make kernel_menuconfig
- 아래 feature를 M으로 조정한다.
- <M> IP: Foo (IP protocols) over UDP
$ make V=s -j1
root@OpenWrt:~/workspace# sysupgrade -F ./openwrt-ar71xx-generic-MiniBox-V3-squashfs-sysupgrade.bin
<env.sh 파일 내용>
$ source ./env.sh
$ mkdir WG; cd WG
$ git clone https://git.zx2c4.com/wireguard-linux-compat
$ cd wireguard-linux-compat/src
$ vi Makefile
$ make
$ chyi@mars:~/workspace/new_boards/GainStrong/WG/wireguard-linux-compat/src$ file wireguard.ko
wireguard.ko: ELF 32-bit MSB relocatable, MIPS, MIPS32 rel2 version 1 (SYSV), BuildID[sha1]=0a837ec741fa1ca556d901896befc1f1c9e5fef2, not stripped
$ cd wireguard-tools/src
$ make
chyi@mars:~/workspace/new_boards/GainStrong/WG/wireguard-tools/src$ file wg
wg: ELF 32-bit MSB executable, MIPS, MIPS32 rel2 version 1 (SYSV), dynamically linked, interpreter /lib/ld-, with debug_info, not stripped
<Target board>
root@OpenWrt:~/workspace# insmod ./wireguard.ko
root@OpenWrt:~/workspace# ip link add dev wg0 type wireguard
root@OpenWrt:~/workspace# ip address add dev wg0 10.1.1.30/8
root@OpenWrt:~/workspace# ip link set up dev wg0
root@OpenWrt:~/workspace# ./wg genkey | tee ./privatekey | ./wg pubkey > ./publickey
root@OpenWrt:~/workspace# ./wg set wg0 listen-port 59760 private-key ./privatekey peer gXlNPhrIpbOSr4rMD9tF614mVFvF/GqyONJo4kmNB3I=
allowed-ips 10.100.1.1/8 endpoint 13.125.60.224:59760
allowed-ips 10.100.1.1/8 endpoint 13.125.60.224:59760
root@OpenWrt:~/workspace# ping 10.100.1.1
- AWS EC2(10.100.1.1)과 ping을 시도해 본다. 반대편 설정은 생략...
==============================================================================
5. OpenWrt 이모 저모
끝으로 OpenWrt 관련하여 궁금한 사항을 간략하게 질의/응답 형태로 정리하면서 이번 posting을 마치고자 한다.
[Q1] Clean 하는 방법에는 어떤 것이 있나 ?
[A1]
<bin folder 지우기>
$ make clean
<이전 build 시 생성된 모든 folder 지우기>
$ make dirclean
<image 파일을 제외하고 이전 build 시 생성된 모든 folder 지우기>
$ make preclean
<모든 것 - downloads, configurations, feeds - 을 지우기>
$ make distclean
[Q2] 한번 build 한 후, distclean 하여 새로 build하고자 한다면 ?
[A2]
$ make distclean
$ ./scripts/feeds update -a
$ ./scripts/feeds install -a
$ make defconfig_XXXXX
$ make -j2 V=99
[Q3] Build 시 발생하는 내용을 log file 형태로 저장하고 싶다면 ?
[A3]
$ make -j2 V=99 2>&1 | tee build.log
[Q4] Build 시 에러가 발생한 경우, 확인하고 싶다면 ?
[A4]
$ make -j2 V=99 2>&1 | tee build.log | grep -i Error
or
$ grep -i Error build.log
[A5]
$ make kernel_menuconfig
[Q6] Kernel 만(정확히는 kernel module만)을 compile하려면 어찌해야 하나 ?
[A6]
$ make target/linux/clean
$ make target/linux/compile
$ make target/linux/install
[Q7] 특정 패키지만을 compile하려면 어찌해야 하나 ?
[A7]
$ make package/$PACKAGE_NAME/clean V=99
$ make package/$PACKAGE_NAME/compile V=99
$ make package/$PACKAGE_NAME/install V=99
[Q8] hello_world package를 추가하려면 ?
[A8]
<hello world package 추가 절차>
- https://watchmysys.com/blog/2015/10/build-package-your-software-for-openwrt/
- http://www.ccs.neu.edu/home/noubir/Courses/CS6710/S12/material/OpenWrt_Dev_Tutorial.pdf
이 밖에도 OpenWrt 관련하여 궁금한 사항이 많을 줄로 안다. 보다 구체적인 질문 사항은 아래 site에서 답을 찾을 수 있을 것이다.
블로그 관리자가 댓글을 삭제했습니다.
답글삭제