
"The Yocto Project is an open source collaboration project that provides templates, tools and methods to help you create custom Linux-based systems for embedded products regardless of the hardware architecture."
Target board는 이번에도 역시 Atmel SAMA5D3 Xplained board를 활용하기로 한다.
<목차>
1. Yocto Project 개요
2. Poky 소개
3. 새로운 Layer 추가하기
4. BitBake와 Recipe 소개
5. Atmel SAMA5D3 Xplained 보드 용 Yocto Project
6. NFS Booting 하기
7. Recipe 추가하기(패키지 추가하기)
8. 기타 몇가지 Tip
1. Yocto Project 개요
그림 1.1에서 볼 수 있듯이 현존하는 Linux build system에는 여러 종류가 있다. 이 중 단연코 현재 가장 주목을 받고 있는 것은 Yocto Project가 아닌가 싶다. 물론 객관적으로 볼 때 BuildRoot나 OpenWRT(wireless router 용) 등도 매우 훌륭한 build system 이지만 말이다. BuildRoot는 그 이름에서 유추해 볼 수 있듯이 embedded용 root file system 자체를 만드는데 주안점(상대적으로 소규모 시스템 개발에 적합)을 두고 있는데 반해, Yocto Project는 linux system 배포본(run time 패키지 제공)을 염두해 두고 설계되었다는 점이 차이라면 차이가 되겠다. 다시말해, Yocto Project는 좀 더 규모가 큰 linux system을 설계하고자 할 때 보다 적합한 solution이라고 볼 수 있다. 하지만, Yocto의 의미(10^-24)가 말해 주듯이 아주 작은 embedded system에 yocto project를 적용한다고 해서, 문제가 될 것은 전혀 없다.

여기서 잠깐 !
Yocto Project를 Ubuntu나 CentOS 같은 Linux 배포판으로 오해하면 안된다. Yocto Project는 이들 배포판을 포함해 다양한 embedded 기기에 맞는 linux system을 만들어 낼 수 있는 것을 목표로 한다.
Yocto Project의 전체 구조를 한마디로 요약해 표현하기는 매우 어렵다. 아래 그림 1.2는 Yocto Project를 구성하는 여러 요소를 하나의 그림으로 표현한 것인데, 그 중심에는 Poky(reference system)와 OpenEmbedded Core(build system)가 있다.

Yocto Project의 주요 구성 요소를 간략히 소개해 보면 다음과 같다.
<Yocto Project의 주요 구성 요소>
OpenEmbedded-Core(중요 1): OpenEmbedded project와 공유되는 core meta data, base layer 묶음.
참고) OpenEmbedded project는 http://openembedded.org를 home page로 하는 별도의 build system으로, 이것만 가지고도 linux 배포판을 만들 수 있을 정도로 매우 강력함. yocto의 핵심 요소임.
Poky(중요 2): Yocto project의 reference system으로, 다양한 tool과 meta data로 이루어짐. 여기에 자신만의 target board에 대한 내용을 추가해 줌으로써 최종적으로 원하는 linux system을 만들어 낼 수 있겠음.
BitBake(중요 3): python과 shell script로 만들어진 task scheduler로써, build하고자 하는 source를 download하고, build한 후, 최종 install하기 까지의 전 과정을 담당함. Make와 유사하다고 볼 수도 있겠으나, 실제로는 규모면에서 차이가 있음.
Meta data: 아래 세가지를 일컬어 meta data라고 함.
- Recipes (.bb): the logical units of software/images to build
- Classes (.bbclass): abstraction to common code(task)
- Configuration files (.conf): global definitions of variables
- Classes (.bbclass): abstraction to common code(task)
- Configuration files (.conf): global definitions of variables
Recipe: buildroot의 package에 해당하는 내용. source download -> build -> install 관련 내용을 기술하고 있음. BitBake가 이 내용을 보고, 실제 action을 취하게 됨.
이 밖에도 Hob, Toaster, ADT Eclipse, Documents 등이 Yocto Project를 구성하는 요소로 볼 수 있으나, (내용이 너무 장황해질 듯 보여)본 blog에서는 생략하기로 한다.
아래 그림 1.3과 1.4는 source code를 내려 받아, build 한 후, output image & package를 생성하는 전체 과정을 그림으로 표현한 것으로, 이를 통해 Yocto Project의 전체 구조를 한눈에 파악할 수 있다.
<Yocto Project의 대략적인 작업 순서>
0) Poky reference system을 준비(download & 환경 설정)한다.
1) 자신의 target board에 맞는 BSP layer를 하나 만든다. 혹은 기존에 존재하는 내용이 있다면 이를 이용(혹은 개선)한다.
2) (필요하다고 판단이 될 경우) 기존에 다른 사람들이 만들어 둔 여러 layer(meta-XXXX)를 찾아 download 한다.
3) 자신의 target board에 맞는 general layer를 만든다(역시 필요할 경우)
=> conf file & meta data를 적절히 준비(수정)해 둔다.
=> 추가로 필요한 recipe를 만들어 둔다.
4) (이후 작업은 bitbake가 진행함)Recipe 파일을 토대로 build에 필요한 모든 source code를 download(fetch)한다.
5) Source code에 대한 patch가 존재할 경우 관련 patch를 진행한다.
6) configure & compile을 진행한다.
7) install 을 한다.
8) build가 정상적으로 진행될 경우, package 파일(RPM, ipk 등)을 생성한다.
9) booting에 필요한 이미지(kernel, rootfs 등)를 생성한다.

그림 1.3 Yocto Project의 동작 방식 1 - 출처 참고 문헌 [7]
 그림 1.4 Yocto Project의 동작 방식 2 - 출처 참고 문헌 [2]

2. Poky 소개
그럼, 먼저 Yocto project의 reference system인 poky의 source를 내려 받아 build해 봄으로써, Yocto project가 어떤 형태로 이루어져 있는지 가늠해 보도록 하자.

그림 2.1 YP Core releases - https://www.yoctoproject.org/downloads/bsp 참조
<Poky build 절차 소개>
$ mkdir yocto; cd yocto
$ git clone -b morty git://git.yoctoproject.org/poky.git
=> morty는 2.2 최신 version(branch)임.
$ cd poky; ls -l
=============================================================
drwxrwxr-x 8 chyi chyi 4096 12월 12 10:28 .git
-rw-rw-r-- 1 chyi chyi 480 12월 12 10:28 .gitignore
-rw-rw-r-- 1 chyi chyi 65 12월 12 10:28 .templateconf
-rw-rw-r-- 1 chyi chyi 515 12월 12 10:28 LICENSE
-rw-rw-r-- 1 chyi chyi 2467 12월 12 10:28 README
-rw-rw-r-- 1 chyi chyi 12832 12월 12 10:28 README.hardware
drwxrwxr-x 6 chyi chyi 4096 12월 12 10:28 bitbake
drwxrwxr-x 14 chyi chyi 4096 12월 12 10:28 documentation
drwxrwxr-x 20 chyi chyi 4096 12월 12 10:28 meta
drwxrwxr-x 5 chyi chyi 4096 12월 12 10:28 meta-poky
drwxrwxr-x 7 chyi chyi 4096 12월 12 10:28 meta-selftest
drwxrwxr-x 7 chyi chyi 4096 12월 12 10:28 meta-skeleton
drwxrwxr-x 3 chyi chyi 4096 12월 12 10:28 meta-yocto
drwxrwxr-x 8 chyi chyi 4096 12월 12 10:28 meta-yocto-bsp
-rwxrwxr-x 1 chyi chyi 2121 12월 12 10:28 oe-init-build-env
-rwxrwxr-x 1 chyi chyi 2559 12월 12 10:28 oe-init-build-env-memres
drwxrwxr-x 8 chyi chyi 4096 12월 12 10:28 scripts
=============================================================
$ source oe-init-build-env
=>기본 환경 설정을 진행한다.
=> build라는 directory를 생성하고, build를 current directory로 만든다.
=> oe-init-build-env 다음에 아무 값도 지정하지 않을 경우, ARM QEMU emulator가 만들어지게 된다.
=============================================================
chyi@earth:~/Atmel/yocto_rootfs/test/poky$ source oe-init-build-env
You had no conf/local.conf file. This configuration file has therefore been
created for you with some default values. You may wish to edit it to use a
different MACHINE (target hardware) or enable parallel build options to take
advantage of multiple cores for example. See the file for more information as
common configuration options are commented.
You had no conf/bblayers.conf file. The configuration file has been created for
you with some default values. To add additional metadata layers into your
configuration please add entries to this file.
The Yocto Project has extensive documentation about OE including a reference
manual which can be found at:
http://yoctoproject.org/documentation
For more information about OpenEmbedded see their website:
http://www.openembedded.org/
### Shell environment set up for builds. ###
You can now run 'bitbake <target>'
Common targets are:
core-image-minimal
core-image-sato
meta-toolchain
adt-installer
meta-ide-support
You can also run generated qemu images with a command like 'runqemu qemux86'
=============================================================
위의 명령 실행 후, build/conf 디렉토리 아래에 몇가지 파일이 자동으로 생성되게 되는데, 각각의 파일이 의미하는 바를 자세히 따져볼 필요가 있다(실제로 추후, 자신의 board에 맞도록 해당 파일의 내용을 수정해 주어야 함).
$ ls -al
합계 12
drwxrwxr-x 3 chyi chyi 4096 12월 10 17:16 .
drwxrwxr-x 12 chyi chyi 4096 12월 10 17:16 ..
drwxrwxr-x 2 chyi chyi 4096 12월 10 17:16 conf
chyi@earth:~/Atmel/yocto_rootfs/test/poky/build$ cd conf/
chyi@earth:~/Atmel/yocto_rootfs/test/poky/build/conf$ ls -l
합계 20
-rw-rw-r-- 1 chyi chyi 470 12월 10 17:16 bblayers.conf
=> layer 관련 디렉토리 목록을 정의하고 있음. 자신의 device에 맞게 수정해야 함.
-rw-rw-r-- 1 chyi chyi 10135 12월 10 17:16 local.conf
=> build하려는 device 관련 spec을 정의하고, build 환경을 담고 있음(이 내용을 자신의 device에 맞게 수정해야 함).
-rw-rw-r-- 1 chyi chyi 16 12월 10 17:16 templateconf.cfg
=> 여러 conf file이 위치한 디렉토리를 정의하고 있음. default는 meta-yocto/conf 임.
=============================================================
$ bitbake core-image-minimal
=> bitbake task scheduler를 이용하여 실제 build를 진행하여, 최종적으로 bootloader, kernel, root file system 등의 이미지 및 패키지(rpm, deb, or ipk)를 만들어 낸다.
=> bitbake 다음에 입력 가능한 rootfs image 생성 방식으로는 다음과 같은 것들이 있다.
<build 가능한 image 형태>
core-image-minimal : small image 생성(recipes-core/images/core-image-minimal.bb)
core-image-minimal-initramfs : initramfs 용 이미지 생성
core-image-x11: X11 기능이 포함된 이미지 생성
core-image-sato : GNOME이 포함된 이미지 생성
...
(주의) build 시간은 Host PC의 성능 및 인터넷 속도에 따라 차이가 있겠으나, 상당히 오래 걸릴 수 있으니 주의하기 바란다.
<결과물>
build/tmp/deplay/images/*

여기까지, Yocto project의 reference system인 poky를 내려 받아 전체 build를 진행하여, ARM QEMU emulator용 이미지를 생성하는 과정을 살펴 보았다.
여기서 잠깐 !
ARM QEMU emulator 용 image를 실행하기 위해서는 "runqemu qemuarm" 명령을 실행하면 된다.
3. 새로운 Layer 추가하기
Poky를 통해 기초 linux system을 만들어 보았으니, 이제는 자신의 target board에 맞는 실제 linux system을 만들기 위해 필요한 절차인, Layer 추가 방법에 대해 고민해 보도록 하자. Layer는 보통 "meta-" string으로 시작하는데, 먼저 Yocto Project의 핵심 layer 몇가지를 살펴 보면 다음과 같다.
"A layer is a collection of packages and build tasks."
meta: OpenEmbedded core를 위한 meta data
meta-yocto: poky를 포함한 Yocto Project를 위한 meta data
mata-yocto-bsp: Yocto Project가 지원하는 reference machine에 대한 BSP를 포함하는 meta data

3.1 Yocto project Layer의 개념 - 출처 참고 문헌 [7]
meta-browser: web browsers (Chromium, Firefox)
<기타 참고할 만한 layer>
meta-ti, meta-fsl-arm and meta-raspberrypi : SoC specific layer 예
meta-filesystems: support for additional filesystems.
meta-gstreamer10: support for GStreamer 1.0.
meta-java and meta-oracle-java: Java support.
meta-linaro-toolchain: Linaro toolchain recipes.
meta-qt5: QT5 modules.
meta-realtime: real time tools and test programs.
...
아래 site에 가보면 현존하는 각종 layer에 대한 정보를 얻을 수 있다.
여기서 잠깐 !
무조건 새로운 layer를 만들 것이 아니라, 남들이 이미 작업한 내용이 있을 수 있으니, 먼저 찾아보도록 하자. 유사한 내용이 있다면, 이를 기본으로 하고 append file을 추가하는 것이 답이다.
a) 일반(General) layer : 일반 application의 묶음을 위한 layer
b) BSP layer : BSP(board support packages)를 위한 layer
3.1 BSP Layer 만들기
=> 자신의 target board에 맞는 BSP layer를 하나 만들자.
=> 다른 BSP layer를 참조하여 작성하거나, 아래와 같이 자동으로 생성할 수 있다.
==============================================================
$ yocto-bsp create eagle arm
Checking basic git connectivity...
Done.
Would you like to use the default (4.4) kernel? (y/n) [default: y]
Do you need a new machine branch for this BSP (the alternative is to re-use an existing branch)? [y/n] [default: y]
Getting branches from remote repo git://git.yoctoproject.org/linux-yocto-4.4.git...
Please choose a machine branch to base this BSP on: [default: standard/base]
1) standard/arm-versatile-926ejs
2) standard/base
3) standard/beaglebone
4) standard/edgerouter
5) standard/fsl-mpc8315e-rdb
6) standard/mti-malta32
7) standard/mti-malta64
8) standard/qemuarm64
9) standard/qemuppc
2
Do you need SMP support? (y/n) [default: y] n
Which machine tuning would you like to use? [default: tune_cortexa8]
1) arm1136jf-s tuning optimizations
2) arm920t tuning optimizations
3) arm926ejs tuning optimizations
4) arm9tdmi tuning optimizations
5) cortexa5 tuning optimizations
6) cortexa7 tuning optimizations
7) cortexa8 tuning optimizations
8) cortexa9 tuning optimizations
9) cortexa15 tuning optimizations
10) cortexm1 tuning optimizations
11) cortexm3 tuning optimizations
12) cortexr4 tuning optimizations
13) ep9312 tuning optimizations
14) iwmmxt tuning optimizations
15) strongarm1100 tuning optimizations
16) xscale tuning optimizations
5
Please specify a value for UBOOT_MACHINE: [default: am335x_evm_config] sama5d3_xplained_nandflash_config
Please specify a value for UBOOT_ENTRYPOINT: [default: 0x80008000] 0x20008000
Please specify a value for UBOOT_LOADADDRESS: [default: 0x80008000] 0x20008000
Do you need support for X? (y/n) [default: y] n
Does your BSP have a touchscreen? (y/n) [default: n]
Does your BSP have a keyboard? (y/n) [default: y] n
New arm BSP created in meta-eagle
==============================================================
위의 명령 실행 결과, 아래의 내용이 생성된다.
$ ls -la meta-eagle/
합계 40
drwxrwxr-x 7 chyi chyi 4096 12월 12 15:59 .
drwxrwxr-x 8 chyi chyi 4096 12월 12 16:02 ..
-rw-rw-r-- 1 chyi chyi 0 12월 12 15:59 .gitignore
-rw-rw-r-- 1 chyi chyi 1023 12월 12 15:59 COPYING.MIT
-rw-rw-r-- 1 chyi chyi 3812 12월 12 15:59 README
-rw-rw-r-- 1 chyi chyi 621 12월 12 15:59 README.sources
drwxrwxr-x 2 chyi chyi 4096 12월 12 15:59 binary
drwxrwxr-x 3 chyi chyi 4096 12월 12 15:59 conf
drwxrwxr-x 3 chyi chyi 4096 12월 12 15:59 recipes-bsp
drwxrwxr-x 3 chyi chyi 4096 12월 12 15:59 recipes-graphics
drwxrwxr-x 3 chyi chyi 4096 12월 12 15:59 recipes-kernel
==============================================================
이중 machine conf(파일명은 실제로 이게 아니라, 아래와 같이 eagle.conf 형태로 실제 machine 명을 사용함) 파일의 내용을 살펴 보면 다음과 같은데, 자신의 target board에 맞게 내용 수정이 필요할 수 있다.
==============================================================
$ vi conf/machine/eagle.conf
#@TYPE: Machine
#@NAME: eagle
#@DESCRIPTION: Machine configuration for eagle systems
MACHINE_EXTRA_RRECOMMENDS = " kernel-modules kernel-devicetree"
EXTRA_IMAGEDEPENDS += "u-boot"
include conf/machine/include/tune-cortexa5.inc
IMAGE_FSTYPES += "tar.bz2 jffs2"
EXTRA_IMAGECMD_jffs2 = "-lnp "
SERIAL_CONSOLE = "115200 ttyO0"
PREFERRED_PROVIDER_virtual/kernel ?= "linux-yocto"
PREFERRED_VERSION_linux-yocto ?= "4.4%"
KERNEL_IMAGETYPE = "uImage"
KERNEL_DEVICETREE = "am335x-bone.dtb am335x-boneblack.dtb"
KERNEL_EXTRA_ARGS += "LOADADDR=${UBOOT_ENTRYPOINT}"
SPL_BINARY = "MLO"
UBOOT_SUFFIX = "img"
UBOOT_MACHINE = "sama5d3_xplained_nandflash_config"
UBOOT_ENTRYPOINT = "0x20008000"
UBOOT_LOADADDRESS = "0x20008000"
MACHINE_FEATURES = "usbgadget usbhost vfat alsa"
IMAGE_BOOT_FILES ?= "u-boot.${UBOOT_SUFFIX} MLO"
==============================================================
다음으로 자신의 application에 맞는 별도의 Layer를 추가하는 방법을 정리해 보면 다음과 같다.
$ cd poky
$ scripts/yocto-layer create myapp
=> scripts 디렉토리 아래에 있는 yocto-layer python script를 실행하여 새로운 layer 생성
=============================================================
Please enter the layer priority you'd like to use for the layer: [default: 6] <Enter>
Would you like to have an example recipe created? (y/n) [default: n] <Enter>
Would you like to have an example bbappend file created? (y/n) [default: n] <Enter>
New layer created in meta-myapp.
Don't forget to add it to your BBLAYERS (for details see meta-myapp\README).
=============================================================
chyi@earth:~/Atmel/yocto_rootfs/test/poky$ cd meta-myapp/
chyi@earth:~/Atmel/yocto_rootfs/test/poky/meta-myapp$ ls -l
합계 12
-rw-rw-r-- 1 chyi chyi 1023 12월 11 19:48 COPYING.MIT
-rw-rw-r-- 1 chyi chyi 1372 12월 11 19:48 README
drwxrwxr-x 2 chyi chyi 4096 12월 11 19:48 conf
chyi@earth:~/Atmel/yocto_rootfs/test/poky/meta-myapp$ cd conf/
chyi@earth:~/Atmel/yocto_rootfs/test/poky/meta-myapp/conf$ ls -la
합계 12
drwxrwxr-x 2 chyi chyi 4096 12월 11 19:48 .
drwxrwxr-x 3 chyi chyi 4096 12월 11 19:48 ..
-rw-rw-r-- 1 chyi chyi 312 12월 11 19:48 layer.conf
=============================================================
$ bitbake-layers show-layers
=> 현재 사용 중인 Layer 확인함.
layer path priority
==============================================================
meta /home/chyi/Atmel/yocto_rootfs/test/poky/meta 5
meta-yocto /home/chyi/Atmel/yocto_rootfs/test/poky/meta-yocto 5
meta-yocto-bsp /home/chyi/Atmel/yocto_rootfs/test/poky/meta-yocto-bsp 5
meta-myboard /home/chyi/Atmel/yocto_rootfs/test/poky/meta-myapp 6
(참고) 맨 뒤의 숫자는 layer 우선 순위 값으로, 여러 layer에 걸쳐 동일한 recipe가 존재할 경우, 이 우선 순위 값이 큰 layer의 recipe가 실행되도록 되어 있다.
지금까지 자신에 target board에 맞는 Layer를 새로 추가하는 방법에 대하여 알아 보았다. 이렇게 생성한 Layer를 실제로 적용하는 방법과 관련해서는 5절에서 추가로 설명을 하도록 하겠다.
4. BitBake와 Recipe 소개
이번 절에서는 앞서 자주 언급되었던 BitBake(Yocto Project의 3대 요소 중 하나)에 대해 소개해 보고자 한다. 더불어 BitBake가 동작하는데 없어서는 안되는 Recipe에 대한 내용도 함께 설명해 보도록 하겠다.
4.1 BitBake
BitBake는 python과 shell script로 만들어진 task scheduler로써, build하고자 하는 source를 download하고, build한 후, 최종 install하기 까지의 전 과정을 담당한다. 한편 Recipe는 bitbake가 실제 build 절차를 수행하기 위해 참조하는 metadata를 일컫는다. 굳이 비유를 하자면, bitbake는 요리사쯤 되겠고, recipe는 글자 그대로 요리에 사용하는 레시피가 되겠다.
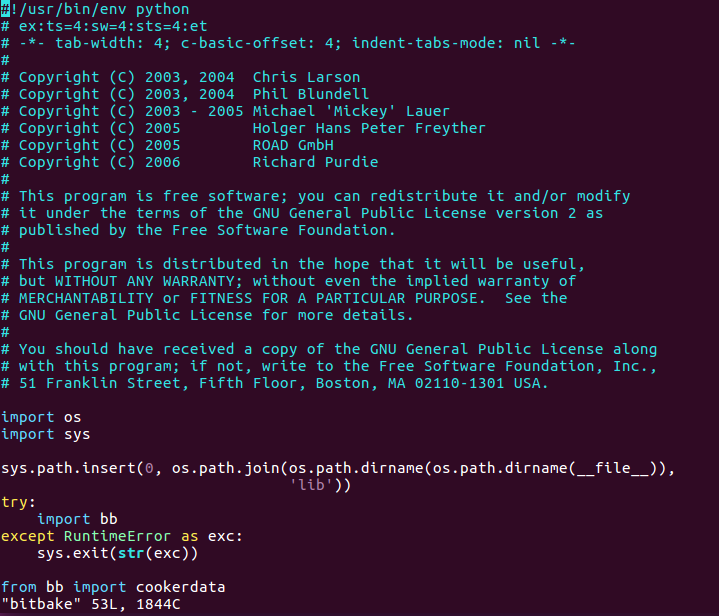
<poky/bitbake/bin/bitbake - python script>
일차적으로 BitBake는 recipe를 포함하여 아래와 같은 내용의 metadata를 처리하게 된다.
==============================================================
recipes: 확장자가 .bb로 끝남. source code build 관련 모든 정보를 담고 있음.
append: 확장자가 .bbappend로 끝남. recipe의 내용을 확장(override or extend)하는 역할 수행
include: 확장자가 .inc로 끝남. 다른 recipe에서 incude(or require) 시켜 사용하는 공통내용을 담고 있음.
classes: 확장자가 .bbclass로 끝남. common build information(공통 정보를 class로 만듦)을 담고 있음. 다른 recipe에서 상속 받아 사용함(inherit keyword를 사용함).
configuration: 확장자가 .conf로 끝남. build 수행시 필요한 다양한 환경 변수를 담고 있음.
==============================================================
Metadata를 처리한 BitBake가 다음으로 하게 되는 일은 python & shell code로 구성된 task를 실행하는 것이라고 말할 수 있다.
<주요 task 정리>
do_fetch : source code를 가져온다(download).
do_unpack: source code의 압축을 푼다(tar.gz, zip, xz, tar ..)
do_patch: source code에 적용할 patch가 있다면 이를 적용한다.
do_configure: source code에 configure script가 있을 경우 이를 수행한다.
do_compile: compile을 진행한다.
do_install: build 결과물을 rootfs에 포함시킨다.
do_package: 패키지를 만든다.
do_rootfs: rootfs 이미지를 생성한다.
..
앞선 절들(2 ~ 3절)에서 이미 보았듯이, bitbake를 이용하면 전체 image를 생성해 낼 수 있다. 뿐만 아니라 각각의 개별 package(정확히는 recipe)를 build하는 것도 당연히 가능하다. 이러한 내용을 포함한 bitbake의 사용법을 정리해 보면 다음과 같다.
==============================================================
$ bitbake --help
Usage: bitbake [options] [recipename/target recipe:do_task ...]
Executes the specified task (default is 'build') for a given set of target recipes (.bb files).
It is assumed there is a conf/bblayers.conf available in cwd or in BBPATH which
will provide the layer, BBFILES and other configuration information.
Options:
--version show program's version number and exit
-h, --help show this help message and exit
-b BUILDFILE, --buildfile=BUILDFILE
Execute tasks from a specific .bb recipe directly.
WARNING: Does not handle any dependencies from other
recipes.
-k, --continue Continue as much as possible after an error. While the
target that failed and anything depending on it cannot
be built, as much as possible will be built before
stopping.
-a, --tryaltconfigs Continue with builds by trying to use alternative
providers where possible.
-f, --force Force the specified targets/task to run (invalidating
any existing stamp file).
-c CMD, --cmd=CMD Specify the task to execute. The exact options
available depend on the metadata. Some examples might
be 'compile' or 'populate_sysroot' or 'listtasks' may
give a list of the tasks available.
-C INVALIDATE_STAMP, --clear-stamp=INVALIDATE_STAMP
Invalidate the stamp for the specified task such as
'compile' and then run the default task for the
specified target(s).
-r PREFILE, --read=PREFILE
Read the specified file before bitbake.conf.
-R POSTFILE, --postread=POSTFILE
Read the specified file after bitbake.conf.
-v, --verbose Output more log message data to the terminal.
-D, --debug Increase the debug level. You can specify this more
than once.
-q, --quiet Output less log message data to the terminal.
-n, --dry-run Don't execute, just go through the motions.
-S SIGNATURE_HANDLER, --dump-signatures=SIGNATURE_HANDLER
Dump out the signature construction information, with
no task execution. The SIGNATURE_HANDLER parameter is
passed to the handler. Two common values are none and
printdiff but the handler may define more/less. none
means only dump the signature, printdiff means compare
the dumped signature with the cached one.
-p, --parse-only Quit after parsing the BB recipes.
-s, --show-versions Show current and preferred versions of all recipes.
-e, --environment Show the global or per-recipe environment complete
with information about where variables were
set/changed.
-g, --graphviz Save dependency tree information for the specified
targets in the dot syntax.
-I EXTRA_ASSUME_PROVIDED, --ignore-deps=EXTRA_ASSUME_PROVIDED
Assume these dependencies don't exist and are already
provided (equivalent to ASSUME_PROVIDED). Useful to
make dependency graphs more appealing
-l DEBUG_DOMAINS, --log-domains=DEBUG_DOMAINS
Show debug logging for the specified logging domains
-P, --profile Profile the command and save reports.
-u UI, --ui=UI The user interface to use (depexp, knotty or ncurses -
default knotty).
-t SERVERTYPE, --servertype=SERVERTYPE
Choose which server type to use (process or xmlrpc -
default process).
--token=XMLRPCTOKEN Specify the connection token to be used when
connecting to a remote server.
--revisions-changed Set the exit code depending on whether upstream
floating revisions have changed or not.
--server-only Run bitbake without a UI, only starting a server
(cooker) process.
--foreground Run bitbake server in foreground.
-B BIND, --bind=BIND The name/address for the bitbake server to bind to.
-T IDLE_TIMEOUT, --idle-timeout=IDLE_TIMEOUT
Set timeout to unload bitbake server due to inactivity
--no-setscene Do not run any setscene tasks. sstate will be ignored
and everything needed, built.
--setscene-only Only run setscene tasks, don't run any real tasks.
--remote-server=REMOTE_SERVER
Connect to the specified server.
-m, --kill-server Terminate the remote server.
--observe-only Connect to a server as an observing-only client.
--status-only Check the status of the remote bitbake server.
-w WRITEEVENTLOG, --write-log=WRITEEVENTLOG
Writes the event log of the build to a bitbake event
json file. Use '' (empty string) to assign the name
automatically.
==============================================================
<bitbake 사용법 요약>
$ bitbake <recipe>
=> 예) $ bitbake helloworld
$ bitbake <recipe> -c <task>
=> 예) $ bitbake -c fetch busybox
=> 예) $ bitbake -c compile busybox
$ bitbake <recipe> -c listtasks
=> 예) $ bitbake -c listtasks core-image-minimal
...
4.2 Recipe
Recipe는 확장자가 .bb or bbappend로 끝나는 file로써 주로 아래와 같은 특징을 갖는다.


그림 4.1 Recipe 개요도

그림 4.2 Recipe 예제
---------------------------------------------------------------------------------------------------
<몇가지 runtime variables 소개>
WORKDIR: bitbake가 package를 build하고 log 정보를 저장하는 디렉토리 full path
$ bitbake -e hello | grep ^WORKDIR=
WORKDIR="/home/chyi/Atmel/yocto_rootfs/poky/build-atmel/tmp/work/cortexa5hf-vfp-poky-linux-gnueabi/hello/0.1-r0"
PN: package name(recipe file 명으로 부터 추출)
PR: package revision
PV: package version
S: bitbake가 package를 풀어서 두는 곳(source가 위치하는 곳)
$ bitbake -e hello | grep ^S=
S="/home/chyi/Atmel/yocto_rootfs/poky/build-atmel/tmp/work/cortexa5hf-vfp-poky-linux-gnueabi/hello/0.1-r0"
D: installation task or image 생성 task가 output 파일을 가져다 놓는 디렉토리 full path(쉽게 말해 destination directory)
$ bitbake -e hello | grep ^D=
D="/home/chyi/Atmel/yocto_rootfs/poky/build-atmel/tmp/work/cortexa5hf-vfp-poky-linux-gnueabi/hello/0.1-r0/image"
bindir: /usr/bin, 단독으로 사용하는 것이 아니라, D 디렉토리에 연이어 붙여 사용한다(아래 내용도 동일하게 적용됨).
sbindir: /usr/sbin
libdir: /usr/lib
libexecdir: /usr/lib
sysconfdir: /etc
datadir: /usr/share
mandir: /usr/share/man
includedir: /usr/include
---------------------------------------------------------------------------------------------------
보다 자세한 Recipe의 관련 사항은 여러 .bb 파일을 직접 살펴 보기 바란다.
(*) 실제로 recipe의 문법을 이해하는 것이 매우 중요한 부분이 되겠으나, 시간 관계 상 생략함 :(
5. Atmel SAMA5D3 Xplained 보드 용 Yocto Project
자, 그럼 지금까지 Yocto Project의 기본적인 사항(Poky, Layer, BitBake)을 확인해 보았으니, 실제로 Atmel SAMA5D3 Xplained board를 위한 source code를 내려 받아 build해 보기로 하자. 이번 절의 내용은 대부분 아래 site를 참조하여 작성하였다.
$ mkdir yocto; cd yocto
$ git clone git://git.yoctoproject.org/poky -b krogoth
=> poky reference system source를 download한다.
$ git clone git://git.openembedded.org/meta-openembedded -b krogoth
=> openembedded layer source를 download한다.
$ git clone git://github.com/linux4sam/meta-atmel.git -b krogoth
=> (사전에 atmel에서 만들어 둔) atmel layer(BSP & general layer 모두 포함) code를 download한다.
=> atmel에서는 atmel 전용 Layer 관련하여 아래와 같은 작업을 해 두었다.
=============================================================
drwxrwxr-x 8 chyi chyi 4096 11월 22 17:14 .git
-rw-rw-r-- 1 chyi chyi 1035 11월 22 17:14 COPYING.MIT
-rw-rw-r-- 1 chyi chyi 5020 11월 22 17:14 README
drwxrwxr-x 4 chyi chyi 4096 12월 9 14:38 conf
-rw-rw-r-- 1 chyi chyi 2138 11월 22 17:14 flashing.txt
drwxrwxr-x 2 chyi chyi 4096 11월 22 17:14 licenses
drwxrwxr-x 3 chyi chyi 4096 11월 22 17:14 qt4-layer
drwxrwxr-x 3 chyi chyi 4096 11월 22 17:14 qt5-layer
drwxrwxr-x 4 chyi chyi 4096 11월 22 17:14 recipes-atmel
drwxrwxr-x 4 chyi chyi 4096 11월 22 17:14 recipes-bsp
drwxrwxr-x 4 chyi chyi 4096 11월 22 17:14 recipes-devtools
drwxrwxr-x 3 chyi chyi 4096 11월 22 17:14 recipes-graphics
drwxrwxr-x 4 chyi chyi 4096 11월 22 17:14 recipes-kernel
drwxrwxr-x 4 chyi chyi 4096 11월 22 17:14 recipes-multimedia
drwxrwxr-x 3 chyi chyi 4096 11월 22 17:14 recipes-utils
drwxrwxr-x 3 chyi chyi 4096 11월 22 17:14 scripts
=============================================================
아래 내용은 위의 디렉토리 내용 중, sama5d3 Xplained board를 위한 machine.conf(실제 파일명은 meta-atmel/conf/machine/sama5d3-xplained.conf) 파일의 내용을 보여준다. 이 내용을 자세히 살펴 보면, dtb는 어떤 것을 사용하는지, rootfs image type은 무엇인지(ubifs), u-boot의 config file은 어떤 것을 사용하는지 ... 등등을 알 수 있다. 또한 상단의 "require include/sama5d3.inc" 파일을 통해 sama5d3.inc의 내용을 참조하고 있음도 확인할 수 있다.

<machine.conf 파일 - meta-atmel/conf/machine/sama5d3-xplained.conf>
그 밖에도 여러 layer가 존재하고, 그 안에 다양한 recipe 파일이 있는데, 각각에 대해 일일이 살펴 보기 바란다.
$ cd poky
$ source oe-init-build-env build-atmel
=> build-atmel을 위한 환경 설정을 한다.
$ vim conf/bblayers.conf
=> atmel용 layer(meta-atmel)를 추가해 준다.

<conf/bblayers.conf 파일 수정 내용>
$ mkdir $(YOURPATH)/yocto_rootfs/downloads/
$ vim conf/local.conf
=> sam5d3 xplained board 용 machine 명 등을 입력한다.
=> 기타 몇가지 설정을 변경한다.

<conf/local.conf 파일 수정 내용>
$ bitbake core-image-minimal
=> minimal os 생성을 위한 build를 진행한다.
<결과물 확인>
$ ls -l pokey/build-atmel/tmp/deploy/images/sama5d3-xplained/*
==============================================================
chyi@earth:~/Atmel/yocto_rootfs/poky/build-atmel/tmp/deploy/images/sama5d3-xplained$ ls -aF
./
../
BOOT.BIN@
README_-_DO_NOT_DELETE_FILES_IN_THIS_DIRECTORY.txt
at91bootstrap-sama5d3_xplained.bin@
<= at91 bootstrap loader(2nd bootloader)
at91bootstrap.bin@
core-image-minimal-sama5d3-xplained-20161122082135.rootfs.manifest
core-image-minimal-sama5d3-xplained-20161122082135.rootfs.tar.gz
core-image-minimal-sama5d3-xplained-20161122082135.rootfs.ubi
core-image-minimal-sama5d3-xplained-20161122082135.rootfs.ubifs
core-image-minimal-sama5d3-xplained.manifest@
core-image-minimal-sama5d3-xplained.tar.gz@\
<= rootfs tar.gz file(NFS booting시 이용할 수 있음)
core-image-minimal-sama5d3-xplained.ubi@
<= ubifs rootfs
modules--4.4+git0+061f02b7aa-r0-sama5d3-xplained-20161122082135.tgz
modules-sama5d3-xplained.tgz@
sama5d3_xplained-nandflashboot-uboot-3.8.7.bin*
u-boot-sama5d3-xplained-v2016.03-at91+gitAUTOINC+801b789cb0-r0.bin*
u-boot-sama5d3-xplained.bin@
<= u-boot bootloader
u-boot.bin@
ubinize-core-image-minimal-sama5d3-xplained-20161122082135.cfg
zImage@
<= kernel image
zImage--4.4+git0+061f02b7aa-r0-at91-sama5d3_xplained-20161122082135.dtb
zImage--4.4+git0+061f02b7aa-r0-at91-sama5d3_xplained_pda4-20161122082135.dtb
zImage--4.4+git0+061f02b7aa-r0-at91-sama5d3_xplained_pda7-20161122082135.dtb
zImage--4.4+git0+061f02b7aa-r0-at91-sama5d3_xplained_pda7b-20161122082135.dtb
zImage--4.4+git0+061f02b7aa-r0-sama5d3-xplained-20161122082135.bin
zImage-at91-sama5d3_xplained.dtb@
<= dtb file
zImage-at91-sama5d3_xplained_pda4.dtb@
zImage-at91-sama5d3_xplained_pda7.dtb@
zImage-at91-sama5d3_xplained_pda7b.dtb@
zImage-sama5d3-xplained.bin@
==============================================================
6. NFS Booting 하기
이제 부터는 5절에서 build한 이미지를 가지고 NFS booting을 진행해 보기로 하겠다. NFS booting과 관련해서는 이지 지난 시간(아래 blog)에 자세히 다루어 보았으므로, 여기서는 간단히 소개하고 넘어가기로 한다.
<Host PC 설정>
<rootfs 디렉토리 준비>
$ build-atmel/tmp/deploy/images/sama5d3-xplained
$ mkdir rootfs
$ sudo tar xvzf ./core-image-minimal-sama5d3-xplained-20161122082135.rootfs.tar.gz -C rootfs/
<dtb, zImage 복사>
$ cp zImage-at91-sama5d3_xplained.dtb /tftpboot/at91-sama5d3_xplained.dtb
$ cp zImage /tftpboot
<NFS server 재설정 & /etc/exports file 내용>
/home/chyi/Atmel/yocto_rootfs/poky/build-atmel/tmp/deploy/images/sama5d3-xplained/rootfs 192.168.1.*(rw,no_root_squash,sync,no_subtree_check)
$ sudo /etc/init.d/nfs-kernel-server restart
<Target Board - u-boot 설정>
=> setenv rootpath /home/chyi/Atmel/yocto_rootfs/poky/build-atmel/tmp/deploy/images/sama5d3-xplained/rootfs
(*) nfs booting시 사용할 rootfs 위치를 지정한다.
=> setenv nfsboot 'setenv bootargs root=/dev/nfs rw nfsroot=${serverip}:${rootpath}
ip=${ipaddr}:${serverip}::${netmask}::eth0:off console=ttyS0,115200; tftp 0x22000000 zImage; tftp 0x21000000 at91-sama5d3_xplained.dtb; bootz 0x22000000 - 0x21000000'
=> run nfsboot

<Yocto image로 NFS 부팅한 모습>
7. Recipe 추가하기(패키지 추가하기)
이번 절에서는 hello recipe를 하나 만들어 보고, 이를 전체 image에 포함시켜 보는 과정을 소개해 보도록 하겠다. 편의상 실제 target board에서 동작을 확인해 볼 수 있도록 meta-atmel Layer에 관련 hello recipe를 추가해 보도록 하겠다.
<추가하는 recipe file>
meta-atmel/recipes-test/hello/hello_0.1.bb
일반적으로 recipe 파일은 <package-name>_version.bb와 같은 이름을 사용하도록 한다.
<hello_0.1.bb recipe 파일 내용 >
=> 실제로 bb file의 문법을 정확히 아는 것이 중요하겠음.
==============================================================
#
# This file was derived from the 'Hello World!' example recipe in the
# Yocto Project Development Manual.
#
SUMMARY = "Simple helloworld application"
SECTION = "hello"
LICENSE = "MIT"
LIC_FILES_CHKSUM = "file://${COMMON_LICENSE_DIR}/MIT;md5=0835ade698e0bcf8506ecda2f7b4f302"
SRC_URI = "file://helloworld.c"
S = "${WORKDIR}"
do_compile() {
${CC} helloworld.c -o helloworld
}
do_install() {
install -d ${D}${bindir}
install -m 0755 helloworld ${D}${bindir}
}
==============================================================
<실제 helloworld source code의 위치 및 파일>
chyi@earth:~/Atmel/yocto_rootfs/meta-atmel/recipes-test/hello$ cd hello-0.1/
chyi@earth:~/Atmel/yocto_rootfs/meta-atmel/recipes-test/hello/hello-0.1$ ls -la
합계 16
drwxrwxr-x 2 chyi chyi 4096 12월 12 14:04 .
drwxrwxr-x 3 chyi chyi 4096 12월 12 14:09 ..
-rw-rw-r-- 1 chyi chyi 441 12월 12 10:51 hello.patch
-rw-rw-r-- 1 chyi chyi 101 12월 12 10:51 helloworld.c
==============================================================
그럼, 작성한 코드에 하자가 없는지를 확인하는 차원에서 앞서 추가한 hello recipe를 단독 build 시켜 보도록 하자.
$ bitbake hello
=> 아래 디렉토리에 실제 build 결과물(중간 파일)이 생성된다.
=> poky/build-atmel/tmp/work/cortexa5hf-vfp-poky-linux-gnueabi/hello/0.1-r0
==============================================================
$ bitbake hello
WARNING: Host distribution "Ubuntu-16.04" has not been validated with this version of the build system; you may possibly experience unexpected failures. It is recommended that you use a tested distribution.
Loading cache: 100% |##################################################################| ETA: 00:00:00
Loaded 2486 entries from dependency cache.
Parsing recipes: 100% |################################################################| Time: 00:00:00
Parsing of 1935 .bb files complete (1929 cached, 6 parsed). 2491 targets, 363 skipped, 0 masked, 0 errors.
NOTE: Resolving any missing task queue dependencies
Build Configuration:
BB_VERSION = "1.30.0"
BUILD_SYS = "x86_64-linux"
NATIVELSBSTRING = "universal"
TARGET_SYS = "arm-poky-linux-gnueabi"
MACHINE = "sama5d3-xplained"
DISTRO = "poky-atmel"
DISTRO_VERSION = "2.1.2"
TUNE_FEATURES = "arm armv7a vfp thumb callconvention-hard cortexa5"
TARGET_FPU = "hard"
meta
meta-poky
meta-yocto-bsp = "krogoth:3bf928a3b6354bc09c87fcbf9e3972c8d368aaa3"
meta-atmel = "krogoth:826e56a932d6957c683716988870378dbe52f2e3"
meta-oe
meta-networking
meta-python
meta-ruby
meta-multimedia = "krogoth:851a064b53dca3b14dd33eaaaca9573b1a36bf0e"
meta-qt5 = "krogoth:2b1871f0d139dc3caaa779a32a1931409c245a36"
NOTE: Preparing RunQueue
NOTE: Executing SetScene Tasks
NOTE: Executing RunQueue Tasks
NOTE: Tasks Summary: Attempted 365 tasks of which 352 didn't need to be rerun and all succeeded.
Summary: There was 1 WARNING message shown.
============================================================================
chyi@earth:~/Atmel/yocto_rootfs/poky/build-atmel/tmp/work/cortexa5hf-vfp-poky-linux-gnueabi/hello/0.1-r0$ ls -l
합계 88
-rw-r--r-- 1 chyi chyi 33 12월 12 14:06 configure.sstate
-rw-r--r-- 1 chyi chyi 723 12월 12 14:06 debugsources.list
drwxr-xr-x 3 chyi chyi 4096 12월 12 14:06 deploy-ipks
-rwxr-xr-x 1 chyi chyi 9424 12월 12 14:06 helloworld
-rw-rw-r-- 1 chyi chyi 101 12월 12 10:51 helloworld.c
drwxr-xr-x 3 chyi chyi 4096 12월 12 14:06 image
drwxrwxr-x 3 chyi chyi 4096 12월 12 14:06 license-destdir
drwxr-xr-x 3 chyi chyi 4096 12월 12 14:06 package
drwxr-xr-x 8 chyi chyi 4096 12월 12 14:06 packages-split
drwxr-xr-x 2 chyi chyi 4096 12월 12 14:06 patches
drwxr-xr-x 6 chyi chyi 4096 12월 12 14:06 pkgdata
drwxrwxr-x 2 chyi chyi 4096 12월 12 14:06 pseudo
drwxr-xr-x 2 chyi chyi 4096 12월 12 14:06 sstate-build-package
drwxr-xr-x 2 chyi chyi 4096 12월 12 14:06 sstate-build-package_qa
drwxr-xr-x 2 chyi chyi 4096 12월 12 14:06 sstate-build-package_write_ipk
drwxrwxr-x 2 chyi chyi 4096 12월 12 14:06 sstate-build-packagedata
drwxrwxr-x 2 chyi chyi 4096 12월 12 14:06 sstate-build-populate_lic
drwxrwxr-x 2 chyi chyi 4096 12월 12 14:06 sstate-build-populate_sysroot
drwxr-xr-x 3 chyi chyi 4096 12월 12 14:06 sysroot-destdir
drwxrwxr-x 2 chyi chyi 4096 12월 12 14:06 temp
==============================================================
자 그럼, 앞서 build에 성공한 helloworld binary를 전체 image에 포함시킬 차례이다.
$ vi conf/local.conf
...
IMAGE_INSTALL_append = " hello" #hello string 앞에 공백을 추가해 주어야 함.
~
$ bitbake core-image-minimal
=> helloworld를 포함시키도록 다시 build를 시도한다.
이어 NFS booting을 하게 되면, helloworld가 보일 것이다.
참고로, helloworld를 추가하는 또 다른 방법(아래)도 생각해 볼 수 있다. 이 부분은 독자 여러분이 직접 확인해 보기 바란다.
------------------------------------------------------------------------
meta-atmel/recipes-test/images/test-image.bb
require recipes-core/images/core-image-minimal.bb
IMAGE_INSTALL += "helloworld"
------------------------------------------------------------------------
8. 기타 몇가지 TIP
이번 절에서는 몇가지 중요한 질문에 대한 질의 & 응답 내용을 정리해 보도록 하겠다.
Q1) bitbake로 kernel menuconfig를 하려면 ?
A1) $ bitbake -c menuconfig virtual/kernel 혹은 bitbake -c menuconfig linux-at91
(*) 보충 설명 (*)
Virtual package(동일한 것으로 목적으로 하는 패키지)는 virtual/<name> 형태로 되어 있는데, 이러한 것에는 아래와 같은 것이 있다.
---------------------------------------------------------------------------------------------------
virtual/bootloader: u-boot, u-boot-ti-staging...
virtual/kernel: linux-yocto, linux-yocto-tiny, linux-yocto-rt, linux-ti-staging...
virtual/libc: eglibc, uclibc
virtual/xserver: xserver-xorg
---------------------------------------------------------------------------------------------------
virtual package 대신 실제 kernel 명을 입력하려면, PREFERRED_PROVIDER_virtual/kernel로 정의된 내용을 menuconfig 다음에 입력하면 된다. SAMA5D3 Xplained의 경우는 meta-atmel/conf/machine/include/sama5.inc 파일 참조 !
Q2) kernel code만 재 build하려면 ?
A2) $ bitbake -C compile virtual/kernel
주의: 이 경우 -C는 대문자임. 대문자를 사용하게 되면, 주어진 task(여기서는 compile) 이후의 작업이 한번에 진행되게 됨.
Q3) core-image-minimal에 대한 SDK를 만들려면 ?
A3) bitbake -c populate_sdk core-image-minimal
(*) 보충 설명 (*)
사용자 영역의 program을 위한 SDK는 물론이고, toolchain도 함께 만들어지게 된다.
Q4) 특정 패키지의 build directory가 어디인지 알고 싶다면 ?
A4) $ bitbake -e <package> | grep ^WORKDIR=
예를 들어, kernel의 build directory를 찾고 싶다면, 아래와 같이 하면 됨.
$ bitbake -e virtual/kernel | grep ^WORKDIR=
WORKDIR="/home/chyi/IoT/BBB/yocto_fe/poky/build/tmp/work/beaglebone-poky-linux-gnueabi/linux-ti-staging/4.4.19+gitAUTOINC+e581bb1cac-r22a"
(*) 보충 설명 - kernel 디렉토리 내용 (*)
$ cd /home/chyi/IoT/BBB/yocto_fe/poky/build/tmp/work/beaglebone-poky-linux-gnueabi/linux-ti-staging/4.4.19+gitAUTOINC+e581bb1cac-r22a
$ ls -l
- defconfig : kernel config(보통 arch/arm/configs 아래에 있던 내용이 이 파일에 해당함)
- git 디렉토리: Linux source(patch가 있다면 적용된 내용). kernel code 수정을 이 디렉토리에서 진행하고, 이후 git commit도 여기서 하면 됨.
- build 디렉토리: build output이 위치함. 이 디렉토리 아래의 .config가 실제 적용된 kernel config 임.
- deploy-linux-XXX: 최종 kernel build 결과물(zImage, dtb, modules 등)
...
Q5) rootfs file system의 위치를 알고 싶다면 ?
A5) $ bitbake -e core-image-minimal | grep ^IMAGE_ROOTFS=
예를 들자면, 아래와 같은 결과를 얻을 수 있겠음.
IMAGE_ROOTFS="/home/chyi/IoT/BBB/yocto_fe/poky/build/tmp/work/beaglebone-poky-linux-gnueabi/core-image-minimal/1.0-r0/rootfs"
Q6) menuconfig로 수정한 kernel config 내용을 (clean build 이후에도 사용할 수 있도록)저장하려면 ?
A6) $ bitbake -c savedefconfig virtual/kernel
이 명령은 단순히 .config 파일로 부터 dependency 부분을 제거한 후, 같은 디렉토리(build)의 defconfig 파일로 저장하는 역할만 수행함. 따라서 이후 반드시 이 파일(defconfig)을 kernel recipe 디렉토리로 복사해 주어야 함. 예를 들어, (beaglebone black의 경우라면) defconfig 파일을 meta-ti/recipes-kernel/linux/linux-ti-staging-4.4/defconfig에 복사해 주어야만 함.
Q7) kernel, bootloader build 방법을 구체적으로 알고 싶다면 ?
A7) 아래 내용 참조
<BeagleBone Black에 Yocto project를 적용한 예 - 1절 참조>
=> kernel, bootloader를 build하는 방법도 소개되어 있음.
http://slowbootkernelhacks.blogspot.kr/2016/12/booting-beaglebone-black-with-yocto.html
<RIoT board에 Yocto project를 적용한 예 - 5절 참조>
http://slowbootkernelhacks.blogspot.kr/2017/01/riot-board-based-on-freescale-imx-6solo.html
Q8) kernel module build 방법을 구체적으로 알고 싶다면 ?
A8) 아래 내용 참조(2.3절)
<나중에 추가한 것임>
Q9) devtool을 사용하여 (좀 더 편리하게) application & library를 개발하는 방법을 알고 싶다면 ?A9) 아래 내용 참조(6장)
Q10) devtool을 사용하여 (좀 더 편리하게) kernel을 개발하는 방법을 알고 싶다면 ?
A10) 아래 내용 참조(7장)
이상으로 Yocto Project의 가장 기본적인 사용 방법을 정리해 보았다. 보다 자세한 사항을 위해서는 아래 참고 문헌(References)을 참조해 주기 바란다.
References
1. http://www.at91.com/linux4sam/bin/view/Linux4SAM/YoctoProject
2. Yocto Project Quick Start - https://www.yoctoproject.org/docs/current/yocto-project-qs/yocto-project-qs.html#super-user
3. yocto-slides.pdf - free-electrons((http://free-electrons.com/docs/)
4. Mastering Embedded Linux Programming Chapter 6 - Chris Simmonds, PACKT Publishing.
5. Using Yocto Project with BeagleBone Black, H M Irfan Sadiq, PACKT Publishing.
6. Yocto 프로젝트를 활용한 임베디드 리눅스 개발, 에이콘
7. Elce11_stewart.pdf - Developing Embedded Linux Devices Using the Yocto Project
8. Embedded Linux Projects Using Yocto Project Cookbook, Alex Gonzalez, PACKT Publishing.
9. Embedded Linux Systems with the Yocto Project, Rudolf J. Streif, Prentice Hall.
Slowboot


