
이번 시간에는 FD.io VPP와 Snort 및 StrongSWAN을 이용하여 (아주 기본적인 수준의) NGFW(Next Generation Firewall)을 만들어 보고자 한다. 😎

이번 글은 아래 post의 10장 내용을 보강하기 위하여 작성되었다.
https://slowbootkernelhacks.blogspot.com/2024/01/dpdk-fdio-vpp-security-gateway.html
https://slowbootkernelhacks.blogspot.com/2024/01/dpdk-fdio-vpp-security-gateway.html
Chapter I. 목차
1. The Snort Awakens(깨어난 스노트)
2. VPP와 Snort 연동하기
3. NGFW 그리고 SASE
4. References
_______________________________________________________________________________________

[그림 출처 - https://namu.wiki/w/%EC%B9%B4%EB%A1%A0]
이번 글은 아래 post의 9장 내용을 보강하기 위하여 작성되었다.
https://slowbootkernelhacks.blogspot.com/2024/01/dpdk-fdio-vpp-security-gateway.html
https://slowbootkernelhacks.blogspot.com/2024/01/dpdk-fdio-vpp-security-gateway.html
Chapter II. 목차
5. IPSec/IKEv2 이야기
6. VPP IKEv2와 StrongSWAN IKEv2 연동하기
7. VPP IPSec/StrongSWAN IKEv2와 Linux IPSec/StrongSWAN IKEv2 연동하기
8. References
_______________________________________________________________________________________
VPP는 L2 switch, L3 Routing, NAT, IPSec, WireGuard, ACL(Packet filtering) 등 다양한 기능을 보유하고 있는 S/W ASIC이다. 여기에 IPS 기능과 Web Filtering, Anti-Virus 기능이 추가된다면, NGFW로 거듭날 수 있다. 또한, 이를 Cloud 환경으로 옮긴다면, SASE를 만드는 기초가 될 수 있지 않을까 ?
<VPP 관련 이전 글>
1. The Snort Awakens(깨어난 스노트)
Snort는 IDS(Intrusion Detection System)/IPS(Intrusion Prevention System)로 널리 알려져 있는 open source이다. 20년 전에 사용한 적이 있는데, 최근에 다시 보니, Snort3으로 버젼이 올라갔고, C++ 기반으로 재 개발(개발진도 대폭 교체 - cisco 개발자 주축)된 듯 하다. 사실 Snort와 비교되는 open source로는 Suricata가 있으며, 최근의 사용량도 (공식적인 것은 아니나) Suricata 쪽이 많은 것 같다.
[그림 1.1] Snort 3 (일명 Snort++)
📌 거의 20년만에 3.x 버젼으로 거듭나면서, 새로운 도전을 시작하는 듯 보인다. 과연 성공할 수 있을지 ... 눈물 아니 박수를 보낸다. 😂
아무튼, 이번 장에서는 새로운 반격에 나선 Snort3를 build해 보고, 내용이 어떻게 바뀌었는지 잠시 살펴 보고자 한다.
1) Snort3 build 하기
아래 site의 내용을 참조하여, snort3를 build해 보도록 한다.
DEPENDENCIES [출처: 참고문헌 6]
- cmake to build from source
- daq from https://github.com/snort3/libdaq for packet IO
- dnet from https://github.com/dugsong/libdnet.git for network utility functions
- flex >= 2.6.0 from https://github.com/westes/flex for JavaScript syntax parser
- g++ >= 5 or other C++14 compiler
- hwloc from https://www.open-mpi.org/projects/hwloc/ for CPU affinity management
- LuaJIT from http://luajit.org for configuration and scripting
- OpenSSL from https://www.openssl.org/source/ for SHA and MD5 file signatures, the protected_content rule option, and SSL service detection
- pcap from http://www.tcpdump.org for tcpdump style logging
- pcre from http://www.pcre.org for regular expression pattern matching
- pkgconfig from https://www.freedesktop.org/wiki/Software/pkg-config/ to locate build dependencies
- zlib from http://www.zlib.net for decompression
_________________________________________________________________________________
<주요 library build & 패키지 설치>
$ git clone https://github.com/snort3/libdaq
$ cd libdaq/
$ ./bootstrap
$ ./configure
$ make
$ sudo make install
$ sudo apt install pkgconf
$ sudo apt-get install check
$ git clone https://github.com/ofalk/libdnet
$ cd libdnet/
$ ./configure
$ make
$ sudo make install
$ tar xvjf hwloc-2.11.0.tar.bz2
$ cd hwloc-2.11.0/
$ ./configure
$ make
$ sudo make install
$ git clone https://luajit.org/git/luajit.git
$ cd luajit/
$ make
$ sudo make install
$ sudo apt-get install libpcre3-dev libpcre3
$ sudo apt-get install flex
$ sudo apt-get install libssl-dev
$ sudo apt-get install libpcap-dev
$ sudo apt-get install zlib1g-dev
$ sudo apt-get install -y liblzma-dev
_____________________________________________________________
📌 snort3를 build하는데 필요한 library는 package 형태로 설치해도 되고, 위와 같이 source를 직접 build해서 설치해도 된다.
<snort3 build 하기>
$ git clone https://github.com/snort3/snort3
$ cd snort3/
$ mkdir output
$ ./configure_cmake.sh --prefix=/mnt/hdd/workspace/VPP/snort/snort3/output
$ cd build/
$ make -j8
$ make install
$ cd ../output/
chyi@earth:/mnt/hdd/workspace/VPP/snort/snort3/output$ ls -lR
.:
합계 20
drwxrwxr-x 2 chyi chyi 4096 6월 29 16:10 bin
drwxrwxr-x 3 chyi chyi 4096 6월 29 16:06 etc
drwxrwxr-x 3 chyi chyi 4096 6월 29 16:06 include
drwxrwxr-x 4 chyi chyi 4096 6월 29 16:06 lib
drwxrwxr-x 3 chyi chyi 4096 6월 29 16:06 share
./bin:
합계 217772
-r-xr-xr-x 1 chyi chyi 24571 6월 29 15:20 appid_detector_builder.sh
-rwxr-xr-x 1 chyi chyi 200634280 6월 29 16:06 snort
-rwxr-xr-x 1 chyi chyi 22242976 6월 29 16:06 snort2lua
-rwxr-xr-x 1 chyi chyi 36576 6월 29 16:06 u2boat
-rwxr-xr-x 1 chyi chyi 54832 6월 29 16:06 u2spewfoo
./etc:
합계 4
drwxrwxr-x 2 chyi chyi 4096 6월 29 17:51 snort
./etc/snort:
합계 148
-rw-r--r-- 1 chyi chyi 590 6월 29 15:20 balanced.lua
-rw-r--r-- 1 chyi chyi 616 6월 29 15:20 connectivity.lua
-rw-r--r-- 1 chyi chyi 45258 6월 29 15:20 file_magic.rules
-rw-r--r-- 1 chyi chyi 410 6월 29 15:20 inline.lua
-rw-r--r-- 1 chyi chyi 1123 6월 29 15:20 max_detect.lua
-rw-r--r-- 1 chyi chyi 814 6월 29 15:20 security.lua
-rw-r--r-- 1 chyi chyi 5426 6월 29 15:20 sensitive_data.rules
-rw-r--r-- 1 chyi chyi 8916 6월 29 15:20 snort.lua
-rw-r--r-- 1 chyi chyi 55670 6월 29 15:20 snort_defaults.lua
-rw-r--r-- 1 chyi chyi 791 6월 29 15:20 talos.lua
./include:
합계 4
drwxrwxr-x 33 chyi chyi 4096 6월 29 16:06 snort
...

[그림 1.2] Snort 3 버젼 확인
<snort rules download 하기>
$ wget https://www.snort.org/downloads/community/snort3-community-rules.tar.gz
$ tar xvzf snort3-community-rules.tar.gz
$ ls -la
합계 2300
drwxr-xr-x 2 chyi chyi 4096 6월 27 03:59 .
drwxrwxr-x 3 chyi chyi 4096 7월 1 13:14 ..
-rw-r--r-- 1 chyi chyi 7834 6월 27 03:59 AUTHORS
-rw-r--r-- 1 chyi chyi 15127 6월 27 03:59 LICENSE
-rw-r--r-- 1 chyi chyi 21084 6월 27 03:59 VRT-License.txt
-rw-r--r-- 1 chyi chyi 494963 6월 27 03:59 sid-msg.map
-rw-r--r-- 1 chyi chyi 1798418 6월 27 03:59 snort3-community.rules
2) Snort3의 주요 특징
Snort3는 Snort2에 비해 많은 변화가 있는 것 같다. 외관상의 큰 변화는 모든 설정은 lua 문법을 기본으로 한다는 점과, Suricata 처럼 multi-thread 환경으로 개선되었다는 점이다. 이 밖에도 아주 많은 변화가 있는 듯 한데, 자세한 사항은 아래 내용을 참조하기 바란다.

[그림 1.3] Snort2 vs Snort3 [출처 : 참고문헌 8]
📌 간혹 보다보면 lua script를 기반으로 하는 s/w가 눈에 띈다. 예를 들어 OpenWrt webUI인 LuCI도 그렇고 ...
Snort3의 주요 특징을 파악하기 위해서는 아래 문서를 정독할 필요가 있겠다. 살짝 보았는데, 재밌는 기능이 많이 보인다. 😋
2. VPP와 Snort 연동하기
이번 장에서는 VPP와 Snort를 연결하는 과정을 소개하고자 한다. (당연한 얘기지만) 이를 하는 이유는 VPP의 고속 패킷 처리 능력과 Snort의 IPS 기능을 모두 이용하기 위함이다. VPP와 Snort는 아래 그림처럼 DAQ library를 통해 연결된다.

[그림 2.1] VPP와 Snort 연동(1) [그림 출처 - 참고문헌 1]
📌 사실 이 하나의 그림을 보고, 본 blog post를 쓸 결심을 했드랬다. 😍

[그림 2.2] VPP와 Snort 연동(2) [그림 출처 - 참고문헌 2]
📌 이 그림도 아주 좋다. VPP와 SNORT의 관계를 한눈에 알 수 있다.
1) VPP Snort Plugin 준비하기
1장을 통해 snort를 build하기 위한 환경(정확히는 libdaq.so)이 갖추어 졌으니, 이 상태에서 vpp를 재 build하도록 한다.
$ make build
chyi@earth:/mnt/hdd/workspace/VPP/vpp/build-root/install-vpp_debug-native/vpp/lib/x86_64-linux-gnu/daq$ ls -la
합계 48
drwxrwxr-x 2 chyi chyi 4096 6월 29 17:58 .
drwxrwxr-x 7 chyi chyi 4096 6월 29 17:58 ..
lrwxrwxrwx 1 chyi chyi 19 6월 29 17:58 libdaq_vpp.so -> libdaq_vpp.so.24.06
-rw-r--r-- 1 chyi chyi 39848 6월 29 17:57 libdaq_vpp.so.24.06
📌 이 library가 snort와 vpp를 연결해 줄 비밀의 열쇠다. 🔑
chyi@earth:/mnt/hdd/workspace/VPP/vpp/build-root/install-vpp_debug-native/vpp/lib/x86_64-linux-gnu/vpp_plugins$ ls -l snort_plugin.so
-rw-r--r-- 1 chyi chyi 559160 6월 29 17:58 snort_plugin.so
📌 사실 snort_plugin.so는 이번 build하고는 무관하게 초기 build 시 생성된다.
여기서 만들어진 2개의 library를 target machine으로 복사하도록 한다(복사하여 각각 아래 위치로 옮긴다).
chyi@vppbox2:/usr/local/lib/daq$ ls -la
total 964
drwxr-xr-x 2 root root 4096 Jun 30 08:57 .
drwxr-xr-x 6 root root 4096 Jun 30 08:57 ..
-rwxr-xr-x 1 root root 971 Jun 30 07:53 daq_afpacket.la
-rwxr-xr-x 1 root root 89192 Jun 30 07:53 daq_afpacket.so
-rwxr-xr-x 1 root root 941 Jun 30 07:53 daq_bpf.la
-rwxr-xr-x 1 root root 31240 Jun 30 07:53 daq_bpf.so
-rwxr-xr-x 1 root root 937 Jun 30 07:53 daq_dump.la
-rwxr-xr-x 1 root root 37272 Jun 30 07:53 daq_dump.so
-rwxr-xr-x 1 root root 924 Jun 30 07:53 daq_fst.la
-rwxr-xr-x 1 root root 538064 Jun 30 07:53 daq_fst.so
-rwxr-xr-x 1 root root 930 Jun 30 07:53 daq_gwlb.la
-rwxr-xr-x 1 root root 43088 Jun 30 07:53 daq_gwlb.so
-rwxr-xr-x 1 root root 947 Jun 30 07:53 daq_pcap.la
-rwxr-xr-x 1 root root 55312 Jun 30 07:53 daq_pcap.so
-rwxr-xr-x 1 root root 954 Jun 30 07:53 daq_savefile.la
-rwxr-xr-x 1 root root 37264 Jun 30 07:53 daq_savefile.so
-rwxr-xr-x 1 root root 936 Jun 30 07:53 daq_trace.la
-rwxr-xr-x 1 root root 55856 Jun 30 07:53 daq_trace.so
lrwxrwxrwx 1 chyi chyi 19 Jun 29 08:58 libdaq_vpp.so -> libdaq_vpp.so.24.06
-rw-r--r-- 1 chyi chyi 39848 Jun 29 08:57 libdaq_vpp.so.24.06
📌 이 위치는 snort 명령 실행 시 주게되는 아래 option과 연관된다.
--daq-dir /usr/local/lib/daq --daq vpp
chyi@vppbox2:/usr/lib/x86_64-linux-gnu/vpp_plugins$ ls -l snort_plugin.so
-rw-r--r-- 1 root root 559160 Jun 29 09:40 snort_plugin.so
chyi@vppbox2:/usr/lib/x86_64-linux-gnu/vpp_plugins$
📌 snort_plugin.so의 경우, 이미 target machine 상에 존재할 수도 있다.
-rw-r--r-- 1 root root 559160 Jun 29 09:40 snort_plugin.so
chyi@vppbox2:/usr/lib/x86_64-linux-gnu/vpp_plugins$
📌 snort_plugin.so의 경우, 이미 target machine 상에 존재할 수도 있다.
2) VPP 설정하기
자, 이제 부터는 vpp 설정을 통해서 vpp와 snort를 연결시켜 보도록 하자.

[그림 2.3] vpp 기본 설정 상태(1)

[그림 2.4] vpp 기본 설정 상태(2)
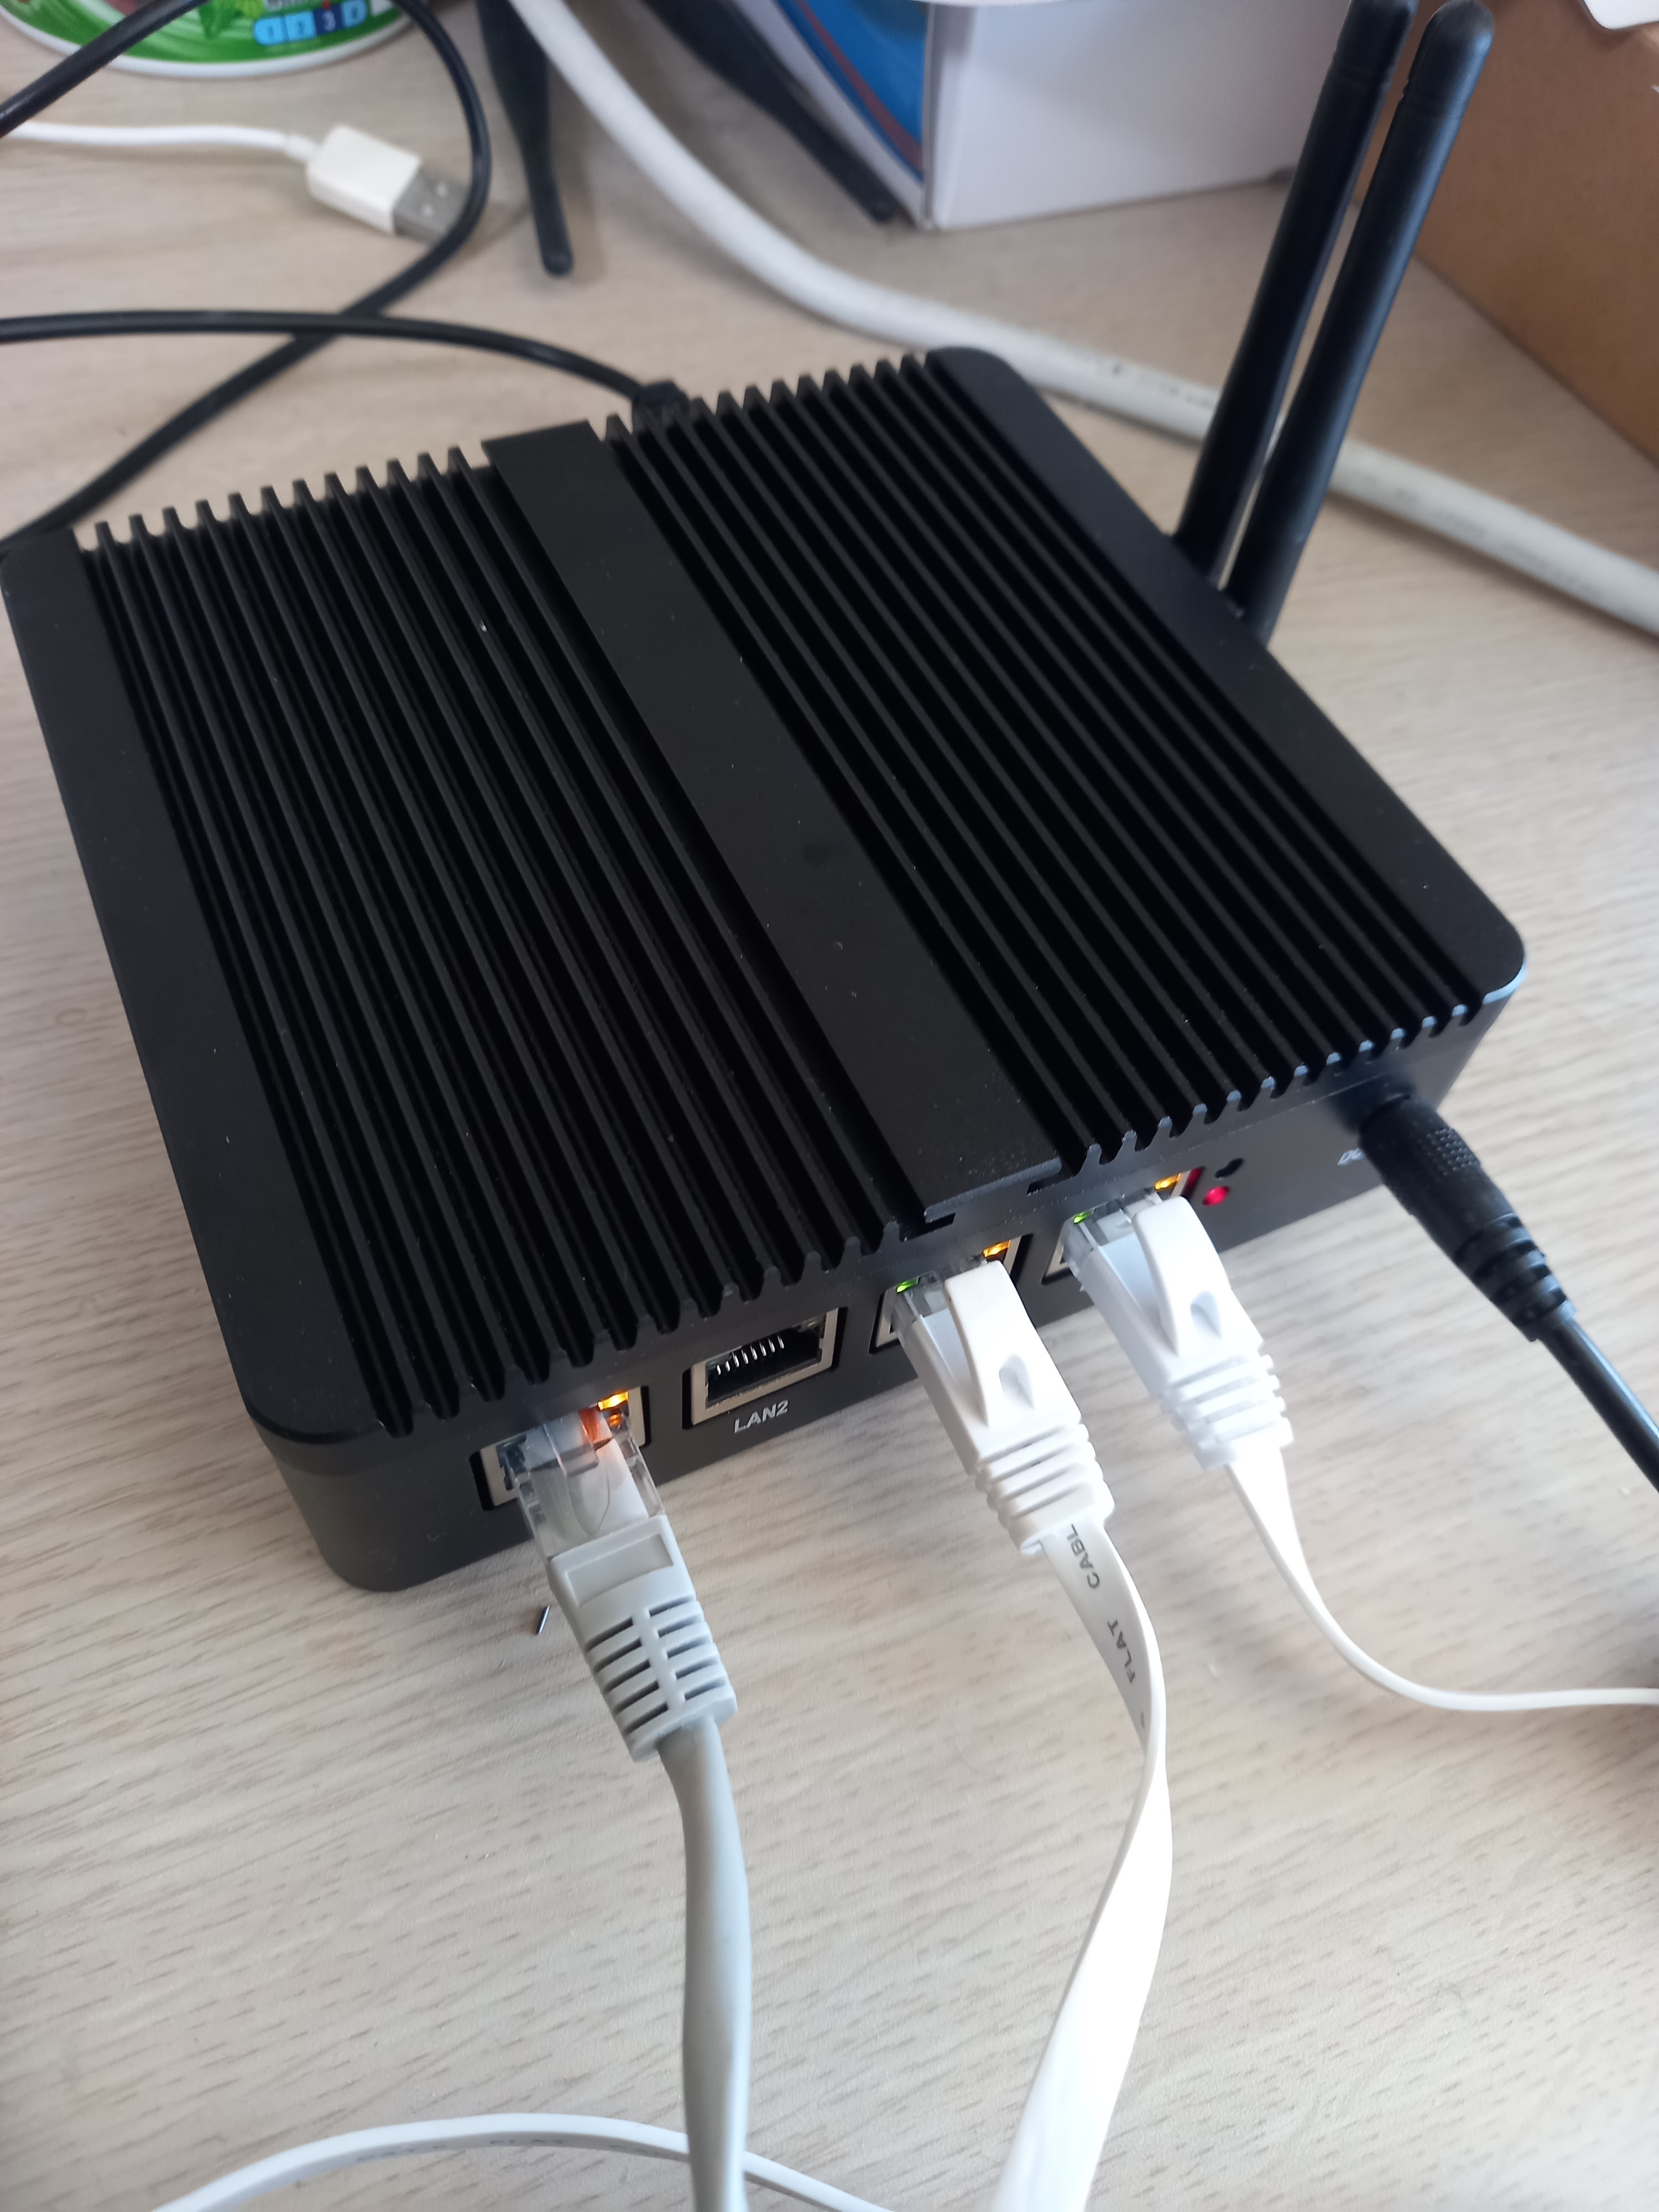
[그림 2.5] vpp box 외관
WAN(192.168.8.134/24) === VPP (Snort) === LAN(192.168.5.1/24)
📌 vpp 설정과 관련해서는 이전 blg post를 참조하기 바란다.
vpp# snort ?
snort attach snort attach instance <name> interface <if-name> [input|ouput|inout]
snort create-instance snort create-instaince name <name> [queue-size <size>] [on-disconnect drop|
pass]
snort detach snort detach interface <if-name>
snort mode interrupt snort mode polling|interrupt
snort mode polling snort mode polling|interrupt
📌 이 명령이 먹히려면, show plugins 명령을 통해 snort_plugin이 올라와 있는지를 먼저 확인해야 한다.
vpp# snort create-instance name ips queue-size 8192
=> snort instance를 생성하고, 이름을 지정한다. 여기서는 ips라고 지정하였다.
vpp# show snort instances
=> 생성된 snort instance를 확인한다.
=> 생성된 snort instance를 확인한다.
ips [idx:0 sz:200704 fd:45]
vpp# snort attach instance ips interface GigabitEthernet4/0/0
=> snort instance(ips)를 network interface에 연결한다.
vpp# snort attach instance ips interface GigabitEthernet1/0/0
=> attach 과정은 여러번 할 수 있다.
=> attach 과정은 여러번 할 수 있다.
vpp# show snort interfaces
=> attach된 interface를 확인한다.
=> attach된 interface를 확인한다.
interface snort instance
GigabitEthernet1/0/0: ips
GigabitEthernet4/0/0: ips
GigabitEthernet1/0/0: ips
GigabitEthernet4/0/0: ips
chyi@vppbox2:~/workspace/snort3/snort3/output/bin$ sudo ./snort -c /home/chyi/workspace/snort3/snort3/output/etc/snort
/snort.lua --daq-dir /usr/local/lib/daq --daq vpp -i ips -Q
=> Shell 상태에서 snort3를 구동시킨다. 이때 --daq vpp, -i <snort instance 명>를 사용하도록 한다. -Q option은 inline mode를 뜻한다.
/snort.lua --daq-dir /usr/local/lib/daq --daq vpp -i ips -Q
=> Shell 상태에서 snort3를 구동시킨다. 이때 --daq vpp, -i <snort instance 명>를 사용하도록 한다. -Q option은 inline mode를 뜻한다.
--------------------------------------------------
o")~ Snort++ 3.2.2.0
--------------------------------------------------
Loading /home/chyi/workspace/snort3/snort3/output/etc/snort/snort.lua:
Loading snort_defaults.lua:
Finished snort_defaults.lua:
file_id
active
alerts
daq
decode
host_cache
hosts
network
packets
process
output
so_proxy
http2_inspect
ips
classifications
references
wizard
trace
appid
ftp_server
sip
arp_spoof
stream_file
stream_user
stream_udp
stream_tcp
stream_icmp
stream_ip
stream
search_engine
host_tracker
back_orifice
dns
imap
netflow
normalizer
pop
rpc_decode
ssh
ssl
telnet
cip
dnp3
iec104
mms
modbus
s7commplus
dce_smb
dce_tcp
dce_udp
dce_http_proxy
dce_http_server
gtp_inspect
port_scan
smtp
ftp_client
ftp_data
http_inspect
file_policy
js_norm
binder
Finished /home/chyi/workspace/snort3/snort3/output/etc/snort/snort.lua:
Loading file_id.rules_file:
Loading file_magic.rules:
Finished file_magic.rules:
Finished file_id.rules_file:
--------------------------------------------------
ips policies rule stats
id loaded shared enabled file
0 219 0 219 /home/chyi/workspace/snort3/snort3/output/etc/snort/snort.lua
--------------------------------------------------
rule counts
total rules loaded: 219
text rules: 219
option chains: 219
chain headers: 1
--------------------------------------------------
service rule counts to-srv to-cli
file_id: 219 219
total: 219 219
--------------------------------------------------
fast pattern groups
to_server: 1
to_client: 1
--------------------------------------------------
search engine (ac_bnfa)
instances: 2
patterns: 438
pattern chars: 2602
num states: 1832
num match states: 392
memory scale: KB
total memory: 71.2812
pattern memory: 19.6484
match list memory: 28.4375
transition memory: 22.9453
appid: MaxRss diff: 2944
appid: patterns loaded: 300
--------------------------------------------------
vpp DAQ configured to inline.
Commencing packet processing
++ [0] ips
vpp# show snort clients o")~ Snort++ 3.2.2.0
--------------------------------------------------
Loading /home/chyi/workspace/snort3/snort3/output/etc/snort/snort.lua:
Loading snort_defaults.lua:
Finished snort_defaults.lua:
file_id
active
alerts
daq
decode
host_cache
hosts
network
packets
process
output
so_proxy
http2_inspect
ips
classifications
references
wizard
trace
appid
ftp_server
sip
arp_spoof
stream_file
stream_user
stream_udp
stream_tcp
stream_icmp
stream_ip
stream
search_engine
host_tracker
back_orifice
dns
imap
netflow
normalizer
pop
rpc_decode
ssh
ssl
telnet
cip
dnp3
iec104
mms
modbus
s7commplus
dce_smb
dce_tcp
dce_udp
dce_http_proxy
dce_http_server
gtp_inspect
port_scan
smtp
ftp_client
ftp_data
http_inspect
file_policy
js_norm
binder
Finished /home/chyi/workspace/snort3/snort3/output/etc/snort/snort.lua:
Loading file_id.rules_file:
Loading file_magic.rules:
Finished file_magic.rules:
Finished file_id.rules_file:
--------------------------------------------------
ips policies rule stats
id loaded shared enabled file
0 219 0 219 /home/chyi/workspace/snort3/snort3/output/etc/snort/snort.lua
--------------------------------------------------
rule counts
total rules loaded: 219
text rules: 219
option chains: 219
chain headers: 1
--------------------------------------------------
service rule counts to-srv to-cli
file_id: 219 219
total: 219 219
--------------------------------------------------
fast pattern groups
to_server: 1
to_client: 1
--------------------------------------------------
search engine (ac_bnfa)
instances: 2
patterns: 438
pattern chars: 2602
num states: 1832
num match states: 392
memory scale: KB
total memory: 71.2812
pattern memory: 19.6484
match list memory: 28.4375
transition memory: 22.9453
appid: MaxRss diff: 2944
appid: patterns loaded: 300
--------------------------------------------------
vpp DAQ configured to inline.
Commencing packet processing
++ [0] ips
number of clients: 1
📌 snort clients가 1로 보이면 성공적으로 연결된 것이다.
3) VPP Snort 동작 시험하기
이제 snort configuration 파일을 수정하여 snort rule을 추가한 후, 제대로 동작하는지 확인해 보도록 하자.

[그림 2.6] VPP Snort IPS 시험
<snort configuration 수정하기>
$ vi snort.lua
=> HOME_NET을 아래와 같이 수정하고, ips section에 snort rule을 추가하도록 한다.
______________________________________________________________________
...
-- HOME_NET and EXTERNAL_NET must be set now
-- setup the network addresses you are protecting
HOME_NET = '192.168.5.0/24'
-- set up the external network addresses.
-- (leave as "any" in most situations)
EXTERNAL_NET = 'any'
include 'snort_defaults.lua'
-- setup the network addresses you are protecting
HOME_NET = '192.168.5.0/24'
-- set up the external network addresses.
-- (leave as "any" in most situations)
EXTERNAL_NET = 'any'
include 'snort_defaults.lua'
...
ips =
{
-- use this to enable decoder and inspector alerts
--enable_builtin_rules = true,
-- use include for rules files; be sure to set your path
-- note that rules files can include other rules files
-- (see also related path vars at the top of snort_defaults.lua)
variables = default_variables,
rules = [[
include /home/chyi/workspace/snort3/snort3-community-rules/snort3-community.rules
include /home/chyi/workspace/snort3/snort3-community-rules/test.rules
]]
}
...
______________________________________________________________________
<test.rules 파일 내용>
block icmp any any -> any any (msg:"ICMP connection attempt"; sid:1000010; rev:1;)
~
이후, 아래와 같이 snort 명령을 다시 실행하자.
$ sudo ./snort -c /home/chyi/workspace/snort3/snort3/output/etc/snort/snort.lua --daq-dir /usr/local/lib/daq --daq vpp -i ips -Q -A cmg
[sudo] password for chyi:
--------------------------------------------------
o")~ Snort++ 3.2.2.0
--------------------------------------------------
Loading /home/chyi/workspace/snort3/snort3/output/etc/snort/snort.lua:
Loading snort_defaults.lua:
Finished snort_defaults.lua:
ips
file_id
references
classifications
stream
alerts
daq
decode
host_cache
host_tracker
hosts
network
packets
process
search_engine
so_proxy
dnp3
modbus
dce_smb
dce_udp
stream_ip
stream_icmp
stream_tcp
stream_udp
stream_user
stream_file
arp_spoof
back_orifice
dns
imap
netflow
normalizer
pop
rpc_decode
sip
ssh
ssl
telnet
cip
iec104
mms
output
s7commplus
dce_tcp
dce_http_proxy
dce_http_server
gtp_inspect
port_scan
smtp
ftp_server
ftp_client
ftp_data
http_inspect
http2_inspect
file_policy
js_norm
appid
wizard
binder
trace
active
Finished /home/chyi/workspace/snort3/snort3/output/etc/snort/snort.lua:
Loading file_id.rules_file:
Loading file_magic.rules:
Finished file_magic.rules:
Finished file_id.rules_file:
Loading ips.rules:
Loading /home/chyi/workspace/snort3/snort3-community-rules/snort3-community.rules:
Finished /home/chyi/workspace/snort3/snort3-community-rules/snort3-community.rules:
Loading /home/chyi/workspace/snort3/snort3-community-rules/test.rules:
Finished /home/chyi/workspace/snort3/snort3-community-rules/test.rules:
Finished ips.rules:
--------------------------------------------------
ips policies rule stats
id loaded shared enabled file
0 4242 0 4242 /home/chyi/workspace/snort3/snort3/output/etc/snort/snort.lua
--------------------------------------------------
rule counts
total rules loaded: 4242
text rules: 4242
option chains: 4242
chain headers: 319
flowbits: 48
flowbits not checked: 23
--------------------------------------------------
port rule counts
tcp udp icmp ip
any 472 58 148 22
src 170 15 0 0
dst 775 150 0 0
both 6 11 0 0
total 1423 234 148 22
--------------------------------------------------
service rule counts to-srv to-cli
dcerpc: 72 20
dhcp: 2 2
dns: 28 7
file_id: 219 219
ftp: 90 4
ftp-data: 1 97
http: 2085 256
http2: 2085 256
http3: 2085 256
imap: 35 118
irc: 5 2
kerberos: 3 0
ldap: 0 1
mysql: 3 0
netbios-dgm: 1 1
netbios-ns: 4 3
netbios-ssn: 69 17
nntp: 2 0
pop3: 23 118
rdp: 5 0
sip: 5 5
smtp: 130 2
snmp: 18 7
ssdp: 3 0
ssl: 20 42
sunrpc: 68 4
telnet: 12 6
tftp: 1 0
wins: 1 0
total: 7075 1443
--------------------------------------------------
fast pattern groups
src: 114
dst: 312
any: 8
to_server: 72
to_client: 49
--------------------------------------------------
search engine (ac_bnfa)
instances: 338
patterns: 10800
pattern chars: 175372
num states: 123398
num match states: 10520
memory scale: MB
total memory: 3.68976
pattern memory: 0.578913
match list memory: 1.33705
transition memory: 1.73254
fast pattern only: 7099
appid: MaxRss diff: 3328
appid: patterns loaded: 300
--------------------------------------------------
vpp DAQ configured to inline.
Commencing packet processing
++ [0] ips
01/01-00:00:00.000000 [block] [**] [1:1000010:1] "ICMP connection attempt" [**] [Priority: 0] {ICMP} 192.168.8.134 ->
192.168.8.1
192.168.8.134 -> 192.168.8.1 ICMP TTL:64 TOS:0x0 ID:14483 IpLen:20 DgmLen:84 DF
Type:8 Code:0 ID:2390 Seq:244 ECHO
snort.raw[56]:
- - - - - - - - - - - - - - - - - - - - - - - - - - - - - - - - -
53 3F 82 66 00 00 00 00 D5 DB 01 00 00 00 00 00 S?.f.... ........
10 11 12 13 14 15 16 17 18 19 1A 1B 1C 1D 1E 1F ........ ........
20 21 22 23 24 25 26 27 28 29 2A 2B 2C 2D 2E 2F !"#$%&' ()*+,-./
30 31 32 33 34 35 36 37 01234567
- - - - - - - - - - - - - - - - - - - - - - - - - - - - - - - - -
이 상태에서 외부로 나가는 ping(ping 192.168.8.1)을 시도해 보면, ping이 차단되고, console에 "ICMP connection attempt" 로그 메시지가 출력되는 것을 알 수 있다(다시 말해 snort가 정상동작하여 icmp packet을 정상적으로 차단하고 있다는 뜻이다). 반대로 test.rules 파일 내용을 아래와 같이 수정 후, 다시 시도해 보면 정상적으로 ping이 된다. 😎
<test.rules 파일 내용>
alert icmp any any -> any any (msg:"ICMP connection attempt"; sid:1000010; rev:1;)
~
_____________________________________________________________________________여기까지 VPP와 Snort3를 연동시키는 과정을 (시간 관계상)아주 아주 간략히 소개해 보았다.
Snort3에 대한 자세한 사용법(특히 rule 설정 관련)이나, VPP + Snort 설정 관련하여 추가 테스트가 필요한 부분은 독자 여러분의 몫으로 남긴다. 😋 😋
3. NGFW 그리고 SASE
VPP와 Snort를 integration하는 부분만 설명하고 끝내자니, 좀 아쉽다는 생각이 든다. 따라서 이번 장에서는 10년도 넘은 기술인 NGFW(Next Generation Firewall)과 최근에 새롭게 등장하고 있는 SASE(Secure Access Service Edge)에 관한 얘기를 잠시 해 보고자 한다.
📌 네트워크 보안은 잠자고 일어나면 매번 새로운 개념이 등장하곤 한다. 왜 그럴까 ? 가트너에서 일하고 계신 분들이 문젠가 ? 😓
먼저 NGFW은 아래와 같은 핵심 기능을 갖추어야 한다.
<NGFW의 핵심 기능>
- 기본 기능#1: Statefule firewall - packet filtering, NAT, VPN 기능
- 기본 기능#2: IPS(Intrusion Prevention System)
- 기본 기능#3: 애플리케이션 인식 기능(애플리케이션을 식별하고 애플리케이션을 기반으로 정책 결정을 내릴 수 있는 능력)
- 추가 기능#1: DLP(data loss prevention), SWG(secure web gateway - URL filtering), antivirus
- 추가 기능#2: TLS 등으로 암호화된 트래픽 내에 감추어진 attack 감지 기능(decrypting, inspecting, re-encrypting 기능 필요, TLS proxy 기능)
- 성능: line speed 보장
- Platform: bare metal appliance or VM(Virtual Machine)

[그림 3.1] NGFW Architecture [출처 - 참고문헌 1]
NGFW를 위해 참고할 만한 open source는 다음과 같다. 너무 기초적인가 ? ㅋ
<IPS open source>
https://www.snort.org/
https://suricata.io/
<SSL proxy open source>
https://github.com/sonertari/SSLproxy
<Web content filtering open source>
https://github.com/e2guardian/e2guardian
<Mail antivirus open source>
https://docs.clamav.net/
📌 이런게 있다는 정도지, 반드시 이걸 사용해야 한다는 뜻은 결코 아니다. 😝
____________________________________________________________
한편, 아주 아주 큰 그림인 SASE의 주요 기능은 다음과 같이 요약해 볼 수 있을 듯 하다.
<SASE 기능>
- 기본 기능: NGFW의 전 기능(Cloud로 갈 경우 FWaaS)
- 추가 기능: CASB, SWG, ZTNA, SD-WAN(or WANaaS)
- Plaform: Cloud
SASE(쌔시)란 ?
클라우드 자체의 보안 뿐만 아니라 사용자의 주변, 즉 Edge에서 보안 웹 게이트웨이(SWG), 클라우드 액세스 보안 브로커(CASB), 방화벽(FWaaS), 제로 트러스트 네트워크 액세스(ZTNA), VPN 등의 클라우드 네이티브 보안 기능과 CDN 및 SD-WAN 같은 네트워크 기능이 통합되어 있는 보안 아키텍처를 말한다. 근데 도무지 무슨 얘긴지 잘 모르겠다. ㅋ
아무래도 SASE는 좀 더 많은 study가 필요해 보인다. I'll be back.
To be contineud...
4. References
[1] Next Generation Firewall – Optimizations with 4th Gen Intel® Xeon® Scalable Processor, Intel
[2] Performance Optimization for Next-Generation Firewall (NGFW), TECH mahindra
[11] And Google~
_____________________________________________________________________________________
IPSec은 30년도 넘은 VPN Protocol이다. 그만큼 성숙도가 있는 protocol이지만, 한편으로는 old한 protocol이라고도 할 수 있겠다. 개인적으로는 최근에 개발된 WireGuard protocol을 밀고 있지만, VPP의 사용법을 확인하는 차원에서 VPP + IPSec/IKEv2를 다뤄 보고자 한다.
IPSec/IKEv2 => OpenVPN => SoftEther VPN => WireGuard
5. IPSec/IKEv2 이야기
아주 오래전(20년도 넘었음)에 FreeSWAN이라는 open source project를 이용하여 IPSec/IKE를 사용(개발)해 본 적이 있다. 그 사이 많은 변화가 있었고, FreeSWAN은 OpenSWAN, LibreSWAN, StrongSWAN 등으로 다각화되었다(IKE는 v1 -> v2로 발전함). Linux IPSec Kernel도 FreeSWAN 개발자가 개발한 KLIPS로 부터 kernel 2.6에서 도입된 Netkey 스택 & XFRM framework 기반(BSD 쪽의 KAME project 내용 반영)으로 변하게 되었다.
📌 SWAN은 백조를 뜻하지만, Secure WAN(= VPN)의 약자이기도 한다.
📌 Snort도 그렇지만 이동네도 대단들 하다. 👏
1) IPSec/IKEv2 개요
IPSec은 IPv6에도 기본적으로 포함되어 있을 만큼, VPN의 원조 격으로 위세등등하다. 😋 문제는 늘 형제 protocol인 IKE(Internet Key Exchange)가 너무나도 복잡하고 어렵다는 것인데 ... 지금은 IKEv2로 개선된 상황인 만큼 예전과는 사뭇 달라진 분위기가 느껴진다. 근데, 이게 정말로 끝일까 ? 👀
IPSec과 IKEv2를 자세히 소개하는 것 자체가 너무나도 방대한 영역인지라, (도저히 엄두가 나질 않아) 여기서는 몇가지 그림을 살펴 보는 것으로 퉁치고자 한다. 😂

[그림 5.1] IPSec/IKEv2 개념도 [출처 - 인터넷/정확한 위치 기억 못함]
📌 IKEv2는 IPSec이 암호통신하기 위해 필요한 키를 안전하게 교환하는 protocol이다. WireGuard는 이 과정을 kernel에서 한방에 처리하지만, IPSec/IKEv2의 경우는 kernel과 사용자 영역에서 각각 나누어 처리(이원화)한다.

[그림 5.2] IPSec ESP Tunnel Mode [출처 - 인터넷/정확한 위치 기억 못함]
📌 IPSec은 ESP(Encapsulation Security Payload, 50)와 AH(Authentication Header, 51)라는 2가지 protocol을 지원하지만, 일반적으로는 (암호통신하는) ESP만 사용된다. 이것말고 Tunnel 모드와 Transport 모드라는 것도 있다(이것도 거의 터널 모드만 사용함).

[그림 5.3] IKEv2 Handshaking 과정 [출처 - 인터넷/정확한 위치 기억 못함]
📌 IKEv2는 사용자 영역의 program으로 IKE SA와 Child SA(= IPSec SA) 확립 단계로 크게 나뉘어져 있다. (악몽같았던) IKEv1과 비교하여 아주 많이 간소화되었으나, 그래도 여전히 복잡하다고 느끼는 것은 나만의 피해 의식일까 ? 😓

[그림 5.4] Linux Kernel IPSec Input 흐름도 [출처 - 참고문헌 14]

[그림 5.5] Linux Kernel IPSec Output 흐름도 [출처 - 참고문헌 14]
2) StrongSWAN 돌려 보기
이번 장에서는 Ubuntu 18.04 PC를 이용하여 strongSWAN(IKEv2)/IPSec이 정상 동작하는지를 확인해 보도록 하겠다.
[그림 5.6) StrongSWAN 로고
<Ubuntu 18.04>
=> strongswan-5.9.6을 build하여, 설치하기
$ curl -o ./strongswan-5.9.6.tar.gz -LO https://github.com/strongswan/strongswan/archive/5.9.6.tar.gz
$ tar xvzf ./strongswan-5.9.6.tar.gz
$ cd strongswan-5.9.6
$ ./autogen.sh
$ ./configure --prefix=/usr --sysconfdir=/etc --enable-libipsec --enable-systemd
--enable-swanctl --disable-gmp --enable-openssl$ make -j8
$ sudo make install
$ sudo systemctl restart strongswan-starter.service
$ systemctl status strongswan-starter.service
● strongswan-starter.service - strongSwan IPsec IKEv1/IKEv2 daemon using ipsec.conf
Loaded: loaded (/lib/systemd/system/strongswan-starter.service; disabled; vendor preset: enabled)
Active: active (running) since Thu 2024-06-27 16:07:56 KST; 31s ago
Main PID: 215012 (starter)
Tasks: 18 (limit: 38212)
Memory: 2.7M
CPU: 25ms
CGroup: /system.slice/strongswan-starter.service
├─215012 /mnt/hdd/workspace/VPP/strongswan_output/libexec/ipsec/starter --daemon charon --nofork
└─215016 /mnt/hdd/workspace/VPP/strongswan_output/libexec/ipsec/charon
6월 27 16:07:56 earth charon[215016]: 00[CFG] loading ca certificates from '/mnt/hdd/workspace/VPP/strongswan_output/>
6월 27 16:07:56 earth charon[215016]: 00[CFG] loading aa certificates from '/mnt/hdd/workspace/VPP/strongswan_output/>
6월 27 16:07:56 earth charon[215016]: 00[CFG] loading ocsp signer certificates from '/mnt/hdd/workspace/VPP/strongswa>
6월 27 16:07:56 earth charon[215016]: 00[CFG] loading attribute certificates from '/mnt/hdd/workspace/VPP/strongswan_>
6월 27 16:07:56 earth charon[215016]: 00[CFG] loading crls from '/mnt/hdd/workspace/VPP/strongswan_output/etc/ipsec.d>
6월 27 16:07:56 earth charon[215016]: 00[CFG] loading secrets from '/mnt/hdd/workspace/VPP/strongswan_output/etc/ipse>
6월 27 16:07:56 earth charon[215016]: 00[LIB] loaded plugins: charon aes des rc2 sha2 sha1 md5 random nonce x509 revo>
6월 27 16:07:56 earth charon[215016]: 00[JOB] spawning 16 worker threads
6월 27 16:07:56 earth ipsec[215012]: charon (215016) started after 20 ms
6월 27 16:07:56 earth ipsec_starter[215012]: charon (215016) started after 20 ms
_____________________________________________________________________
StrongSWAN 최신 버젼의 자세한 사용법은 아래 site에 잘 설명이 되어 있으니, 참고하기 바란다. 본 blog post는 편의상 다소 낮은 버젼을 이용하여 내용 전개를 진행하고자 한다.
📌 사실, 이 글을 쓰기 전에 여기 먼저 보았는데, 아주 최신이면서도 재밌는 내용이 많이 보인다.
6. VPP IKEv2와 StrongSWAN IKEv2 연동하기
이번 장에서는 VPP의 기본 기능인 IPSec & IKEv2와 Linux IPSec & StrongSWAN IKEv2를 상호 연결시켜 보도록 하겠다.
<VPN 시험 환경>
192.168.7.0/24 | 192.168.8.139Ubuntu StrongSWAN) ============== 192.168.8.134|192.168.5.0/24(VPP IKEv2)
<VPP Box>
vpp# ikev2 profile add pr1
vpp# ikev2 profile set pr1 auth shared-key-mic string Vpp123
vpp# ikev2 profile set pr1 id local fqdn roadwarrior.vpp
vpp# ikev2 profile set pr1 id remote fqdn sswan.vpn.example.com
vpp# ikev2 profile set pr1 traffic-selector local ip-range 192.168.5.0 - 192.168.5.255 port-range 0 - 65535 protocol 0
vpp# ikev2 profile set pr1 traffic-selector remote ip-range 192.168.7.0 - 192.168.7.255 port-range 0 - 65535 protocol 0
vpp# ikev2 profile set pr1 responder GigabitEthernet4/0/0 192.168.8.139
vpp# ikev2 profile set pr1 ike-crypto-alg aes-gcm-16 256 ike-dh modp-2048
vpp# ikev2 profile set pr1 esp-crypto-alg aes-gcm-16 256
vpp# create ipip tunnel src 192.168.8.134 dst 192.168.8.139
vpp# ikev2 profile set pr1 tunnel ipip0
vpp# ip route add 192.168.7.0/24 via 192.168.8.134 ipip0
vpp# set interface unnumbered ipip0 use GigabitEthernet4/0/0
📌 VPP IKEv2 plugin은 뭔가 최신 알고리즘(암호/해쉬)을 지원하지 못하고 있다.
vpp# show ikev2 profile
profile pr1
auth-method shared-key-mic auth data Vpp123
local id-type fqdn data roadwarrior.vpp
remote id-type fqdn data sswan.vpn.example.com
local traffic-selector addr 192.168.5.0 - 192.168.5.255 port 0 - 65535 protocol 0
remote traffic-selector addr 192.168.7.0 - 192.168.7.255 port 0 - 65535 protocol 0
protected tunnel ipip0
responder GigabitEthernet4/0/0 192.168.8.139
ike-crypto-alg aes-gcm-16 256 ike-integ-alg none ike-dh modp-2048
esp-crypto-alg aes-gcm-16 256 esp-integ-alg none
lifetime 0 jitter 0 handover 0 maxdata 0
<Ubuntu 18.04 - StrongSWAN>
Ubuntu 18.04 PC에서도 동일하게 StrongSWAN 설정을 진행하도록 하자.
</etc/ipsec.conf>
config setup
strictcrlpolicy=no
conn ipsec-ikev2-vpn
mobike=no
auto=add
type=tunnel
keyexchange=ikev2
ike=aes256gcm16-prfsha256-modp2048!
esp=aes256gcm16-esn!
# local:
left=%any
leftauth=psk
leftid=@sswan.vpn.example.com
leftsubnet=192.168.7.0/24
# remote: vpp
right=%any
rightid=@roadwarrior.vpp
right=192.168.8.134
rightauth=psk
rightsubnet=192.168.5.0/24
</etc/ipsec.secrets>
: PSK 'Vpp123'
~
_____________________________________________________________
이 상태에서 Ubuntu 18.04에 내부망(LAN) 192.168.7.0/24이 있는 것 처럼 dummy interface를 하나 만들자.
$ sudo ip link add dummy0 type dummy
$ sudo ip add add 192.168.7.1/24 dev dummy0
$ sudo ip link set dummy0 up
$ sudo systemctl restart strongswan-starter.service
$ systemctl status strongswan.service

[그림 6.1] strongswan.service 상태 확인

[그림 6.2] strongswan daemon(charon - 카론) 로그 내용
📌 카론(charon)은 그리스 신화에 나오는 아케론 강(황천)의 뱃사공을 뜻한다고 한다. IKE 패킷을 저승의 뱃사공이 안전(?)하게 실어날으는 모습인가 ...chyi@earth:~$ sudo ipsec up ipsec-ikev2-vpn

[그림 6.3] ipsec 연결 시도 성공 모습
chyi@earth:~$ sudo ipsec status
Security Associations (1 up, 0 connecting):
ipsec-ikev2-vpn[1]: ESTABLISHED 57 minutes ago, 192.168.8.139[moon.strongswan.org]...192.168.8.243[sun.strongswan.org]
ipsec-ikev2-vpn{7}: INSTALLED, TUNNEL, reqid 2, ESP SPIs: ce288614_i ce284082_o
ipsec-ikev2-vpn{7}: 192.168.7.0/24 === 192.168.5.0/24
ipsec-ikev2-vpn{8}: INSTALLED, TUNNEL, reqid 2, ESP SPIs: ccf294cc_i cd6f85f2_o
ipsec-ikev2-vpn{8}: 192.168.7.0/24 === 192.168.5.0/24
ipsec-ikev2-vpn{9}: INSTALLED, TUNNEL, reqid 2, ESP SPIs: c3309c54_i cf99b59c_o
ipsec-ikev2-vpn{9}: 192.168.7.0/24 === 192.168.5.0/24
📌 ipsec 연결 시도를 여러 차례 시도 후 확인해서 그렇다.
이 상태에서 192.168.5.1로 ping을 시도하고, tcpdump로 esp packet이 보이는지 확인해 보자.
chyi@earth:~$ ping 192.168.5.1

[그림 6.4] ESP 터널 위에서 ping 성공 모습
chyi@earth:~$ sudo tcpdump -i enp2s0 esp

[그림 6.5] ESP 패킷 캡쳐 모습
OK, 얘는 그럭저럭 잘 동작한다. 😊
7. VPP IPSec/StrongSWAN IKEv2와 Linux IPSec/StrongSWAN IKEv2 연동하기
VPP는 IPSec과 더불어 IKEv2 protocol을 지원한다. 문제는 그 수준인데, IPSec의 경우는 상용화 가능 수준이지만, IKEv2의 경우는 그렇지가 못한 듯하다. 따라서 이 장에서는 VPP IKEv2 기능 대신 StrongSWAN을 이용하여 고성능의 IPSec과 Full 기능의 IKEv2를 조합한 일명 VPP-SSWAN 기능을 다뤄 보고자 한다.
VPP IPSec + StrongSWAN <=> Linux kernel IPSec + StrongSWAN
<VPN 시험 환경>
192.168.7.0/24 | 192.168.8.139(Ubuntu StrongSWAN) ============== 192.168.8.243|192.168.5.0/24(VPP IKEv2)
1) VPP-SSWAN plugin build하기
VPP에는 이미 아래 위치에 vpp-sswan plugin code가 이미 준비되어 있다.
chyi@earth:/mnt/hdd/workspace/VPP/vpp/extras/strongswan/vpp_sswan$ ls -la
합계 1188
drwxrwxr-x 3 chyi chyi 4096 7월 3 11:28 .
drwxrwxr-x 5 chyi chyi 4096 7월 2 18:17 ..
-rw-rw-r-- 1 chyi chyi 3966 7월 2 16:03 Makefile
-rw-rw-r-- 1 chyi chyi 5566 6월 18 10:50 README.rst
drwxrwxr-x 4 chyi chyi 4096 7월 2 18:17 docker
-rw-rw-r-- 1 chyi chyi 136 6월 18 10:50 kernel-vpp.conf
-rw-rw-r-- 1 chyi chyi 51515 6월 18 10:50 kernel_vpp_ipsec.c
-rw-rw-r-- 1 chyi chyi 1138 6월 18 10:50 kernel_vpp_ipsec.h
-rw-rw-r-- 1 chyi chyi 19089 6월 18 10:50 kernel_vpp_net.c
-rw-rw-r-- 1 chyi chyi 1118 6월 18 10:50 kernel_vpp_net.h
-rw-rw-r-- 1 chyi chyi 2609 6월 18 10:50 kernel_vpp_plugin.c
-rw-rw-r-- 1 chyi chyi 933 6월 18 10:50 kernel_vpp_plugin.h
-rw-rw-r-- 1 chyi chyi 15304 6월 18 10:50 kernel_vpp_shared.c
-rw-rw-r-- 1 chyi chyi 2763 6월 18 10:50 kernel_vpp_shared.h
-rw-rw-r-- 1 chyi chyi 652 6월 18 10:50 swanctl.conf
$ make all
이걸 수행하면 아래 명령이 순차적으로 수행되어, strongswan 5.9.6 version을 내려 받아 build & 설치를 진행한 후, libstrongswan-kernel-vpp.so library를 만들어 낸다.
📌 눈치채셨겠지만, 이 library가 strongswan과 VPP를 연결시켜주는 접착제 역할을 하게 된다.
<strongswan 5.9.6 build & install>
curl -o strongswan-5.9.6.tar.gz -LO https://github.com/strongswan/strongswan/archive/5.9.6.tar.gz;
mkdir ${CURDIR}/../../../build-root/build-vpp-native/external;
tar -zxof strongswan-5.9.6.tar.gz -C ${CURDIR}/../../../build-root/build-vpp-native/external/
mv ${CURDIR}/../../../build-root/build-vpp-native/external/strongswan-5.9.6 ${CURDIR}/../../../build-root/build-vpp-native/external/sswan
cd ${CURDIR}/../../../build-root/build-vpp-native/external/sswan
./autogen.sh
./configure --prefix=${PREFIX} --sysconfdir=${PREFIX_SYS_CONF} --enable-libipsec --enable-systemd --enable-swanctl --disable-gmp --enable-openssl
./configure --prefix=${PREFIX} --sysconfdir=${PREFIX_SYS_CONF} --enable-libipsec --enable-systemd --enable-swanctl --disable-gmp --enable-openssl
make -j$(nproc)
sudo make install
sudo make install
<vpp-sswan plugin build & install>
gcc $(CFLAGS) -shared -DPIC $(OBJECTS) $(LDFLAGS) -Wl,-soname -Wl,libstrongswan-kernel-vpp.so -o $@
cp libstrongswan-kernel-vpp.so ${CURDIR}/../../../build-root/build-vpp-native/external/sswan
📌 vpp-sswan library는 최종적으로 /usr/lib/ipsec/plugins/libstrongswan-kernel-vpp.so에 위치하게 된다.

[그림 7.1] VPP와 StrongSWAN 통합 아키텍쳐 [출처 - 참고문헌 2, 3]
2) VPP 구동하기
아래 설정을 반영한 후, vpp를 재 구동시키도록 한다.
</etc/vpp/startup.conf>
unix {
nodaemon
log /var/log/vpp/vpp.log
full-coredump
cli-listen /run/vpp/cli.sock
startup-config /etc/vpp/sswan.gate
gid vpp
...
nodaemon
log /var/log/vpp/vpp.log
full-coredump
cli-listen /run/vpp/cli.sock
startup-config /etc/vpp/sswan.gate
gid vpp
...
}
...
plugins {
plugin linux_cp_plugin.so { enable }
plugin ikev2_plugin.so { disable } #strongswan을 사용해야 하므로 기존 ikev2는 disable 시키자.
}
plugin linux_cp_plugin.so { enable }
plugin ikev2_plugin.so { disable } #strongswan을 사용해야 하므로 기존 ikev2는 disable 시키자.
}
...
</etc/vpp/sswan.gate>
set int state GigabitEthernet1/0/0 up
set int ip address GigabitEthernet1/0/0 192.168.5.1/24
set int state GigabitEthernet4/0/0 up
set int ip address GigabitEthernet4/0/0 192.168.8.134/24
ip route add 0.0.0.0/0 via 192.168.8.1 GigabitEthernet4/0/0
lcp create GigabitEthernet1/0/0 host-if eth0
lcp create GigabitEthernet4/0/0 host-if eth3
set int ip address GigabitEthernet1/0/0 192.168.5.1/24
set int state GigabitEthernet4/0/0 up
set int ip address GigabitEthernet4/0/0 192.168.8.134/24
ip route add 0.0.0.0/0 via 192.168.8.1 GigabitEthernet4/0/0
lcp create GigabitEthernet1/0/0 host-if eth0
lcp create GigabitEthernet4/0/0 host-if eth3
lcp lcp-sync on
____________________________________________________________
$ sudo service vpp restart
$ sudo vppctl

[그림 7.2] vpp show interface 명령 실행 모습
3) Ubuntu PC에서 StrongSWAN 구동하기
먼저 Ubuntu 18.04 PC에서 StrongSWAN 설정을 진행하도록 하자.
</etc/ipsec.conf>
config setup
# strictcrlpolicy=yes
# uniqueids = no
strictcrlpolicy=no
conn ipsec-ikev2-vpn
mobike=no
auto=add
type=tunnel
keyexchange=ikev2
ike=aes256gcm16-prfsha256-modp2048!
esp=aes256gcm16-esn!
# local:
left=%any
leftauth=psk
leftid=@moon.strongswan.org
leftsubnet=192.168.7.0/24
# remote: vpp
right=%any
rightid=@sun.strongswan.org
right=192.168.8.243
rightauth=psk
rightsubnet=192.168.5.0/24
</etc/ipsec.secrets>
: PSK 'simplepsk'
~
_____________________________________________________________
Ubuntu 18.04 PC에 내부망(LAN) 192.168.7.0/24이 있는 것 처럼, dummy interface를 하나 만들자.
$ sudo ip link add dummy0 type dummy
$ sudo ip add add 192.168.7.1/24 dev dummy0
$ sudo ip link set dummy0 up
이후, strongswan을 재구동 시킨다.
$ sudo systemctl restart strongswan-starter.service
$ systemctl status strongswan.service
* strongswan.service - strongSwan IPsec IKEv1/IKEv2 daemon using ipsec.conf
Loaded: loaded (/lib/systemd/system/strongswan.service; enabled; vendor preset: enabled)
Active: inactive (dead) since Wed 2024-07-03 12:51:06 KST; 1h 12min ago
Process: 2840 ExecStart=/usr/sbin/ipsec start --nofork (code=exited, status=0/SUCCESS)
Main PID: 2840 (code=exited, status=0/SUCCESS)
7<EC>�<94> 03 12:51:06 earth ipsec[2840]: 13[IKE] retransmit 1 of request with message ID 0
7<EC>�<94> 03 12:51:06 earth ipsec[2840]: 13[NET] sending packet: from 192.168.8.139[500] to 192
7<EC>�<94> 03 12:51:06 earth ipsec[2840]: 05[IKE] retransmit 2 of request with message ID 0
7<EC>�<94> 03 12:51:06 earth ipsec[2840]: 05[NET] sending packet: from 192.168.8.139[500] to 192
7<EC>�<94> 03 12:51:06 earth ipsec[2840]: 00[DMN] signal of type SIGINT received. Shutting down
7<EC>�<94> 03 12:51:06 earth ipsec[2840]: 00[IKE] destroying IKE_SA in state CONNECTING without
7<EC>�<94> 03 12:51:06 earth ipsec_starter[2840]: charon stopped after 200 ms
7<EC>�<94> 03 12:51:06 earth ipsec[2840]: charon stopped after 200 ms
7<EC>�<94> 03 12:51:06 earth ipsec[2840]: ipsec starter stopped
7<EC>�<94> 03 12:51:06 earth ipsec_starter[2840]: ipsec starter stopped
chyi@earth:~$ sudo ipsec up ipsec-ikev2-vpn
=> 터널 연결을 시작한다.
establishing CHILD_SA ipsec-ikev2-vpn{10}
generating CREATE_CHILD_SA request 8 [ SA No TSi TSr ]
sending packet: from 192.168.8.139[500] to 192.168.8.243[500] (177 bytes)
received packet: from 192.168.8.243[500] to 192.168.8.139[500] (177 bytes)
parsed CREATE_CHILD_SA response 8 [ SA No TSi TSr ]
CHILD_SA ipsec-ikev2-vpn{10} established with SPIs cc51ddbc_i cee0fb10_o and TS 192.168.7.0/24 === 192.168.5.0/24
connection 'ipsec-ikev2-vpn' established successfully
📌 당연한 거지만, 이게 성공하라면 4)절의 vpp 설정이 준비되어 있어야 한다.
chyi@earth:~$ sudo ipsec status
=> 터널 연결 상태를 확인한다.
Security Associations (1 up, 0 connecting):
ipsec-ikev2-vpn[1]: ESTABLISHED 57 minutes ago, 192.168.8.139[moon.strongswan.org]...192.168.8.243[sun.strongswan.org]
ipsec-ikev2-vpn{7}: INSTALLED, TUNNEL, reqid 2, ESP SPIs: ce288614_i ce284082_o
ipsec-ikev2-vpn{7}: 192.168.7.0/24 === 192.168.5.0/24
ipsec-ikev2-vpn{8}: INSTALLED, TUNNEL, reqid 2, ESP SPIs: ccf294cc_i cd6f85f2_o
ipsec-ikev2-vpn{8}: 192.168.7.0/24 === 192.168.5.0/24
ipsec-ikev2-vpn{9}: INSTALLED, TUNNEL, reqid 2, ESP SPIs: c3309c54_i cf99b59c_o
ipsec-ikev2-vpn{9}: 192.168.7.0/24 === 192.168.5.0/24
이 상태에서 192.168.5.1로 ping을 시도하고, tcpdump로 esp packet이 보이는지 확인해 보자.
chyi@earth:~$ ping 192.168.5.1
PING 192.168.5.1 (192.168.5.1) 56(84) bytes of data.
64 bytes from 192.168.5.1: icmp_seq=1 ttl=64 time=0.308 ms
64 bytes from 192.168.5.1: icmp_seq=2 ttl=64 time=0.338 ms
64 bytes from 192.168.5.1: icmp_seq=3 ttl=64 time=0.326 ms
64 bytes from 192.168.5.1: icmp_seq=4 ttl=64 time=0.295 ms
64 bytes from 192.168.5.1: icmp_seq=5 ttl=64 time=0.317 ms
^C
--- 192.168.5.1 ping statistics ---
5 packets transmitted, 5 received, 0% packet loss, time 4079ms
rtt min/avg/max/mdev = 0.295/0.316/0.338/0.026 ms
chyi@earth:~$ sudo tcpdump -i enp2s0 esp
=> ESP protocol이 보이는 것으로 보아, ipsec 통신이 제대로 되고 있음을 알 수 있다.
tcpdump: verbose output suppressed, use -v or -vv for full protocol decode
listening on enp2s0, link-type EN10MB (Ethernet), capture size 262144 bytes
14:13:54.323565 IP earth > 192.168.8.243: ESP(spi=0xcd640ada,seq=0x72), length 120
14:13:54.323803 IP 192.168.8.243 > earth: ESP(spi=0xc12bd9bb,seq=0x72), length 120
14:13:55.343527 IP earth > 192.168.8.243: ESP(spi=0xcd640ada,seq=0x73), length 120
14:13:55.343789 IP 192.168.8.243 > earth: ESP(spi=0xc12bd9bb,seq=0x73), length 120
14:13:56.367597 IP earth > 192.168.8.243: ESP(spi=0xcd640ada,seq=0x74), length 120
14:13:56.367835 IP 192.168.8.243 > earth: ESP(spi=0xc12bd9bb,seq=0x74), length 120
14:13:57.391608 IP earth > 192.168.8.243: ESP(spi=0xcd640ada,seq=0x75), length 120
14:13:57.391831 IP 192.168.8.243 > earth: ESP(spi=0xc12bd9bb,seq=0x75), length 120
14:13:58.415525 IP earth > 192.168.8.243: ESP(spi=0xcd640ada,seq=0x76), length 120
14:13:58.415752 IP 192.168.8.243 > earth: ESP(spi=0xc12bd9bb,seq=0x76), length 120
참고로, IPSec ESP 터널이 정상적으로 생성된 경우 kernel module을 확인해 보면, esp4, xfrm4_tunnel module 등이 자동으로 구동되어 있음을 알 수 있다.
chyi@earth:~$ lsmod |grep esp4
esp4 24576 4
xfrm_algo 16384 5 af_key,esp4,xfrm_ipcomp,ah4,xfrm_user
chyi@earth:~$
chyi@earth:~$ lsmod |grep xfrm
xfrm4_tunnel 16384 0
tunnel4 16384 1 xfrm4_tunnel
xfrm_ipcomp 16384 1 ipcomp
xfrm_user 36864 4
xfrm_algo 16384 5 af_key,esp4,xfrm_ipcomp,ah4,xfrm_user
📌 당연한 거지만, vpp는 kernel ipsec을 사용하는 것이 아니므로, 위의 명령 수행으로 esp4 등을 확인할 수 없다(보이면 안된다).
4) VPP Machine에서 StrongSWAN 구동하기
Shell 상태에서 strongswan을 구동하도록 한다.
</etc/ipsec.conf>
config setup
# strictcrlpolicy=yes
# uniqueids = no
strictcrlpolicy=no
# strictcrlpolicy=yes
# uniqueids = no
strictcrlpolicy=no
conn ipsec-ikev2-vpn
mobike=no
auto=add
type=tunnel
keyexchange=ikev2
ike=aes256gcm16-prfsha256-modp2048!
esp=aes256gcm16-esn!
# local:
left=%any
leftauth=psk
leftid=@sun.strongswan.org
leftsubnet=192.168.5.0/24
# remote: ubuntu
right=%any
rightid=@moon.strongswan.org
right=192.168.8.139
rightauth=psk
rightsubnet=192.168.7.0/24
📌 인증서를 기반으로 상호 인증을 하도록 설정할 수도 있겠으나, 우선은 vpp-sswan이 정상 동작하는 것이 급한 문제이니, PSK 기반으로 간단 설정을 해 보도록 하자.
</etc/ipsec.secrets>
# ipsec.secrets - strongSwan IPsec secrets file
: PSK 'simplepsk'
: PSK 'simplepsk'
📌 strongswan을 잠시 사용해 보니, version별 특성을 좀 타는 것 같다. 5.9.6 버젼의 경우, swanctl로 제어가 잘 안되어, 이전 style 즉 ipsec 명령을 통해 설정을 진행했다. 😂
$ sudo systemctl restart strongswan-starter.service
$ systemctl status strongswan.service
● strongswan-starter.service - strongSwan IPsec IKEv1/IKEv2 daemon using ipsec.conf
Loaded: loaded (/usr/lib/systemd/system/strongswan-starter.service; enabled; preset: enabled)
Active: active (running) since Tue 2024-07-02 07:11:00 UTC; 4s ago
Main PID: 4489 (starter)
Tasks: 20 (limit: 4480)
Memory: 4.9M (peak: 5.4M)
CPU: 75ms
CGroup: /system.slice/strongswan-starter.service
├─4489 /usr/libexec/ipsec/starter --daemon charon --nofork
└─4493 /usr/libexec/ipsec/charon
Jul 02 07:11:00 vppbox2 charon[4493]: 00[CFG] loading ca certificates from '/etc/ipsec.d/cacerts'
Jul 02 07:11:00 vppbox2 charon[4493]: 00[CFG] loading aa certificates from '/etc/ipsec.d/aacerts'
Jul 02 07:11:00 vppbox2 charon[4493]: 00[CFG] loading ocsp signer certificates from '/etc/ipsec.d/ocspcerts'
Jul 02 07:11:00 vppbox2 charon[4493]: 00[CFG] loading attribute certificates from '/etc/ipsec.d/acerts'
Jul 02 07:11:00 vppbox2 charon[4493]: 00[CFG] loading crls from '/etc/ipsec.d/crls'
Jul 02 07:11:00 vppbox2 charon[4493]: 00[CFG] loading secrets from '/etc/ipsec.secrets'
Jul 02 07:11:00 vppbox2 charon[4493]: 00[LIB] loaded plugins: charon aes kernel-vpp des rc2 sha2 sha1 md5 random nonce x509 revocation constraints pubkey pkcs1 pkcs7 pkcs12 pgp dnskey sshkey pem >
Jul 02 07:11:00 vppbox2 charon[4493]: 00[JOB] spawning 16 worker threads
Jul 02 07:11:00 vppbox2 ipsec[4489]: charon (4493) started after 120 ms
Jul 02 07:11:00 vppbox2 ipsec_starter[4489]: charon (4493) started after 120 ms
$ sudo ipsec up ipsec-ikev2-vpn
=> 터널 연결을 시작한다. 한쪽에서만 하면 되는게 아니고, 양쪽에서 모두 이짓(?)을 해 주어야 한다. 😓
initiating IKE_SA ipsec-ikev2-vpn[1] to 192.168.8.139
unable to determine source address, faking NAT situation
generating IKE_SA_INIT request 0 [ SA KE No N(NATD_S_IP) N(NATD_D_IP) N(FRAG_SUP) N(HASH_ALG) N(REDIR_SUP) ]
sending packet: from 0.0.0.0[500] to 192.168.8.139[500] (456 bytes)
received packet: from 192.168.8.139[500] to 192.168.8.134[500] (456 bytes)
parsed IKE_SA_INIT response 0 [ SA KE No N(NATD_S_IP) N(NATD_D_IP) N(FRAG_SUP) N(HASH_ALG) N(MULT_AUTH) ]
selected proposal: IKE:AES_GCM_16_256/PRF_HMAC_SHA2_256/MODP_2048
local host is behind NAT, sending keep alives
authentication of 'sun.strongswan.org' (myself) with pre-shared key
establishing CHILD_SA ipsec-ikev2-vpn{1}
generating IKE_AUTH request 1 [ IDi N(INIT_CONTACT) IDr AUTH SA TSi TSr N(MULT_AUTH) N(EAP_ONLY) N(MSG_ID_SYN_SUP) ]
sending packet: from 192.168.8.134[4500] to 192.168.8.139[4500] (266 bytes)
received packet: from 192.168.8.139[4500] to 192.168.8.134[4500] (220 bytes)
parsed IKE_AUTH response 1 [ IDr AUTH SA TSi TSr N(AUTH_LFT) ]
authentication of 'moon.strongswan.org' with pre-shared key successful
IKE_SA ipsec-ikev2-vpn[1] established between 192.168.8.134[sun.strongswan.org]...192.168.8.139[moon.strongswan.org]
scheduling reauthentication in 10105s
maximum IKE_SA lifetime 10645s
selected proposal: ESP:AES_GCM_16_256/EXT_SEQ
UDP encap
UDP encap
policy have interface 192.168.8.134
firstly created, spd for GigabitEthernet4/0/0 found sw_if_index is 2
policy FWD interface
policy have interface 192.168.8.134
CHILD_SA ipsec-ikev2-vpn{1} established with SPIs cfd211db_i cd3efdef_o and TS 192.168.5.0/24 === 192.168.7.0/24
received AUTH_LIFETIME of 9866s, scheduling reauthentication in 9326s
connection 'ipsec-ikev2-vpn' established successfully
OK, IPSec SA가 성공적으로 확립되었다.
vpp로 돌아와 ipsec SPD/SA 상태를 확인해 보니, (이전에는 없던) 뭔가(SPD 설정과 SA 설정 내용)가 잔뜩 보인다.
vpp# show ipsec all
[0] sa 1 (0x1) spi 3368801096 (0xc8cbd348) protocol:esp flags:[esn anti-replay tunnel inbound aead ctr ]
[1] sa 2 (0x2) spi 3410518964 (0xcb4863b4) protocol:esp flags:[esn anti-replay tunnel aead ctr ]
spd 1
ip4-outbound:
[7] priority 2883 action bypass type ip4-outbound protocol UDP
local addr range 0.0.0.0 - 255.255.255.255 port range 4500 - 4500
remote addr range 0.0.0.0 - 255.255.255.255 port range 4500 - 4500
packets 0 bytes 0
[5] priority 2883 action bypass type ip4-outbound protocol UDP
local addr range 0.0.0.0 - 255.255.255.255 port range 500 - 500
remote addr range 0.0.0.0 - 255.255.255.255 port range 500 - 500
packets 1 bytes 235
[3] priority 2883 action bypass type ip4-outbound protocol IPSEC_AH
local addr range 0.0.0.0 - 255.255.255.255 port range 0 - 65535
remote addr range 0.0.0.0 - 255.255.255.255 port range 0 - 65535
packets 0 bytes 0
[1] priority 2883 action bypass type ip4-outbound protocol IPSEC_ESP
local addr range 0.0.0.0 - 255.255.255.255 port range 0 - 65535
remote addr range 0.0.0.0 - 255.255.255.255 port range 0 - 65535
packets 0 bytes 0
[9] priority 2882 action protect type ip4-outbound protocol any sa 2
local addr range 192.168.5.0 - 192.168.5.255 port range 0 - 65535
remote addr range 192.168.7.0 - 192.168.7.255 port range 0 - 65535
packets 0 bytes 0
ip6-outbound:
ip4-inbound-protect:
[8] priority 2882 action protect type ip4-inbound-protect protocol any sa 1
local addr range 192.168.5.0 - 192.168.5.255 port range 0 - 65535
remote addr range 192.168.7.0 - 192.168.7.255 port range 0 - 65535
packets 0 bytes 0
ip6-inbound-protect:
ip4-inbound-bypass:
[6] priority 2883 action bypass type ip4-inbound-bypass protocol UDP
local addr range 0.0.0.0 - 255.255.255.255 port range 4500 - 4500
remote addr range 0.0.0.0 - 255.255.255.255 port range 4500 - 4500
packets 0 bytes 0
[4] priority 2883 action bypass type ip4-inbound-bypass protocol UDP
local addr range 0.0.0.0 - 255.255.255.255 port range 500 - 500
remote addr range 0.0.0.0 - 255.255.255.255 port range 500 - 500
packets 0 bytes 0
[2] priority 2883 action bypass type ip4-inbound-bypass protocol IPSEC_AH
local addr range 0.0.0.0 - 255.255.255.255 port range 0 - 65535
remote addr range 0.0.0.0 - 255.255.255.255 port range 0 - 65535
packets 0 bytes 0
[0] priority 2883 action bypass type ip4-inbound-bypass protocol IPSEC_ESP
local addr range 0.0.0.0 - 255.255.255.255 port range 0 - 65535
remote addr range 0.0.0.0 - 255.255.255.255 port range 0 - 65535
packets 0 bytes 0
ip6-inbound-bypass:
ip4-inbound-discard:
ip6-inbound-discard:
SPD Bindings:
1 -> GigabitEthernet4/0/0
IPSec async mode: off
________________________________________________________________
strongswan이 vpp와 정말로 연동되었는지를 확인하려면 아래 명령도 확인할 필요가 있다.
chyi@vppbox2:~$ sudo vppctl -s /run/vpp/cli.sock sh api client
Shared memory clients
Name PID Queue Length Queue VA Health
strongswan 2098 0 0x00000001301c2800 OK
Shared memory clients
Name PID Queue Length Queue VA Health
strongswan 2098 0 0x00000001301c2800 OK
$ sudo ip route add 192.168.7.0/24 via 192.168.8.139
=> Ubuntu 쪽에 IPSec을 타고 ping을 해 올 경우, 응답이 제대로 처리되기 위해 routing entry를 추가해 주자.
이 상태에서 Ubuntu 쪽으로 ping을 시도해 보자.
chyi@vppbox2:~$ ping 192.168.7.1
PING 192.168.7.1 (192.168.7.1) 56(84) bytes of data.
PING 192.168.7.1 (192.168.7.1) 56(84) bytes of data.
어라, 안된다.😈 왜 그럴까 ? 여러가지 routing entry를 추가해 보아도 소용없다.
vpp-sswan library가 하는 역할을 코드를 통해서 좀 더 분석해 볼 필요가 있겠다. OK, 오늘은 VPP/StrongSWAN 첫번째 시간인 만큼 이 정도 선에서 마무리하고자 한다. 못다한 부분은 다음 시간을 기약하자. 😓
To be continued...
8. References
[2] strongSwan Kernel-VPP plugin An Overview, lfnetworking.org
=> VPP IPSec/IKEv2 관련 문서
=> StrongSWAN 관련 site
[15] And, Google~
Slowboot
댓글 없음:
댓글 쓰기